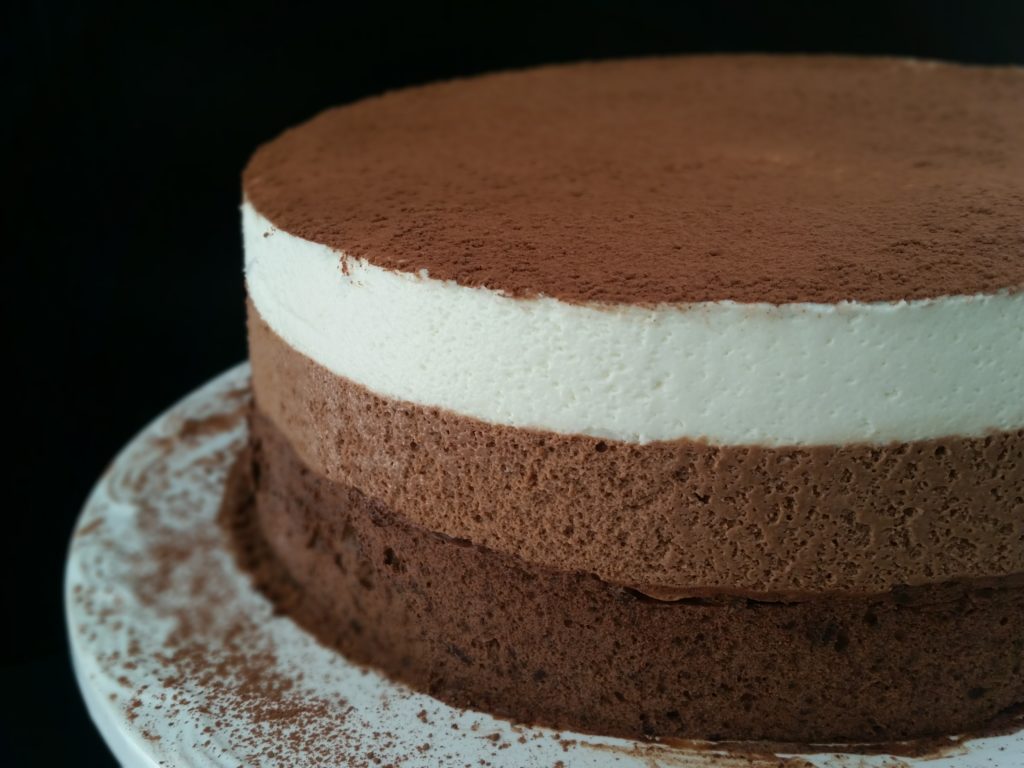
Tag Archives: guide

Salted Caramel Hazelnut Macchiato Macarons


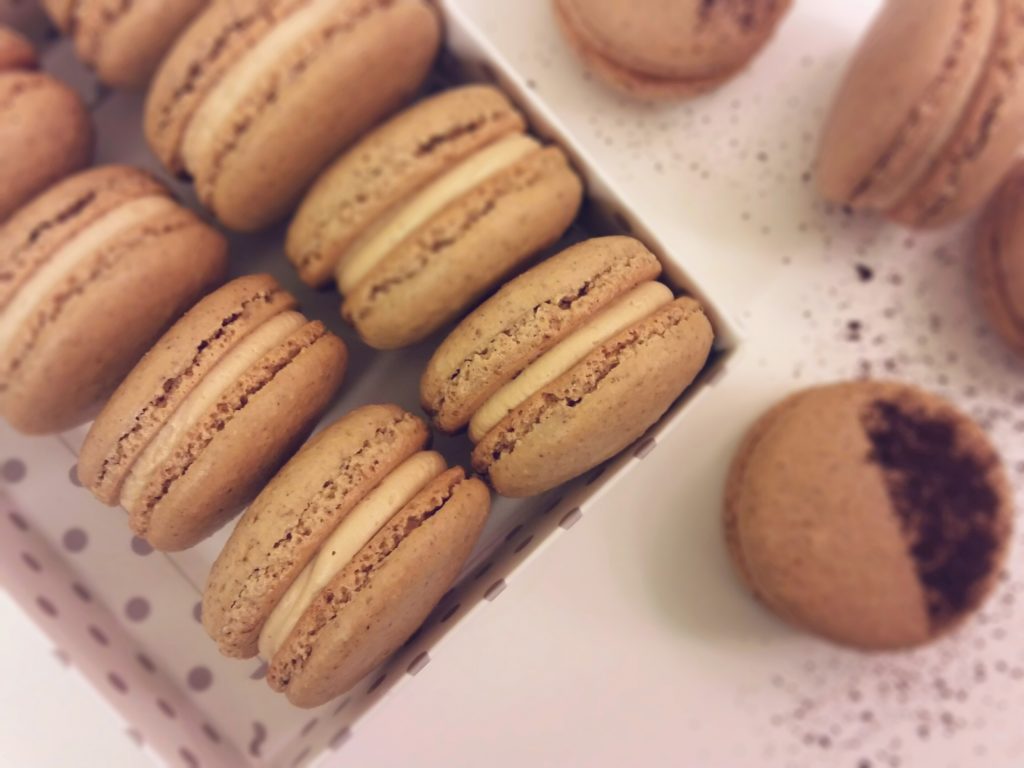
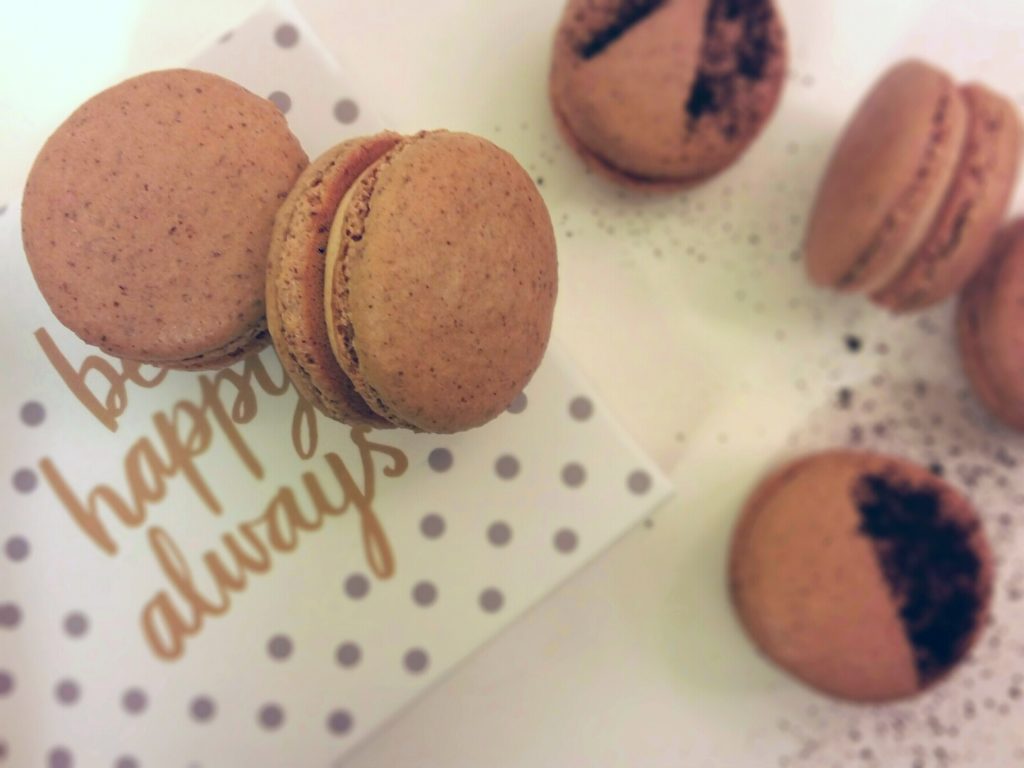
SPICED HAZELNUT ESPRESSO MACARON SHELLS WITH BUTTERY SALTED CARAMEL FILLING.


As if they haven’t gotten tired of making macarons already, about 100 more shells came out of the BooPeaKitchen oven since our vanilla bean macarons a few recipes ago. An unrepentant coffee and hazelnut fanatic, Boo loves his tiramisu and macchiatos and has chowed through literal boxes of raw hazelnuts in his years as a fatty. With Pea’s love of caramel, and macarons being a primary product in their kitchen, batches marrying these these flavors were obligatory.

Hazelnut flour is just like almond flour, and works just as well for macarons, but tastes even nuttier. A few dashes of cayenne pepper and cinnamon in the macaron shells give them a flavor that plays with your mouth unlike many other recipes, with just a bit of a tingle! The salted caramel filling recipe will make leftovers, but is a lot easier to work with in a batch this size. So make more macarons to use it all up, or heat it up and ladle it over a scoop of vanilla ice cream – it won’t need to go to waste!

P.S. If you haven’t made macarons before, read our quickie guide in our French Macaron blurb – it’s a lot less intimidating than some people make it seem, and we break it down into 3 main things to look out for!

Yield: 44-56 shells
Difficulty: 2 star

Oven: 310 F, 18 minutes

Preparation:

  • Line 2-3 baking trays with parchment paper or silicone mats.
  • If using parchment paper, optionally draw guide circles (diameter 2.5-3 cm) about 3 cm apart on parchment paper, and flip written-side down.

Hazelnut espresso shells:

  • Dry ingredients, sifted
    120 g hazelnut meal
    150 g powdered sugar
    1 tb instant espresso powder, ground
    0.25 ts cinnamon
    pinch cayenne pepper
  • Meringue
    110 g (~3) egg whites, room temperature
    0.25 ts cream of tartar (or lemon juice)
    95 g granulated sugar
  1. Beat egg whites with cream of tartar to soft peaks. Gradually add granulated sugar to egg whites, and beat to a stiff meringue (tips of peaks should gently curl when whisk is lifted), ~4-6 minutes.
  2. Add dry ingredients to the meringue. Fold until smooth and falling in thick ribbons (which disappear after 6-8 seconds).
  3. Using a large round tip, pipe circles onto the prepared baking tray spaced 1.5-2 cm between the edges of adjacent shells.
    Small pea tip: Keep the tip perpendicular to, and 1 cm above, the baking tray. Keep the tip centered while piping each shell to desired size; avoid moving it around while piping.
  4. Rest at room temperature until dry to the touch, 60-90 minutes.
  5. Bake on middle rack, 18 minutes. Remove from oven, and set aside until cooled to room temperature. Meanwhile, making filling.
    Small pea tip: Lower the oven temperature by 5-10 F, and bake for 1 minute shorter if using a dark pan.
  6. Carefully remove/peel shells from parchment or silicone mat.
    Small pea tip: If macarons stick to silicone mat, may run a thin knife across the bottom to help release shells from the mat.

Salted caramel cream:

  • Caramel
    1 c sugar
    2 tb water
  • 0.33 c heavy cream
  • 8 tb (1 stick) butter, diced
  • Flavorings
    0.25 ts vanilla extract
    0.5 ts instant espresso powder
    1 ts salt
  • cold water bath
  1. In a light-colored pot, heat sugar with water over medium heat to desired caramel color.
  2. Remove from heat, and carefully whisk in heavy cream until smooth.
  3. Whisk in butter until smooth.
  4. Whisk in flavorings, and transfer to a mixing bowl in a shallow cold water bath.
  5. Beat caramel just until peaks start to form, and remove from cold water bath.
    Small pea tip: Avoid over-chilling the cream, since this will cause the butter to solidify and separate from the cream. If it separates, microwave and whisk until recombined.
  6. Assemble macarons.

Assembly:

  1. Pair shells by size.
  2. Using a round tip, pipe ~0.5 tb filling onto one shell of each pair. Gently sandwich with the second shell.
  3. In an airtight or covered container, refrigerate macarons in a single layer, at least 8 hours.
  4. Serve, and optionally refrigerate up to 1 week or freeze up to 3 months.
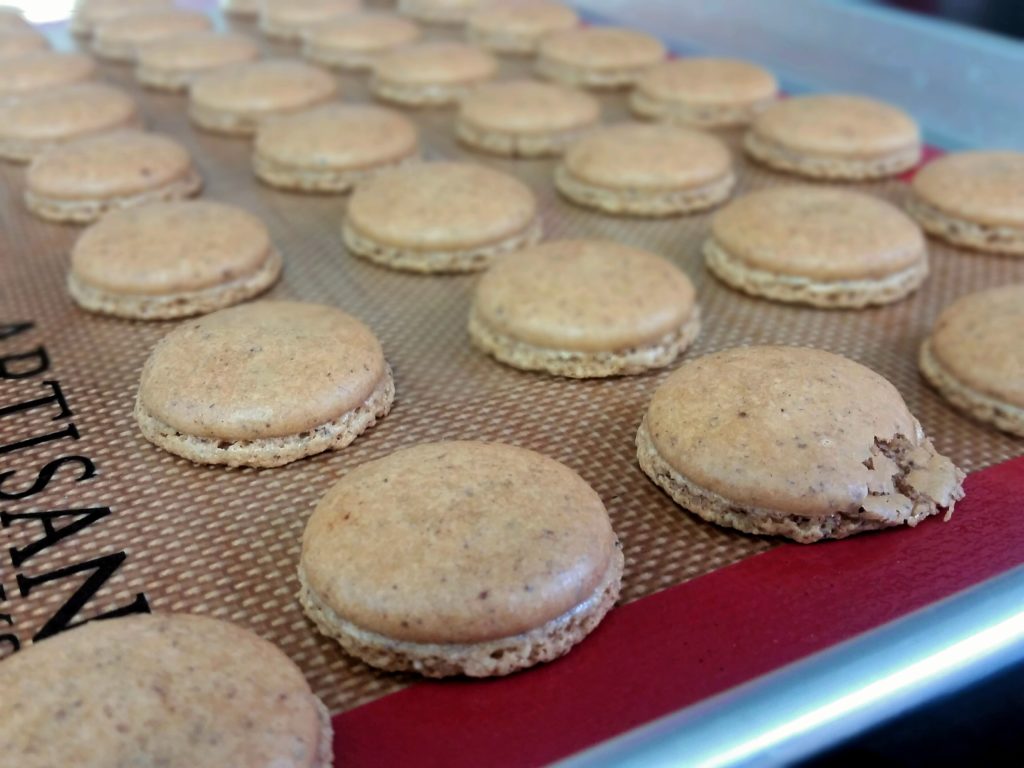
 OOPS!

Vanilla Bean Macarons

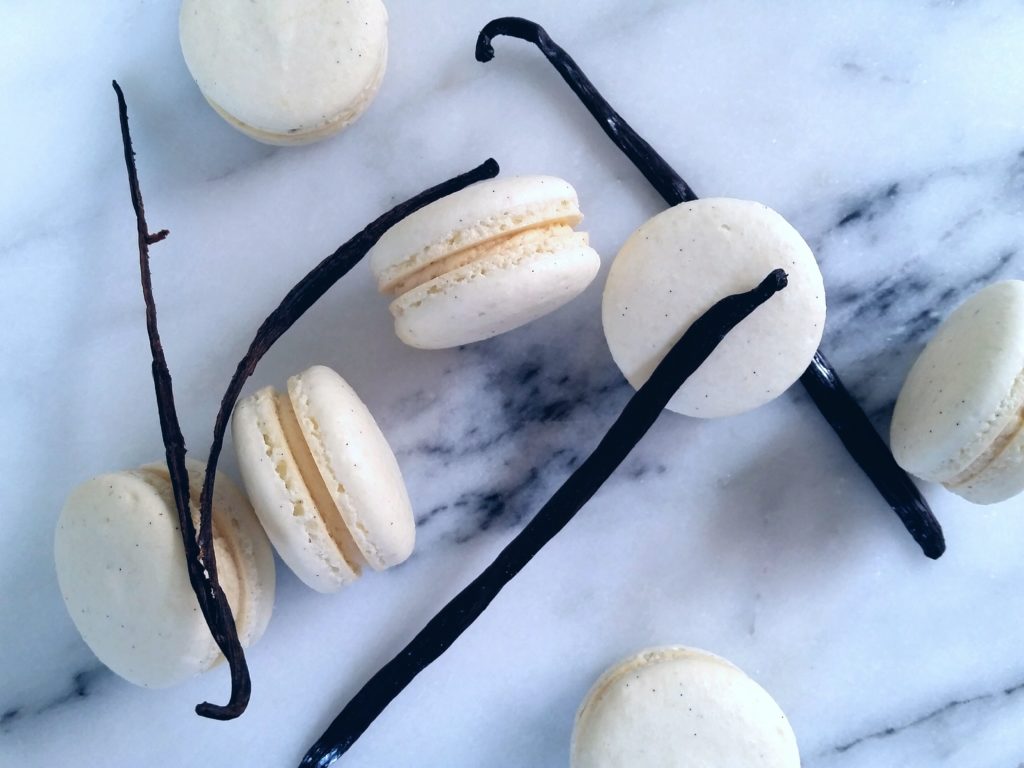
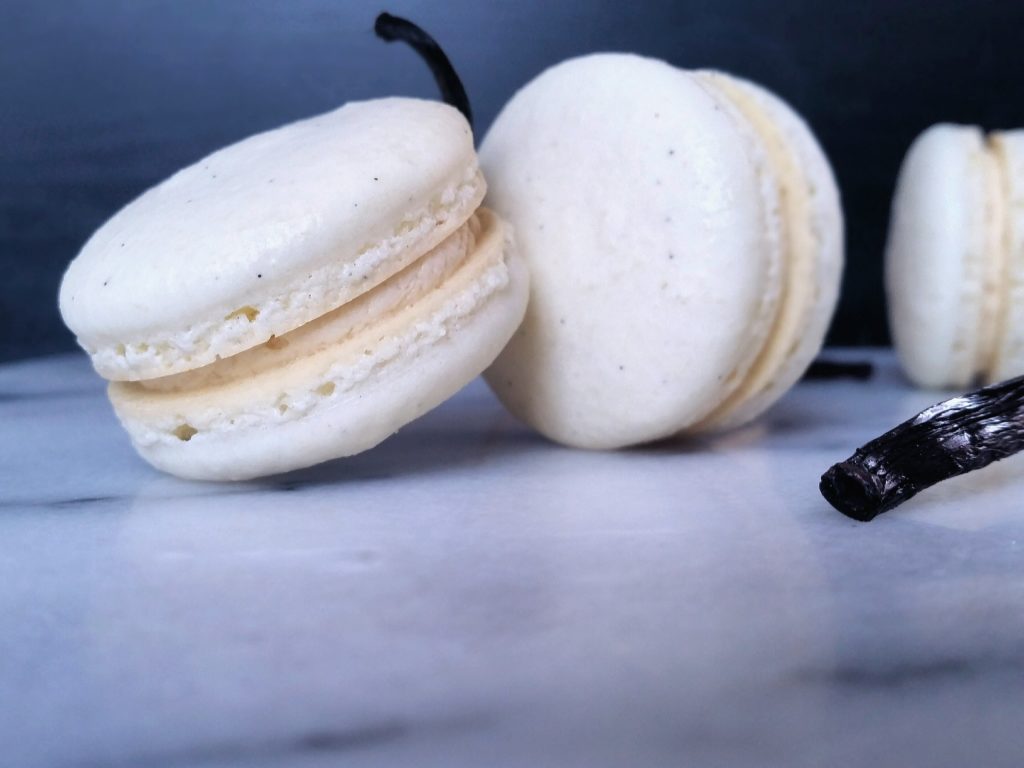
VANILLA BEAN MACARONS WITH CREAMY VANILLA ERMINE BUTTERCREAM.


How vanilla became synonymous with boring and unexciting is a mystery to me. Used correctly, vanilla is an amazing, unique flavor that is the furthest thing from “default” you could get. After all, vanilla beans contain over 200 distinct chemical compounds. Vanillin is the most important by far, and the others help make the aroma nearly indescribable. So if you’re one of those people who judges vanilla from its use in commercial ice cream and limited edition cola, it’s time to give it a real try.

We always keep a healthy stock of vanilla extract from our favorite wholesale warehouse at our disposal, but we’re breaking out the vanilla beans for these vanilla macarons today. Other than decorating your shells with tons of tiny vanilla seed specks to let your friends know you used the real deal, you also don’t lose as much of the vanilla flavor with baking as you do with regular vanilla extract. With a smooth ermine buttercream with plenty of vanilla to fit the theme, these vanilla macarons are anything but boring! – Boo and Pea

P.S. If you haven’t made macarons before, read our quickie guide in our French Macaron blurb – it’s a lot less intimidating than some people make it seem, and we break it down into 3 main things to look out for!


Yield: 44-56 macaron shells
Difficulty: 2 star

Oven: 310 F, 18 minutes

Preparation:

  • Line 2-3 baking trays with parchment paper or silicone mats.
  • If using parchment paper, optionally draw guide circles (diameter 2.5-3 cm) about 3 cm apart on parchment paper, and flip written-side down.

Macaron shells:

  • Dry ingredients, sifted
    120 g almond meal
    150 g powdered sugar
  • Meringue
    110 g (~3) egg whites, room temperature
    0.25 ts cream of tartar (or lemon juice)
    2 vanilla beans, split and scraped
    100 g granulated sugar
  • (optional) 4-10 drops food coloring
  1. In a mixing bowl, beat egg whites with cream of tartar and vanilla bean seeds to soft peaks. Gradually add granulated sugar to egg whites while beating to a firm meringue (tips of peaks should gently curl when whisk is lifted), ~4-6 minutes.
  2. Sift dry ingredients into the meringue. Fold until smooth and falling in thick ribbons.
  3. Using a large round tip, pipe batter into buttons (diameter 2.5-3 cm) onto the prepared baking trays spaced ~3 cm between the edges of adjacent shells.
    Small pea tip: Keep the tip ~0.5 cm above and perpendicular to the baking tray. Keep the tip centered and still while piping each shell to desired size.
  4. Rest at room temperature until surface dries to the touch, 45-60 minutes.
  5. Bake on middle rack, 18 minutes. Remove from oven, and set side until cooled to room temperature. Meanwhile, make filling.
    Small pea tip: Lower the oven temperature by 5-10 F, and bake for 1 minute shorter if using a dark pan.
  6. Carefully remove/peel shells from parchment or silicone mat.
    Small pea tip: If macarons stick to parchment or silicone mat, run a thin knife across the bottom to help release shells.

Vanilla ermine buttercream:

  • Roux
    0.25 c milk
    1 tb flour
    pinch of salt
  • 4 tb butter, room temperature
  • 3 tb sugar
  • 0.5 tb vanilla extract
  1. In a small saucepan over medium heat, stir and bring roux to a simmer, and cook, 2 minutes. Transfer to a small container, and cover and refrigerate until chilled.
  2. In a mixing bowl, cream butter with sugar and vanilla.
  3. Beat roux into butter mixture by spoonfuls, and beat until fluffy.

Assembly:

  1. Pair shells by size.
  2. Using a round tip, pipe ~0.5 tb filling onto one shell of each pair. Gently sandwich with second shell.
  3. In an airtight or covered container, refrigerate macarons in a single layer, at least 8 hours.
  4. Serve, and optionally refrigerate up to 1 week or freeze up to 3 months.

Eggnog Cream Puffs

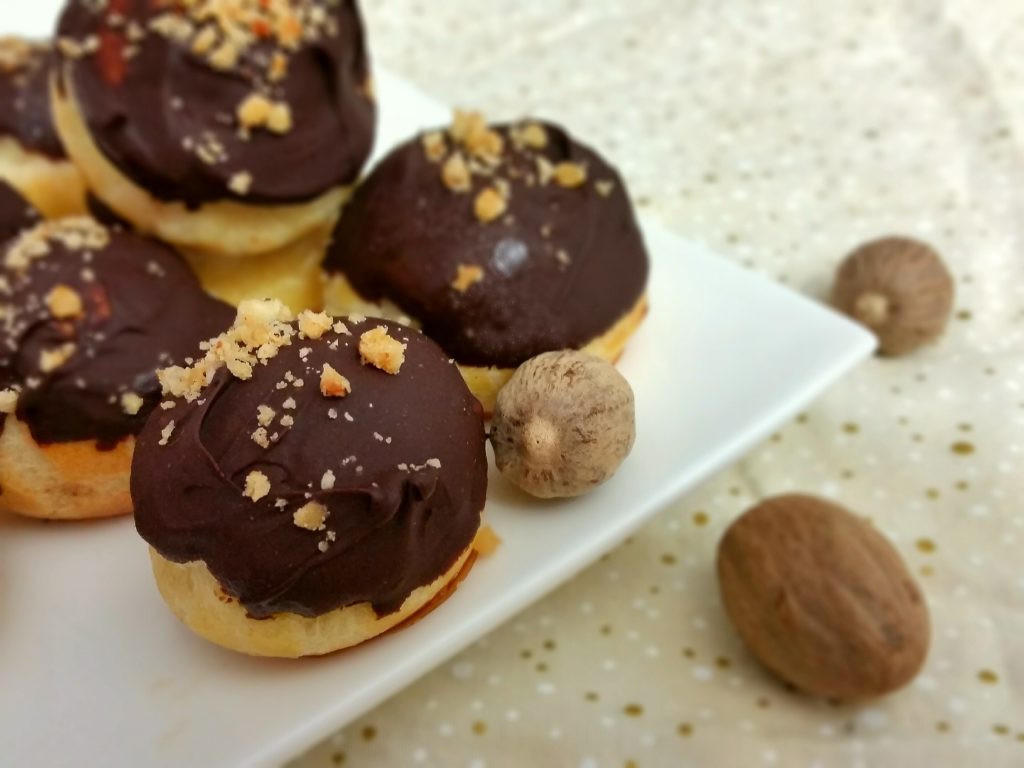
CHOUX PASTRY BALLS FILLED WITH MERINGUE AND NUTMEG PASTRY CREAM. TOPPED WITH CHOCOLATE AND CRUSHED HAZELNUTS.


With the first official day of winter less than 24 hours away, we wanted to share a cream puff recipe, but with an obligatory holiday twist or two. When served chilled, these little puffs are as addictive as they are dangerous when you lose track of how many you’ve already eaten – but that’s perfectly okay when you remember that holiday calories don’t count. In any case, all the holiday deliciousness will just motivate those health-conscious New Years’ resolutions even more.

If you haven’t worked with choux pastry before, it’s really quite a simple and mesmerizing dough that happens to be used for churros, éclairs, beignets, funnel cakes, and so much more. High in moisture compared with other pastry doughs, choux pastry puffs up as the moisture steams up during the cooking process, whether baked (like with éclairs and cream puffs) or deep-fried (like with churros, beignets, or funnel cakes). Baking also leaves a hollow interior for all sorts of tasty fillings! We used a nutmeg chiboust cream, or a nutmeg-infused pastry cream with some meringue folded in to lighten it and simulate the frothiness of a classic holiday eggnog. We wish everyone a happy and tasty holiday season! – Boo and Pea


Yield: 30-35 cream puffs
Difficulty: 

Oven: 400 F, 10 minutes; then 350 F, 20 minutes

Preparation:

  • Line 1-2 baking trays with parchment paper or silicone mats.

Eggnog chiboust cream:

  • 1.25 c milk
  • Yolk mixture
    3 egg yolks
    0.25 c sugar
    2 tb flour
    2 tb corn starch
  • 3 tb butter, chunked
  • 0.75 ts nutmeg
  • 0.5 tb vanilla extract
  • Meringue
    3 egg whites
    0.33 c sugar
  1. In a saucepan, heat milk to a bare simmer.
  2. In a mixing bowl, whisk yolk mixture ingredients until combined. Whisk and slowly add hot milk into yolk mixture.
  3. Return mixture to saucepan, and whisk quickly over medium heat until thickened and boiled for 2 minutes.
  4. Sieve custard into a mixing bowl.
  5. Whisk butter, nutmeg, and vanilla into custard until homogenized.
  6. In a separate mixing bowl, beat egg whites to soft peaks. Gradually add sugar while beating to stiff peaks.
  7. Fold meringue into custard.
  8. Cover with plastic wrap pressed to custard surface, and refrigerate until set, ~2 hours. Meanwhile, prepare choux puffs.

Choux pastry balls:

  • Wet ingredients
    0.5 stick butter
    0.25 c water
    0.25 c milk
    1 ts sugar
    0.25 ts salt
  • 0.5 c flour
  • 2 eggs
  • Egg wash
    1 egg, beaten
    1 tb water
  1. In a saucepan, bring wet ingredients to a bare simmer.
  2. Stir flour into saucepan until dough forms. Stir and cook over medium heat, 2-3 minutes.
  3. Remove dough to a mixing bowl, and cool to lukewarm.
  4. Beat 2 eggs into dough until homogenized.
  5. Using a large round tip, pipe buttons (diameter 2.5 cm, height 2 cm) onto the prepared baking trays spaced ~3 cm between the edges of adjacent buttons.
  6. Brush and smooth buttons with egg wash.
  7. Bake at 400 F on middle rack, 10 minutes. Reduce to 350 F, and bake until golden-brown, 20 minutes.
  8. Turn off oven, and leave door ajar to cool puffs until safe to handle. Refrigerate until assembly.

Assembly:

  • melted chocolate
  • hazelnuts, crushed
  • nutmeg
  1. With a skewer or toothpick, make a small hole near the top of each puff.
  2. Using a small round tip, fill puffs with eggnog pastry cream.
  3. Refrigerate until chilled, 45-60 minutes.
  4. Optionally, dip cream puffs into melted chocolate, and top with crushed hazelnuts and nutmeg.
  5. Serve chilled.

Raspberry Financiers

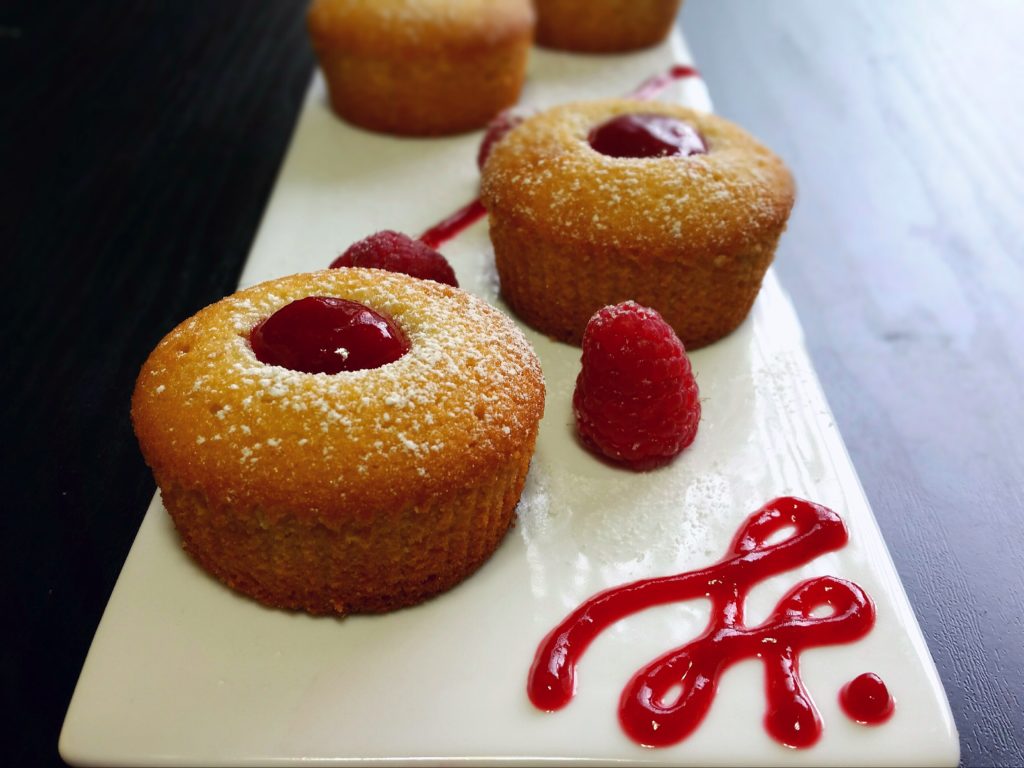
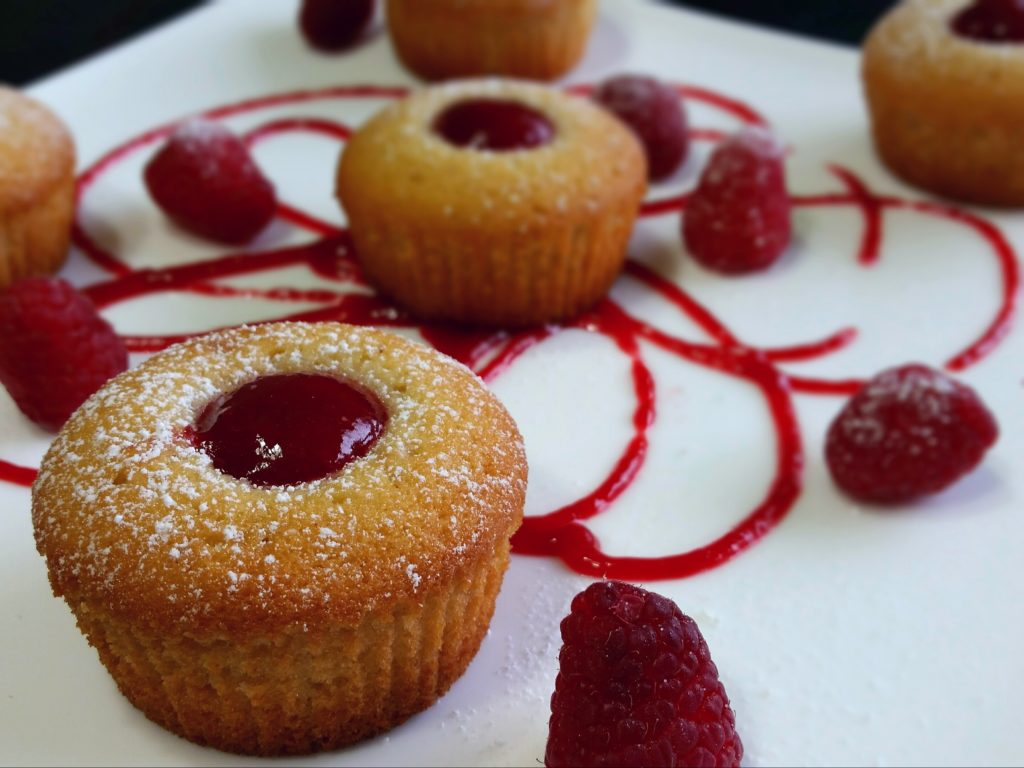
raspberry financiersMOIST, GOLDEN FRENCH ALMOND CAKES WITH RASPBERRY COULIS AND POWDERED SUGAR.


These little guys are like cupcakes, but even better! They are traditionally made as rectangular bars to resemble bars of gold, hence the name financier. And although Boo and I have managed to collect molds of all sorts of shapes, we don’t expect everyone else to have a rectangular 6 x 3 cm mold at arm’s reach, so we decided to use a regular cupcake tin. Plus, I think they’re cuter round. Geometric differences aside, these moist, spongy almond cakes are absolutely satisfying, incredibly easy to make, and great with a cup of tea or coffee.

When you’re making these, you may want to mix gently to keep from incorporating too much air into the batter, otherwise they will deflate as they cool after baking. After breaking up the egg whites with a fork, I used a rubber spatula to mix the batter together, which worked out just fine. But other than for aesthetic reasons, this step can be optional.

For our financiers, we used raspberry, but almost any fruit with a hint of tartness – like blueberries, peach, or even passionfruit – would pair beautifully with the richness of the cake. Be warned: they’re addictive. Thank goodness this recipe only makes 10! – Pea


raspberry financiers 2

Yield: 10 financiers
Difficulty: 1 star

Oven: 400 F, 6 minutes; 350 F, 14 minutes

Preparation:

  • Grease 10 small cupcake molds, or line with cupcake wrappers.

Almond cake:

  • 1 stick butter
  • 4 egg whites
  • Dry ingredients
    0.5 c sugar
    1 c almond meal
    0.33 c flour
  • 2 tb honey
  • 10 raspberries
  1. In a small saucepan, heat and stir butter over medium heat until browned. Pour into a bowl, and set aside to cool slightly.
  2. In a mixing bowl, lightly stir together dry ingredients, egg whites, and honey until homogenized.
  3. Gently stir butter into egg mixture.
  4. Divide batter into prepared molds or cupcake wrappers. Place a raspberry in the center of each with the cavity facing up.
  5. Bake at 400 F, 6 minutes. Lower to 350 F, and bake ~14 minutes until cooked through. Meanwhile, make raspberry coulis.

Raspberry coulis:

  • 3 oz raspberries
  • 1.5 tb sugar
  • 2 tb water
  1. In a small saucepan, stir and mash ingredients over medium heat until thickened, 10-12 minutes.
  2. Press through a strainer, and discard seeds.
  3. Using a small round tip, pipe coulis into the centers of financiers.
  4. Serve warm.

*recipe inspired by Bruno Albouze

Crispy Roasted Cilantro-Lime Chicken Thighs

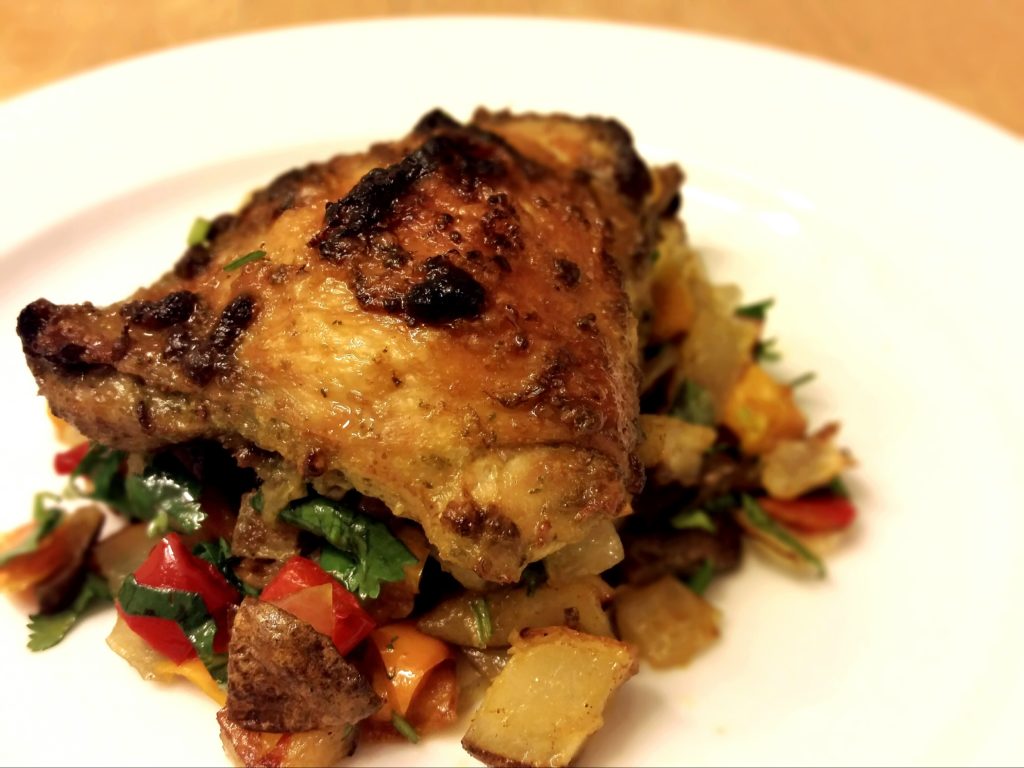
cilanto-lime chicken thighsEASY, TANGY, FLAVORFUL MARINATED CHICKEN THIGH OVEN-CRISPED AND SERVED OVER ROASTED DICED VEGETABLES.


We’ve all had those long days at work. You want (or need) something delicious and comforting, but the last thing you want to do when you get home is be on your feet another hour prepping and cooking dinner. Even passionate home cooks need a break sometimes, and so this recipe was born with those days in mind.

All you have to do is toss the marinade together the previous night or the morning of, and let the refrigerator do the rest of the work for you! You can come back home, move the chicken from the fridge to the oven, and relax for 45-55 minutes until you have a juicy, succulent, tangy chicken with a crispy skin waiting for you. If you want to round out the meal with some vegetables and starch, Pea and I found that roasting up a couple diced bell peppers and potatoes (2-3 extra minutes!) worked amazingly with this. So with simple, comforting dinner that you can look forward to through a tough day, hopefully you can turn your frown upside down 😀 – Boo


Yield: 4 chicken thighs
Difficulty: 1 star

Oven: 400 F, 45-55 minutes

Marinade:

  • 0.25 c cilantro, minced
  • 2 cloves garlic, minced
  • 0.25 tb cumin
  • 0.25 tb coriander
  • 1 ts salt
  • 3 limes, zested and juiced
  • 3 tb olive oil

Directions:

  1. Thoroughly coat chicken thighs with marinade. Seal/cover and refrigerate, at least 8 hours.
  2. Shake off excess marinade, and place chicken thighs skin-side up on baking tray. Bake on upper-middle rack until cooked through, 45-55 minutes. Serve.
  3. Optionally, boil excess marinade in a saucepan for 2 minutes, and spoon over chicken or side dishes.

The French Macaron

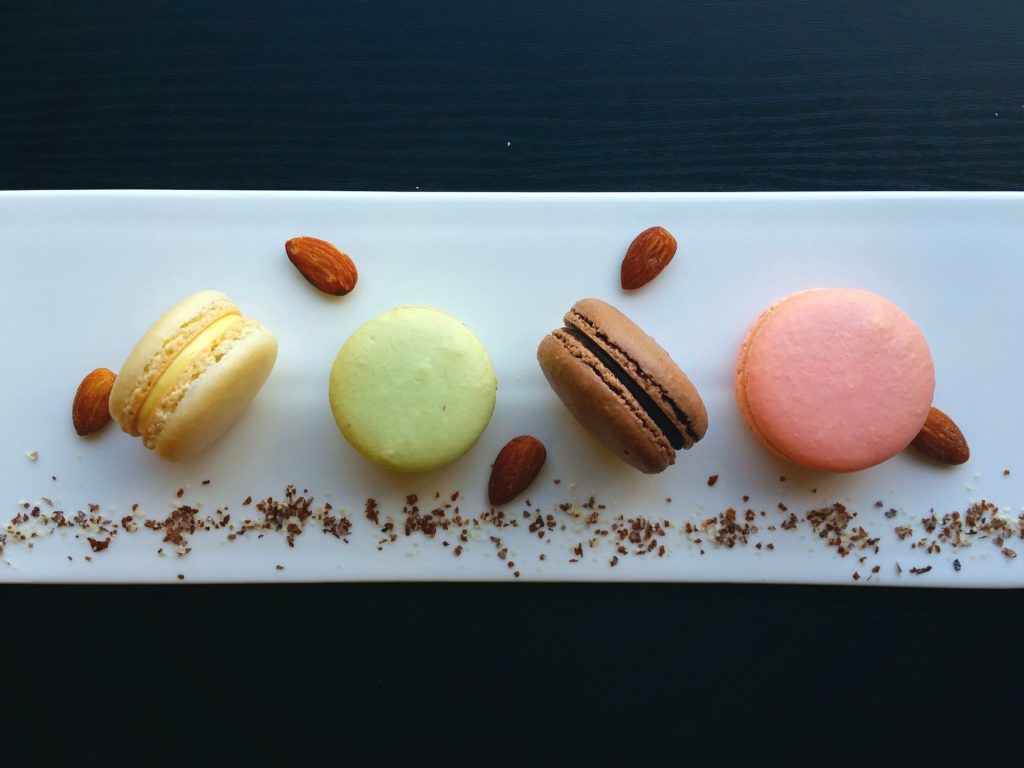
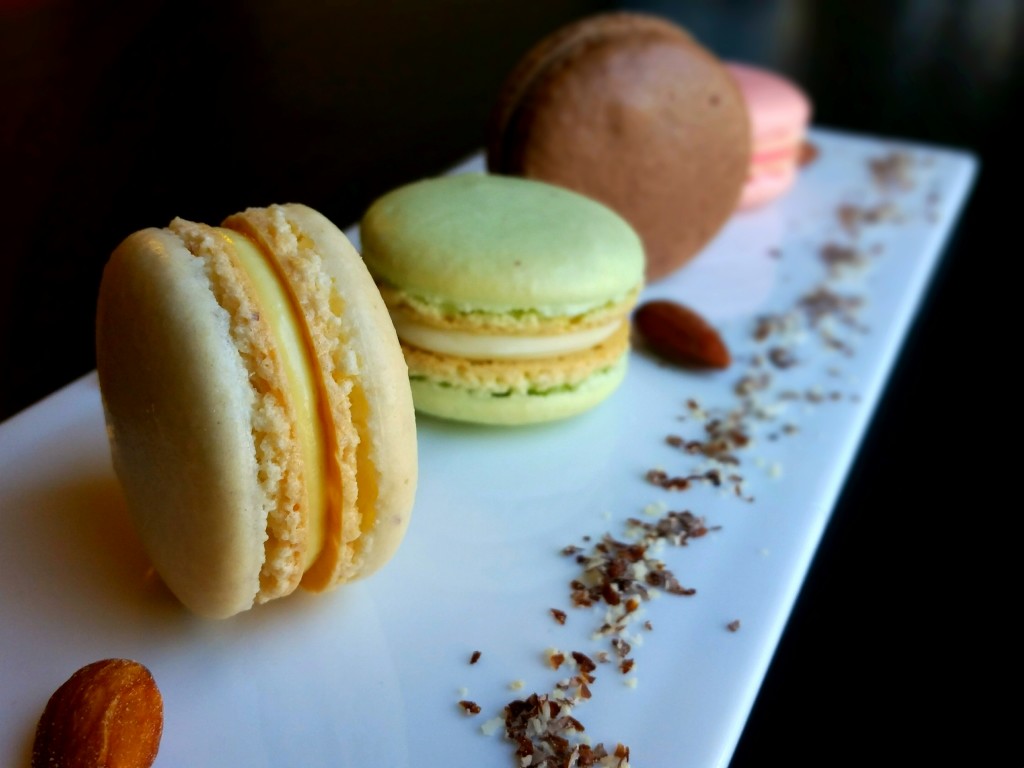
french macaronsFOUR CLASSIC MACARONS. ALMOND MACARON WITH FRENCH ALMOND BUTTERCREAM. MINT MACARON WITH MINTY WHITE CHOCOLATE GANACHE. CHOCOLATE MACARON WITH NUTELLA DARK CHOCOLATE GANACHE. ROSE MACARON WITH RASPBERRY ROSE MASCARPONE CREAM.


If there’s a dessert with a reputation for its difficulty, it’s the macaron. Bakers will tell you how finicky they are from the temperature and age of your egg whites to the moisture content of your flour and the air. They’ll tell you the recipe for the perfect batch one day might crack, collapse, and end in utter disappointment the next evening. That every measurement needs to be absolutely precise. Yes, there’s some truth to these worries. But no, making consistent batches of macarons isn’t just playing a lottery. Just like perfecting any dish or dessert, macaron making comes down to a few key principles – the meringue, the macaronage, and the drying (notice that the weather, age of your egg whites, and miniscule changes in your flour moisture content are not included!). Whether it’s a hot, sunny day or a cold, rainy day, these principles stay the same. It might take a few batches to know exactly what you’re looking for, but once you get it, you won’t forget it!

  1. The Meringue. It’s whipped just enough so that you can fold the almond flour and sugar into it completely without knocking out too much air. You’re looking for peaks that gently curl over when the whisk is lifted straight out of it. This gives you the perfect amount of air so that during the macaronage, you don’t deflate the meringue before all the dry ingredients are properly mixed in (underwhipped), and you don’t have a lumpy, broken mixture (overwhipped)! And there’s no need to age your egg whites. It might make whipping them take a minute or two less but makes no difference in the final product. It’s less effort, too.
    meringue firm peaks
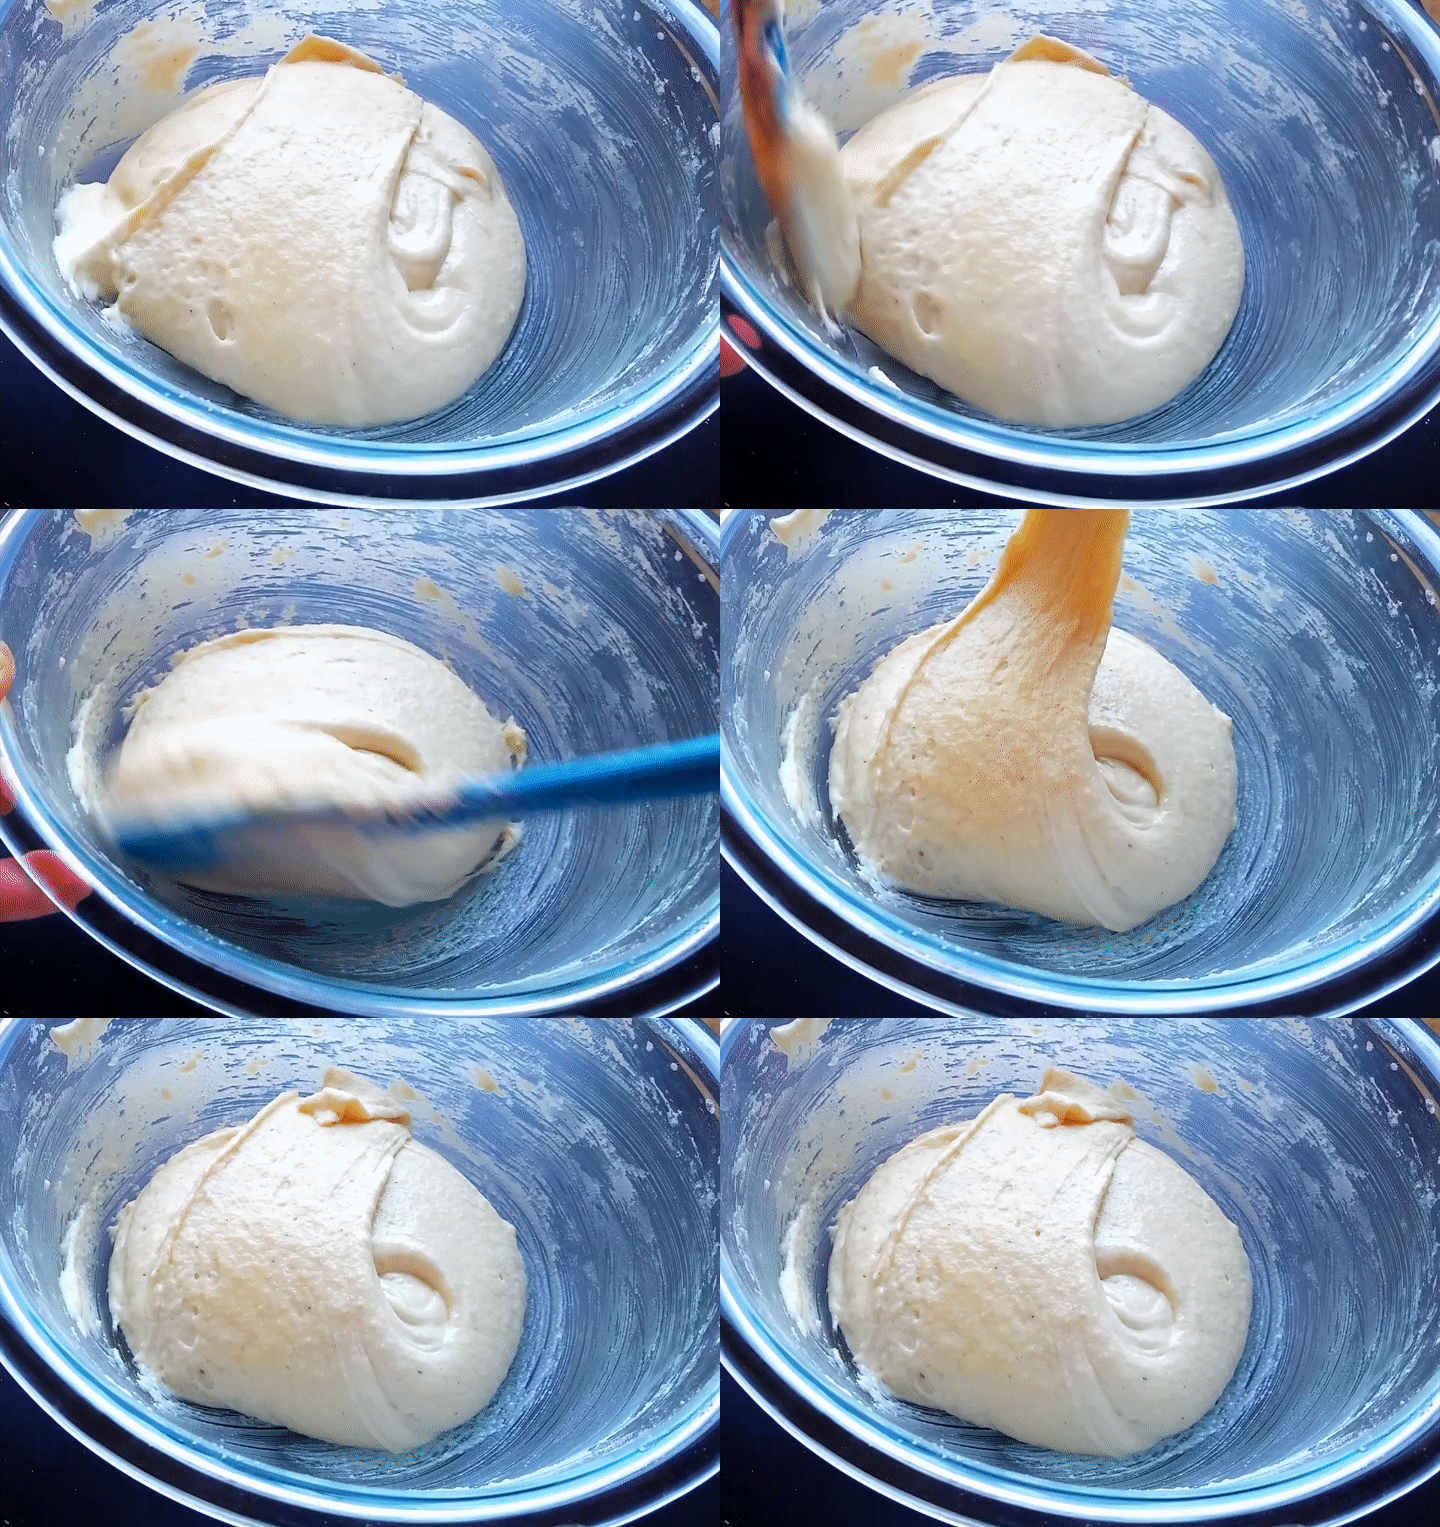
  2. The Macaronage (or the folding of the solids into the meringue). The macaron batter is a suspension of almond meal in a meringue that has been deflated just enough to pipe out smooth round buttons that spread ever so slightly. This is the part where practice makes perfect. Just keep in mind that it’s better to under-mix than  to over-mix, or you’ll have your macarons running into each other on the baking sheet! Some describe this stage as the “molten lava” stage, and others call it the “thick ribbon” stage. Call it what you want, but it should look something like this:
    macaronage
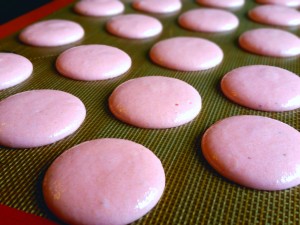
  3. The Drying. After piping out your cute buttons, you need to set them aside until the tops are dry to the touch and don’t stick to your finger when you “pet” them. Just like with royal icing (the shiny, smooth icing you might find on decorated cookies), a crust forms on the macaron surface as the air pulls moisture from the meringue. This forces the air in the meringue to find another way out during baking – through the bottom, where it bubbles out and forms the frilly feet of the macaron. No need to postpone your macaron-making plans on a rainy or humid day! The drying will still happen – it might just take a little longer.
    meringue buttons

Once you get the hang of it, there are all sorts of small changes you can make to the shell recipe, such as using hazelnut or pistachio flour, or adding extracts for flavor and food coloring for fun. And there is a whole world of fillings to try. Below you’ll find the recipe for the basic almond macaron to get you started, with a French almond buttercream. Enjoy! – Boo and Pea


french macarons angleYield: 44-56 macaron shells
Difficulty: 2 star

Oven: 310 F, 18 minutes

Preparation:

  • Line 2-3 baking trays with parchment paper or silicone mats.
  • If using parchment paper, optionally draw guide circles (diameter 2.5-3 cm) about 3 cm apart on parchment paper, and flip written-side down.

Macaron shells:

  • Dry ingredients, sifted
    120 g almond meal
    150 g powdered sugar
  • Meringue
    110 g (~3) egg whites, room temperature
    0.25 ts cream of tartar (or lemon juice)
    100 g granulated sugar
  • (optional) 4-10 drops food coloring
  1. In a mixing bowl, beat egg whites with cream of tartar to soft peaks. Gradually add granulated sugar to egg whites while beating to a firm meringue (tips of peaks should gently curl when whisk is lifted), ~4-6 minutes.
  2. Sift dry ingredients into the meringue. Fold until smooth and falling in thick ribbons.
  3. Using a large round tip, pipe buttons (diameter 2.5-3 cm) onto the prepared baking trays spaced ~3 cm between the edges of adjacent shells.
    Small pea tip: Keep the tip ~0.5 cm above and perpendicular to the baking tray. Keep the tip centered and still while piping each shell to desired size.
  4. Rest at room temperature until surface dries to the touch, 45-60 minutes.
  5. Bake on middle rack, 18 minutes. Remove from oven, and set side until cooled to room temperature. Meanwhile, make filling.
    Small pea tip: Lower the oven temperature by 5-10 F, and bake for 1 minute shorter if using a dark pan.
  6. Carefully remove/peel shells from parchment or silicone mat.
    Small pea tip: If macarons stick to parchment or silicone mat, run a thin knife across the bottom to help release shells.

French almond buttercream:

  • 3 egg yolks
  • Simple syrup
    75 g sugar
    2.5 tb water
  • Flavorings
    1 ts almond extract
    0.25 ts vanilla extract
    0.25 ts salt
  • 6 tb butter, room temperature
  1. In a mixing bowl, beat egg yolks until light yellow and thickened.
  2. In a small saucepan, heat sugar with water to 240 F (or just beginning to turn golden).
  3. Continue beating egg yolks while pouring syrup into yolks a thin stream along the side of the bowl. Beat until cooled to room temperature, 6-8 minutes.
  4. Beat in flavorings.
  5. Add butter in 1 tb increments, and beat until smooth and holds peaks.
  6. Refrigerate for 5 minutes until use.

Assembly:

  1. Pair shells by size.
  2. Using a round tip, pipe ~0.5 tb filling onto one shell of each pair. Gently sandwich with second shell.
  3. In an airtight or covered container, refrigerate macarons in a single layer, at least 8 hours.
  4. Serve, and optionally refrigerate up to 1 week or freeze up to 3 months.

Meat Internal Temperatures – A Guide to Juicy, Flavorful Meat, Every Time

If you’ve watched some TV cooking shows, you’re bound to have heard how cooking a steak to a pitch-perfect pink medium-rare, or keeping a roast chicken or turkey juicy, takes professional skill. Or at the very least, a laundry list of preparation steps like brining in a tub of 20 ingredients or salting no more or less than five-and-a-half seconds before the meat hits the pan.

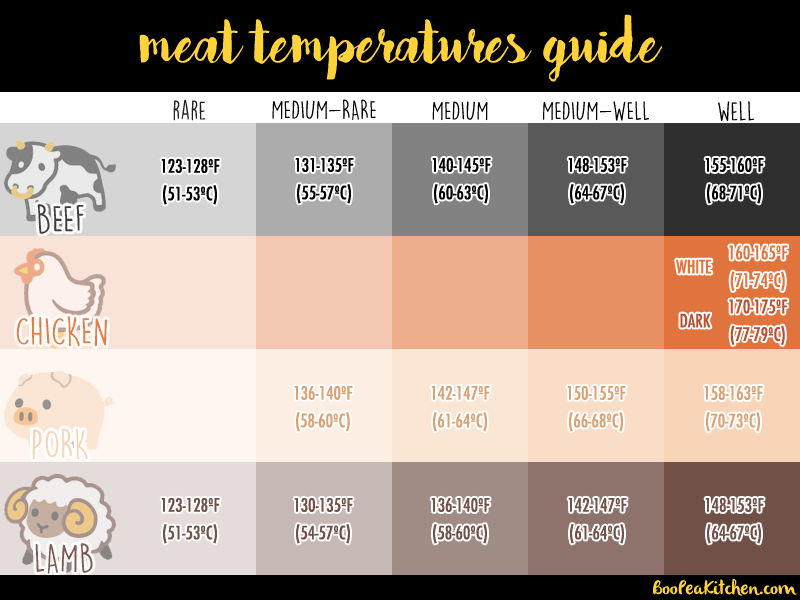
Yes, some of these tricks have their merits, but I would say 95% of the moistness and natural flavor of your favorite steak of roast comes down to temperature. So once you go out and buy a sturdy, reliable meat thermometer, here’s a table of temperatures to look for if you want that juicy goodness:

meat temperatures guide

These are RESTED temperatures!

One important note is that these are rested temperatures taken after the meat is removed from your oven or stove and allowed to sit for about 5-15 minutes, depending on the size of the steak or roast! Because the temperature of the outer parts of the meat is much higher than on the inside as you just finish cooking, the heat redistributes and transfers towards the inside as the meat rests. You should aim to rest the meat after the thickest part of the meat reaches about 5-10 F under the target temperature. The larger the meat and the higher the cooking temperature, the earlier you should rest it, towards the side of 10 F under.

Using a New York Strip steak as an example…

Remove it from the pan or oven onto a resting plate when it hits about 126-130 F for medium-rare, since it will cook through to the middle and rise a few degrees as it rests.

On cooking chicken:

Don’t eat raw or undercooked pink, fleshy chicken. As if you needed a reminder. Though some of the USDA’s 165 F guideline is rightly simplified for mass public safety, some of the juiciest, most tender chicken can be served safely around 145-150 F using proper techniques and times. At BooPeaKitchen, we like our white meat (the breast) around 155-160 F and dark meat (the rest) around 165 F, so we take our roast chickens out around 150 F when the juices that run off the chicken just start turning clear. Just so that no one accidentally gets sick thanks to us, our official recommendation will be a little higher!

On cooking pork:

While rare pork is still questionable because of the risk of the Trichinella spiralis parasite, the USDA fairly recently lowered the safe temperature to 145 F. It turns out that a few minutes around 136 F is sufficient stave off this parasite, so we give temperatures down to medium-rare. We would still recommend pork be cooked medium for the best taste and texture!

On ground meats:

These temperature do not apply for ground meats, simply because there is a lot more surface area for possible bacteria to survive. Cook any ground meat to at least 157-160 F!

*The images used the chart are credited to Google emojis.

Triple Chocolate Mousse Cake

DARK CHOCOLATE MERINGUE MOUSSE ACCENTED WITH ESPRESSO AND SALT. MILK CHOCOLATE CREME ANGLAISE MOUSSE. WHITE CHOCOLATE CREAM MOUSSE. COCOA POWDER. SERVED OVER CHOCOLATE GENOISE SPONGE.


Chocolate is the key to the heart and soul, and mousse is one of the all-time great ways to deliver it. There are basically two kinds of mousse – egg white mousse and cream mousse, sometimes with gelatin to help keep structure. Each of these types of mousse can borrow a little from the other, but egg white mousse generally has more body to it, while cream mousse is… well, creamy. So we made mousse out of three chocolates – dark, milk, and white – which would all be great on their own, but were even better layered on top of each other in showstopping fashion! And who doesn’t like a coffee-enhanced chocolate sponge cake surprise at the bottom?

Each mousse layer is a little different, giving a little contrast as you nom your way through the layers. The dark chocolate mousse is a classic meringue mousse, with egg whites and cream folded into a melted chocolate. The milk chocolate mousse started with a custard that enriches the milk chocolate before being lightened with whipped cream. The white chocolate mousse is a a classic cream mousse that gets topped off with a healthy dusting of cocoa powder.

While the recipe itself isn’t too hard, it does test your patience since you have to let the layers set completely before pouring on the next one! Hope you give this one a try soon! – Boo


Servings: 12-16 slices
Difficulty: 

Oven: 350 F, 25 minutes

Preparation:

  • Line an 8-inch cake or springform pan with parchment paper. Butter and flour the interior.
  • Line a 9.5-inch cake ring or springform pan with parchment paper. Optionally, line interior with acetate paper.

Chocolate genoise:

  • 2 eggs, room temperature
  • 0.33 c sugar
  • 0.5 ts vanilla
  • Dry ingredients
    0.25 c flour
    2.5 tb cocoa powder
    0.25 ts salt
  • 0.25 c coffee liqueur
  1. Over a bain-marie, beat eggs with sugar until warm, but not hot. Remove from heat, and beat until eggs fall in ribbons. Beat vanilla into eggs.
  2. Sift and fold dry ingredients into egg mixture.
  3. Bake batter in a buttered and floured 8-inch cake or springform pan, 25 minutes.
  4. Remove from oven, and cool to room temperature.
  5. Transfer cake to the center of lined 9.5-inch springform pan, and brush with coffee liqueur.
  6. Refrigerate while preparing the dark chocolate mousse.

Dark chocolate mousse:

  • Chocolate mixture
    6 oz dark chocolate, recommended 70-78%
    2 tb cocoa powder
    1 tb instant espresso powder
    0.33 ts salt
  • Meringue
    3 egg whites
    4 tb sugar
    1 ts vanilla extract
  • 0.75 c heavy cream
  1. Over a bain-marie, melt dark chocolate. Stir cocoa powder, espresso powder, and salt into melted chocolate.
  2. Beat egg whites with sugar and vanilla to stiff peaks. Fold meringue into chocolate mixture by thirds.
  3. Beat cream to stiff peaks. Fold whipped cream into meringue mixture by thirds.
  4. Pour mousse over the chocolate genoise, starting from the center. Tap down gently several times, and smooth the top.
  5. Refrigerate to set, 1-1.5 hours, then prepare milk chocolate mousse.

Milk chocolate mousse:

  • 1.5 ts gelatin powder
  • Custard
    2 egg yolks
    3 tb sugar
    0.33 c milk
    0.25 c heavy cream
  • 6 oz milk chocolate, chopped
  • 1 ts vanilla extract
  • 1.25 c heavy cream
  1. In a small bowl, stir gelatin into 1 tb water. Set aside.
  2. In a saucepan, heat milk and cream on medium heat to a bare simmer.
  3. In a mixing bowl, whisk yolks with sugar. Whisk hot milk mixture into yolks.
  4. Return yolk mixture to the saucepan over medium heat, and whisk constantly until slightly thickened.
    Small pea tip: the custard should coat the back of a rubber spatula.
  5. In a mixing bowl, stir custard and vanilla into chocolate until homogenized.
  6. Microwave gelatin until melted, 6-8 seconds. Whisk gelatin into chocolate mixture.
  7. Beat cream to stiff peaks. Fold whipped cream into chocolate mixture by thirds.
  8. Pour mousse over the set dark chocolate layer, starting from the center. Tap down gently several times, and smooth the top.
  9. Refrigerate to set, 1-1.5 hours, then prepare white chocolate mousse.

White chocolate mousse:

  • 1 ts gelatin
  • White chocolate cream
    8 oz white chocolate
    0.5 c heavy cream
    0.5 ts vanilla extract
  • 1.5 c heavy cream
  1. In a small bowl, stir gelatin into 1 tb water. Set aside.
  2. Microwave and stir white chocolate in 30-second intervals until melted. Whisk cream and vanilla into white chocolate.
  3. Microwave gelatin until melted, 6-8 seconds. Whisk gelatin into chocolate mixture.
  4. Beat cream to stiff peaks. Fold whipped cream into chocolate mixture by thirds.
  5. Pour mousse over the set milk chocolate layer, starting from the center. Tap down gently several times, and smooth the top.
  6. Refrigerate to set, 1.5-2 hours.

Finish:

  • Garnish
    chocolate espresso beans
    chocolate shavings
    cocoa powder
  1. Optionally garnish, and serve.