Tag Archives: blogging

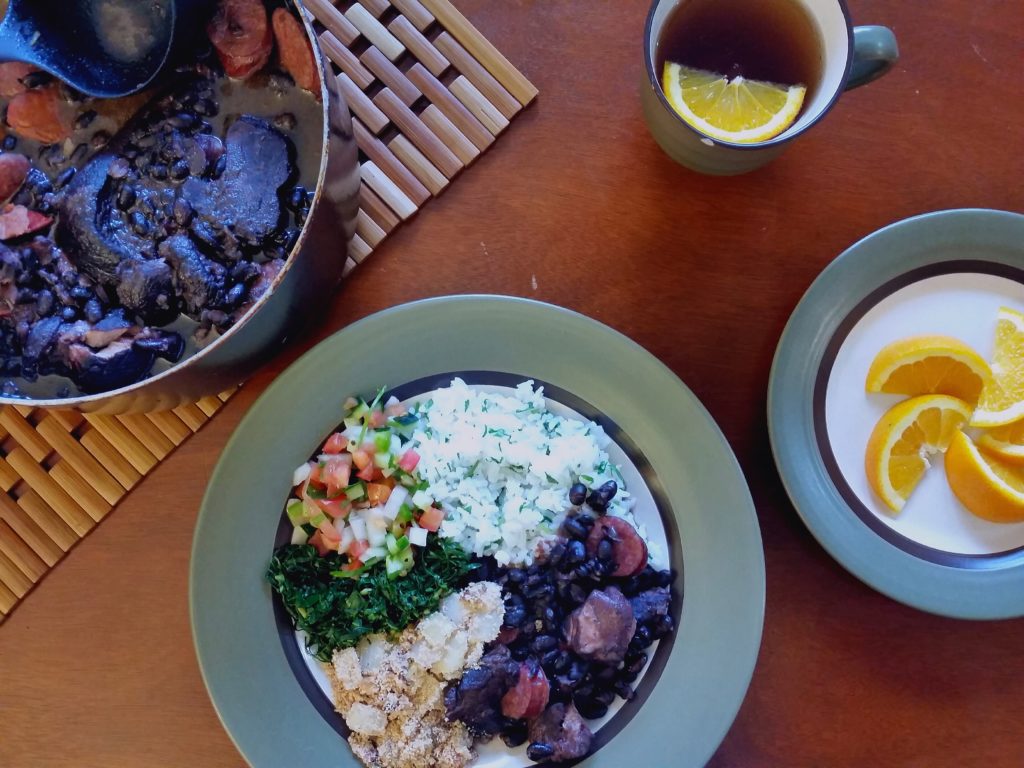
Brazilian Feijoada

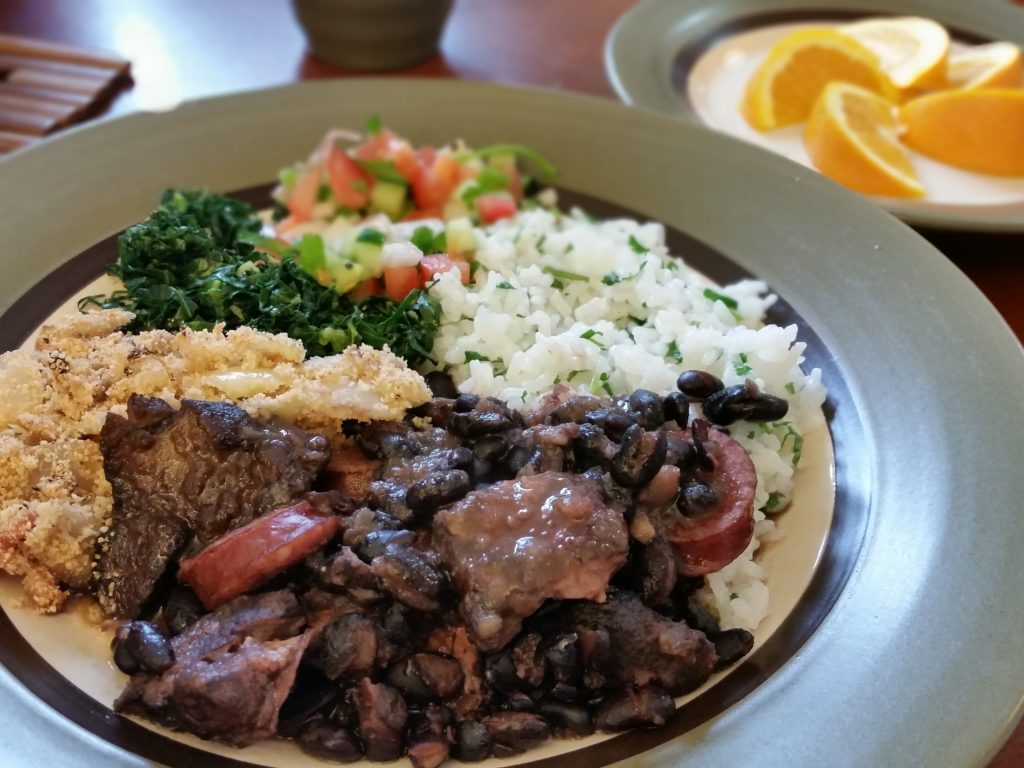
BRAZILIAN BLACK BEAN STEW WITH PORK HOCK, SHOULDER, AND SAUSAGE. FAROFA WITH BACON. GARLIC-FRIED COLLARD THREADS. BRAZILIAN VINAIGRETTE SALSA. CILANTRO-LIME RICE. ORANGE SLICE PALATE CLEANSER.


Binging on Brazilian Youtuber Dani Noce‘s recipe videos is one of my favorite Pea-Boo activities for lazy days. Ever since I managed to convince Boo that her signature background song of festive gibberish means “let’s have a bountiful Feijoada feast” in Portuguese, I cannot make this dish without singing “roomba! ba-ba-ba-e-ba roomba-e!

Fooling the Boo and childhood memories of Brazil aside, this dish itself offers plenty of reason for joy. Easy to make and preferably cooked in large batches so that you can add a variety of meats, Feijoada is perfect for inviting friends over for a hearty meal, served with plenty of tasty sides of toasted farofa, Brazilian vinaigrette salsa, and thinly sliced collard greens. – Pea

Servings: 8-10 (main portions)
Difficulty: 

Ingredients:

  • Stew base
    2 onions, finely minced
    3 c black beans
    0.5 c white wine
    4 cloves garlic, grated
    0.5 tb salt
  • water
  • Meats
    0.75 lb pork hock
    1 lb pork butt (or shoulder), cubed 1 inch
    8 oz linguiça or Kielbasa sausage, sliced
    (optional) pork belly, bacon, beef short rib, beef chuck

Directions:

  1. In a large pot, sauté minced onions in vegetable (or canola) oil over medium-high heat until golden-brown, 4-5 minutes.
  2. Add remaining stew base ingredients. Add water to cover ingredients, and bring to a gentle simmer.
  3. In a pan, sear all meats except sausages. Add seared meats to pot. Cover, and gently simmer until tender, ~3 hours.
    Small pea tip: Add water as needed throughout cooking to keep everything barely covered.
  4. Add sliced sausage to pot to cook, 25 minutes.
  5. Serve with rice and choice of sides.
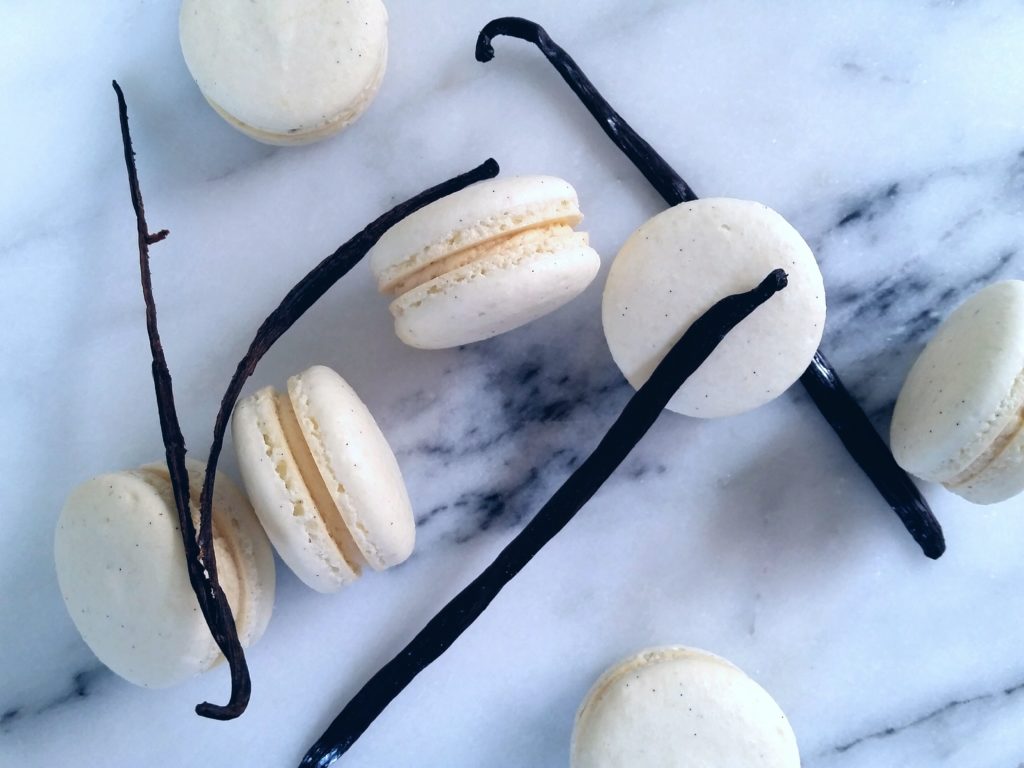
Vanilla Bean Macarons

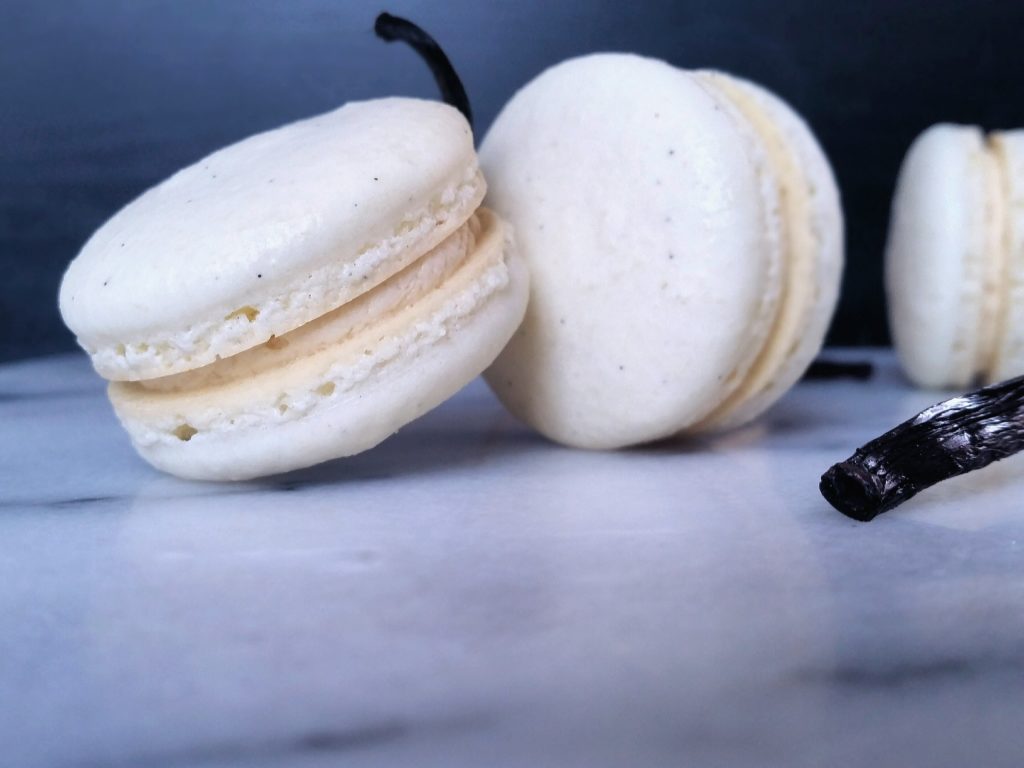
VANILLA BEAN MACARONS WITH CREAMY VANILLA ERMINE BUTTERCREAM.


How vanilla became synonymous with boring and unexciting is a mystery to me. Used correctly, vanilla is an amazing, unique flavor that is the furthest thing from “default” you could get. After all, vanilla beans contain over 200 distinct chemical compounds. Vanillin is the most important by far, and the others help make the aroma nearly indescribable. So if you’re one of those people who judges vanilla from its use in commercial ice cream and limited edition cola, it’s time to give it a real try.

We always keep a healthy stock of vanilla extract from our favorite wholesale warehouse at our disposal, but we’re breaking out the vanilla beans for these vanilla macarons today. Other than decorating your shells with tons of tiny vanilla seed specks to let your friends know you used the real deal, you also don’t lose as much of the vanilla flavor with baking as you do with regular vanilla extract. With a smooth ermine buttercream with plenty of vanilla to fit the theme, these vanilla macarons are anything but boring! – Boo and Pea

P.S. If you haven’t made macarons before, read our quickie guide in our French Macaron blurb – it’s a lot less intimidating than some people make it seem, and we break it down into 3 main things to look out for!


Yield: 44-56 macaron shells
Difficulty: 2 star

Oven: 310 F, 18 minutes

Preparation:

  • Line 2-3 baking trays with parchment paper or silicone mats.
  • If using parchment paper, optionally draw guide circles (diameter 2.5-3 cm) about 3 cm apart on parchment paper, and flip written-side down.

Macaron shells:

  • Dry ingredients, sifted
    120 g almond meal
    150 g powdered sugar
  • Meringue
    110 g (~3) egg whites, room temperature
    0.25 ts cream of tartar (or lemon juice)
    2 vanilla beans, split and scraped
    100 g granulated sugar
  • (optional) 4-10 drops food coloring
  1. In a mixing bowl, beat egg whites with cream of tartar and vanilla bean seeds to soft peaks. Gradually add granulated sugar to egg whites while beating to a firm meringue (tips of peaks should gently curl when whisk is lifted), ~4-6 minutes.
  2. Sift dry ingredients into the meringue. Fold until smooth and falling in thick ribbons.
  3. Using a large round tip, pipe batter into buttons (diameter 2.5-3 cm) onto the prepared baking trays spaced ~3 cm between the edges of adjacent shells.
    Small pea tip: Keep the tip ~0.5 cm above and perpendicular to the baking tray. Keep the tip centered and still while piping each shell to desired size.
  4. Rest at room temperature until surface dries to the touch, 45-60 minutes.
  5. Bake on middle rack, 18 minutes. Remove from oven, and set side until cooled to room temperature. Meanwhile, make filling.
    Small pea tip: Lower the oven temperature by 5-10 F, and bake for 1 minute shorter if using a dark pan.
  6. Carefully remove/peel shells from parchment or silicone mat.
    Small pea tip: If macarons stick to parchment or silicone mat, run a thin knife across the bottom to help release shells.

Vanilla ermine buttercream:

  • Roux
    0.25 c milk
    1 tb flour
    pinch of salt
  • 4 tb butter, room temperature
  • 3 tb sugar
  • 0.5 tb vanilla extract
  1. In a small saucepan over medium heat, stir and bring roux to a simmer, and cook, 2 minutes. Transfer to a small container, and cover and refrigerate until chilled.
  2. In a mixing bowl, cream butter with sugar and vanilla.
  3. Beat roux into butter mixture by spoonfuls, and beat until fluffy.

Assembly:

  1. Pair shells by size.
  2. Using a round tip, pipe ~0.5 tb filling onto one shell of each pair. Gently sandwich with second shell.
  3. In an airtight or covered container, refrigerate macarons in a single layer, at least 8 hours.
  4. Serve, and optionally refrigerate up to 1 week or freeze up to 3 months.

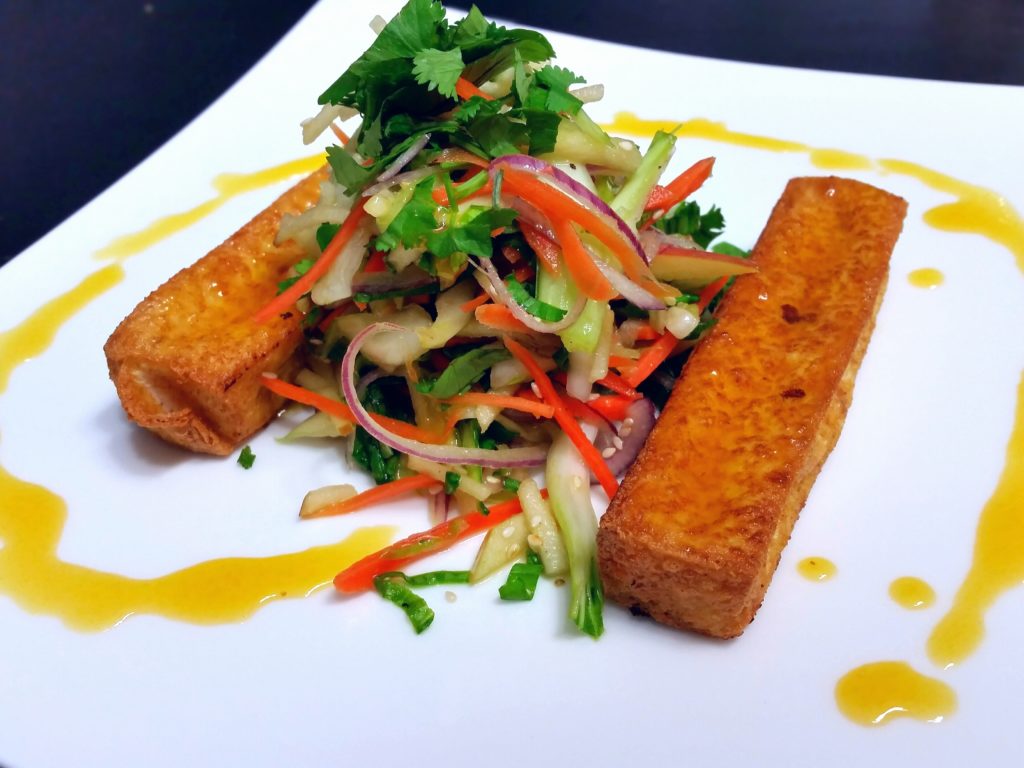
Orange Fried Tofu with Apple Bok Choy Salad

CRISPY FRIED TOFU, LIGHTLY-SALTED AND GLAZED WITH NAVAL ORANGE REDUCTION. LEMONY SESAME BOK CHOY SALAD WITH FUJI APPLE, RED ONION, AND CARROT JULIENNE.


I get occasional cravings for the thick, sweet goop that Chinese take-out calls “orange chicken” and “orange tofu” just like the next person. Unfortunately, Chinese take-out doesn’t usually sit well with New Year’s resolutions, so it was up to me to figure out how to twist a sugary mess into something a bit lighter and fresher. With the help of some bags of fresh Fuji apples and naval oranges, our bok choy bounty, and a desire for something new (because garlic bok choy, while great, can get repetitive), I decided to roll with a raw salad alongside some fried tofu glazed with a naval orange reduction (culinary lingo for an intensified sauce or liquid with a lot of the water boiled away). As much as Pea loves meat, this vegetarian dish ended up being one of Pea’s all-time favorite Boo dishes!

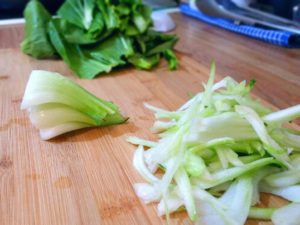
The most intensive part of the dish is probably just slicing everything for the salad into fine matchsticks, or julienne. Although a little time-consuming, it’s a great way to hone your knife skills, and I personally find prep work therapeutic! You’ll find quite a few methods for cutting vegetables into julienne, and some vegetables might be a little trickier than others – but here’s an idea of how I worked the bok choy (by separating the leaves from the stems first, then stacking the stems and rolling the leaves):

Pea has been a little busy learning to be a fantastic doctor recently, but if you have a willing, or unwilling, helper around, they can shallow-fry the tofu and make the sauce while the salad is being put together to save quite a bit of time. Yes, I said shallow-fry because the salad is a good enough reason to have a little bit of fried in the dish, right? – Boo

P.S. make this vegetarian dish vegan by eliminating or replacing the honey! Since there isn’t much honey in the original recipe, and so many other flavors, just taking it out wouldn’t sacrifice much at all!


Servings: 3 (full courses)
Difficulty: 

Bok choy salad:

  • Vegetable julienne
    0.5 lb bok choy
    1 (medium) Fuji apple
    3 oz carrot
    0.25 red onion
  • Seasoning
    2 tb lemon juice
    0.5 tb sesame oil
    0.5 tb honey
    0.5 tb soy sauce
    1 ts mirin
    0.25 ts salt
    0.25 ts black pepper
    0.25 ts garlic powder
  • 2 ts sesame seeds
  • 2-4 tb minced cilantro, to taste
  1. Separate bok choy leaves from stems, and julienne in small stacks.
  2. In a large bowl, toss seasoning with vegetable julienne.
  3. In a small pan, toast sesame seeds over medium heat until aromatic, ~1 minute.
  4. Toss sesame seeds and cilantro into salad.
  5. Cover and refrigerate until use.

Orange tofu:

  • 1-1.25 lb soft tofu
  • Orange reduction
    1 c orange juice
    0.5 tb honey
    1 ts soy sauce
    2 thin slices ginger
    pinch of salt
  • sea salt, coarse
  1. Divide tofu into 6 square logs, and set on paper towels to dry.
  2. In a small pan, reduce orange juice over medium heat until slightly thickened, 6-10 minutes.
  3. Stir remaining orange reduction ingredients into pan, and keep warm.
  4. Shallow fry tofu logs until golden-brown on all sides, 2-3 minutes per side. Set over paper towels to drain, 1 minute.
  5. Glaze tofu with orange reduction, and lightly salt. Serve with apple bok choy salad.

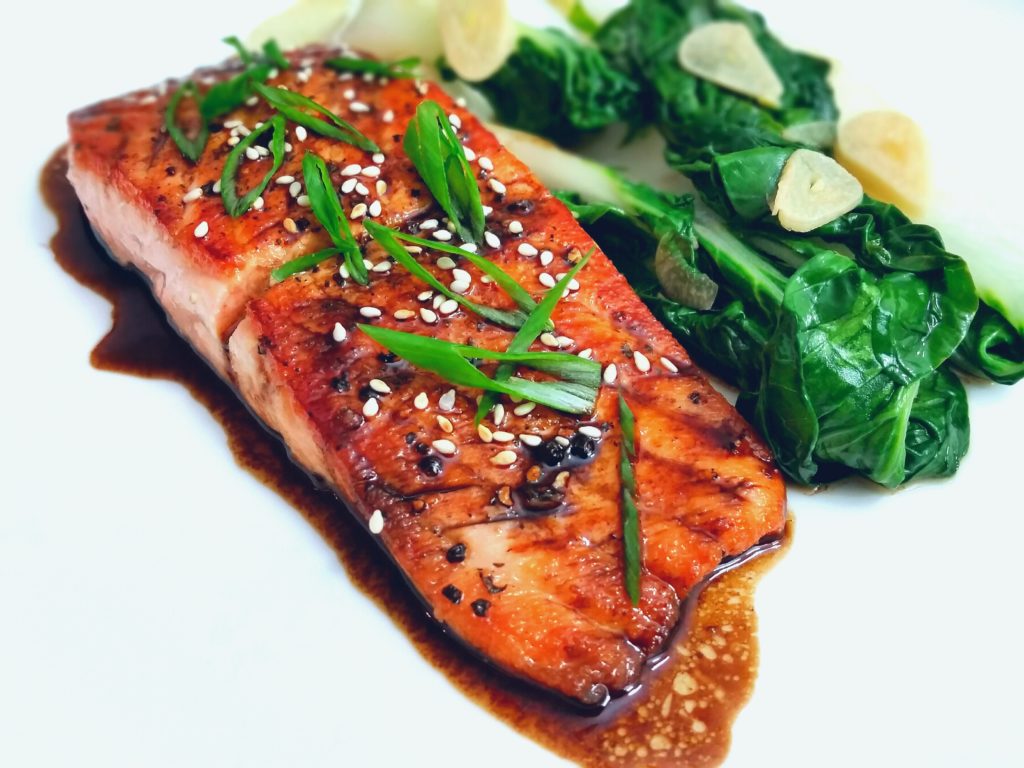
Salmon Balsamic Teriyaki with Garlic Bok Choy

SEARED SALMON FINISHED WITH BALSAMIC TERIYAKI SAUCE, SESAME SEEDS, AND GREEN ONIONS. GARLIC-SAUTEED BOK CHOY.


I’ve heard too many doctors say, “Doctors know how to take care of other people, but don’t know how to take care of themselves”. As Pea and I plow through some of our tougher weeks in medical school, it’s easy (and sad) to see how busy students, professionals, parents, and hobbyists alike may not have the time or effort to spare to eat well. In the name of time management, we’ve definitely caved several times to Chipotle and plenty of unhealthy snacks to mindlessly munch away studying for upcoming exams.

Besides just keeping ourselves healthy, Pea and I know how important it is to be good role models as future doctors, and so we used the start of 2017 as a great excuse to make some changes! First, we’ve been bringing lunch from home that’s healthier and cheaper than buying. Second, we’ve been planning ahead and making more food a few days before the study grind instead of resorting to fast food. Third, we’ve been trying to stick with fruits and nuts as snacks, besides the occasionally irresistible Cheez-Its. For those out there with even tighter schedules, it doesn’t take a laundry list of changes to be healthier – even one change over the long-term is great!

Today, a few days before some upcoming exams, we’re giving you a dish that takes some salmon, bok choy, and some basic pantry ingredients and turns it into a fast, flavorful, and healthy meal. As with all our recipes, it’s okay to omit or substitute if you don’t happen to have something on hand. Doubling the recipe adds almost no time at all, and will let you pack some away for the next few days, too. Here’s to a healthier, happier 2017! – Boo


Servings: 4 (full courses)
Difficulty: 

Balsamic teriyaki:

  • 4 tb balsamic vinegar
  • 2 tb soy sauce
  • 1 tb mirin
  • 1 tb brown sugar
  • 0.5 ts sesame oil
  1. In a small saucepan, stir and simmer all ingredients over medium-high heat until slightly thickened. Set aside.

Seared salmon:

  • 4 portions salmon fillet
  • salt and black pepper
  1. Salt and pepper salmon on both sides.
  2. In a large pan, sear salmon in olive oil over medium-high heat until cooked pink halfway up, ~4 minutes, and flip over.
  3. Sear second side until cooked to desired doneness, 3-5 minutes.
  4. Remove salmon to a plate to rest, and spoon teriyaki over fillets. Meanwhile, prepare bok choy.

Garlic bok choy:

  • 8-10 heads bok choy
  • 4 cloves garlic, thinly sliced
  • 1 tb cooking wine
  • 0.5 tb sesame oil
  • 0.5 tb vinegar
  • salt
  1. Separate and discard root from bok choy stems. Separate bok choy leaves from stems.
  2. In the same large pan, saute garlic and bok choy stems in vegetable/canola oil over medium-high heat until nearly cooked through, ~4 minutes.
  3. Stir bok choy leaves into pan until wilted, ~1 minute.
  4. Mix remaining ingredients into garlic bok choy, and serve with salmon. Optionally, garnish with green onions and sesame seeds.

Eggnog Cream Puffs

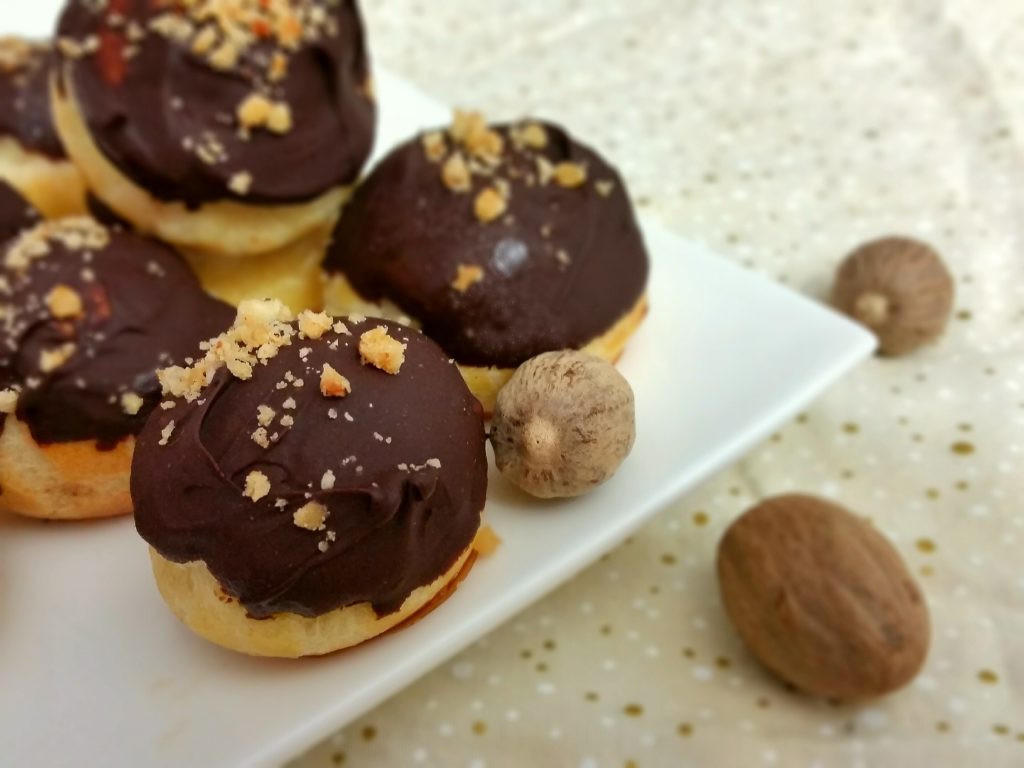
CHOUX PASTRY BALLS FILLED WITH MERINGUE AND NUTMEG PASTRY CREAM. TOPPED WITH CHOCOLATE AND CRUSHED HAZELNUTS.


With the first official day of winter less than 24 hours away, we wanted to share a cream puff recipe, but with an obligatory holiday twist or two. When served chilled, these little puffs are as addictive as they are dangerous when you lose track of how many you’ve already eaten – but that’s perfectly okay when you remember that holiday calories don’t count. In any case, all the holiday deliciousness will just motivate those health-conscious New Years’ resolutions even more.

If you haven’t worked with choux pastry before, it’s really quite a simple and mesmerizing dough that happens to be used for churros, éclairs, beignets, funnel cakes, and so much more. High in moisture compared with other pastry doughs, choux pastry puffs up as the moisture steams up during the cooking process, whether baked (like with éclairs and cream puffs) or deep-fried (like with churros, beignets, or funnel cakes). Baking also leaves a hollow interior for all sorts of tasty fillings! We used a nutmeg chiboust cream, or a nutmeg-infused pastry cream with some meringue folded in to lighten it and simulate the frothiness of a classic holiday eggnog. We wish everyone a happy and tasty holiday season! – Boo and Pea


Yield: 30-35 cream puffs
Difficulty: 

Oven: 400 F, 10 minutes; then 350 F, 20 minutes

Preparation:

  • Line 1-2 baking trays with parchment paper or silicone mats.

Eggnog chiboust cream:

  • 1.25 c milk
  • Yolk mixture
    3 egg yolks
    0.25 c sugar
    2 tb flour
    2 tb corn starch
  • 3 tb butter, chunked
  • 0.75 ts nutmeg
  • 0.5 tb vanilla extract
  • Meringue
    3 egg whites
    0.33 c sugar
  1. In a saucepan, heat milk to a bare simmer.
  2. In a mixing bowl, whisk yolk mixture ingredients until combined. Whisk and slowly add hot milk into yolk mixture.
  3. Return mixture to saucepan, and whisk quickly over medium heat until thickened and boiled for 2 minutes.
  4. Sieve custard into a mixing bowl.
  5. Whisk butter, nutmeg, and vanilla into custard until homogenized.
  6. In a separate mixing bowl, beat egg whites to soft peaks. Gradually add sugar while beating to stiff peaks.
  7. Fold meringue into custard.
  8. Cover with plastic wrap pressed to custard surface, and refrigerate until set, ~2 hours. Meanwhile, prepare choux puffs.

Choux pastry balls:

  • Wet ingredients
    0.5 stick butter
    0.25 c water
    0.25 c milk
    1 ts sugar
    0.25 ts salt
  • 0.5 c flour
  • 2 eggs
  • Egg wash
    1 egg, beaten
    1 tb water
  1. In a saucepan, bring wet ingredients to a bare simmer.
  2. Stir flour into saucepan until dough forms. Stir and cook over medium heat, 2-3 minutes.
  3. Remove dough to a mixing bowl, and cool to lukewarm.
  4. Beat 2 eggs into dough until homogenized.
  5. Using a large round tip, pipe buttons (diameter 2.5 cm, height 2 cm) onto the prepared baking trays spaced ~3 cm between the edges of adjacent buttons.
  6. Brush and smooth buttons with egg wash.
  7. Bake at 400 F on middle rack, 10 minutes. Reduce to 350 F, and bake until golden-brown, 20 minutes.
  8. Turn off oven, and leave door ajar to cool puffs until safe to handle. Refrigerate until assembly.

Assembly:

  • melted chocolate
  • hazelnuts, crushed
  • nutmeg
  1. With a skewer or toothpick, make a small hole near the top of each puff.
  2. Using a small round tip, fill puffs with eggnog pastry cream.
  3. Refrigerate until chilled, 45-60 minutes.
  4. Optionally, dip cream puffs into melted chocolate, and top with crushed hazelnuts and nutmeg.
  5. Serve chilled.

Crawfish Étouffée

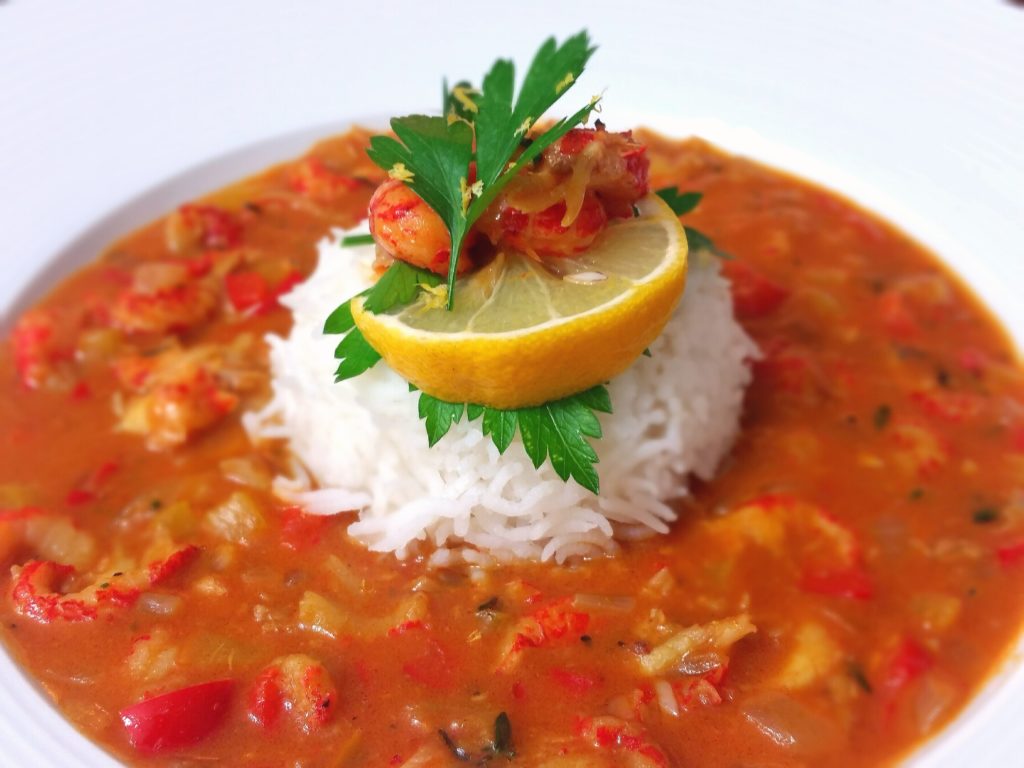
crawfish-etouffeeCRAWFISH TAILS SIMMERED IN A BUTTERY AND SPICY CAJUN BROTH WITH ONIONS AND SWEET BELL PEPPERS. SERVED WITH RICE, AND GARNISHED WITH LEMON AND ITALIAN PARSLEY.


Crawfish étouffée deserves special attention as one of Pea’s all-time favorite dishes. Despite half the name deriving from the French word meaning “to smother”, a few funky accents over the vowels, and the stick of butter in a first step that would make the French proud (although I hear their sticks are twice as big as ours), the crawfish étouffée was actually invented in Louisiana. Though to be fair, the étouffée has quite the culinary overlap with French cuisine, aside from the butter. The technique in making  étouffée is pretty similar to French stews, and it often begins with a butter roux, with or without vegetables or other ingredients, to which spices and a flavorful stock is added with the main protein to cook to a thick, rich consistency.

We won’t get into too many details about the differences between Cajun and Creole – suffice it to say that Creole recipes tend to have tomatoes, and Cajun doesn’t – or the differences between light and dark roux in cousin dishes like gumbo. The idea behind this recipe is to flavor everything to your taste, so the amounts in our recipe might not be the same in yours! And since this dish is from Louisiana, and not France, no one will bite if you don’t follow the instructions to the letter, either. – Boo


Servings: 4 (full courses)
Difficulty: 1 star

Ingredients:

  • 1 stick butter
  • Minced vegetables
    1 onion
    2 bell peppers
    4 cloves garlic
  • 0.33 c flour
  • Cajun spices
    2 ts smoked paprika
    1.5 ts cayenne pepper
    0.75 ts salt
    0.5 ts black pepper
    0.5 ts garlic powder
    0.5 ts onion powder
    1 ts dried oregano
    1 ts dried thyme
  • 2 c chicken stock
  • 2 bay leaves
  • 1 lb crawfish tail meat
  • 2 tb chopped parsley
  • Garnish
    lemon wedges
    chopped parsley

Directions:

  1. In a pot or large pan, melt butter over medium heat.
  2. Saute vegetables in butter until softened, 8-10 minutes.
  3. Add flour and spices to coat vegetables, and toast over medium heat, 3 minutes.
  4. Add chicken stock and bay leaves, and stir and simmer until thickened, 3-4 minutes.
  5. Add crawfish to cook or warm through, 3-5 minutes.
  6. Stir in parsley, optionally garnish, and serve with rice.

Braised Brisket Crêpes au Poivre

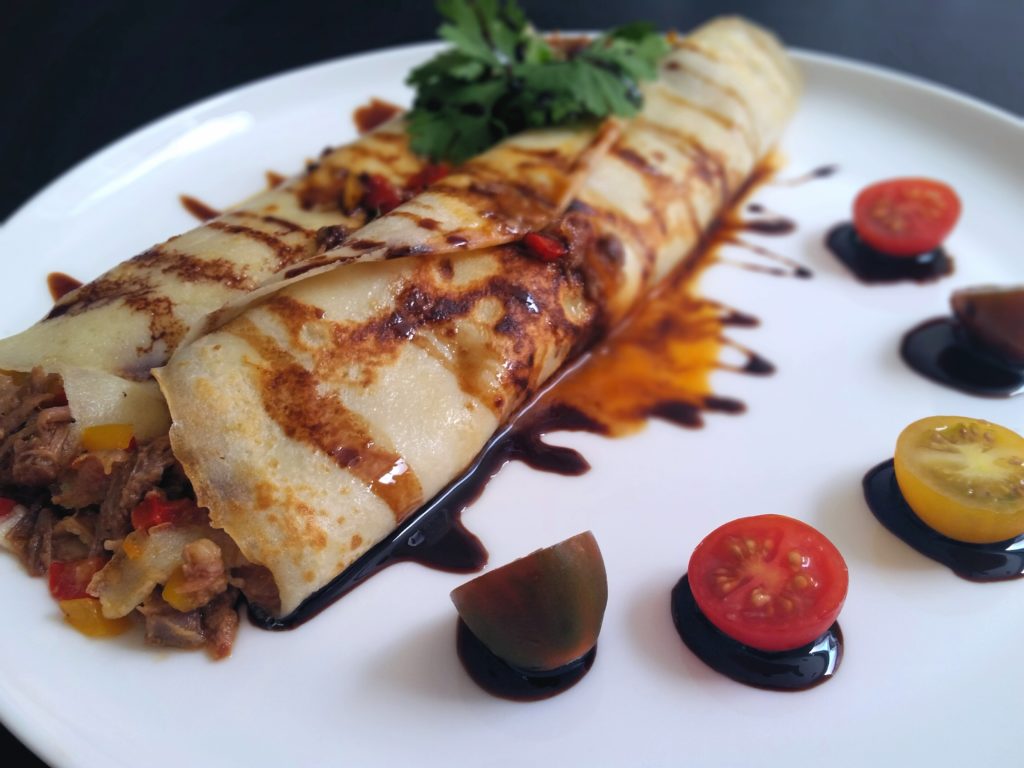
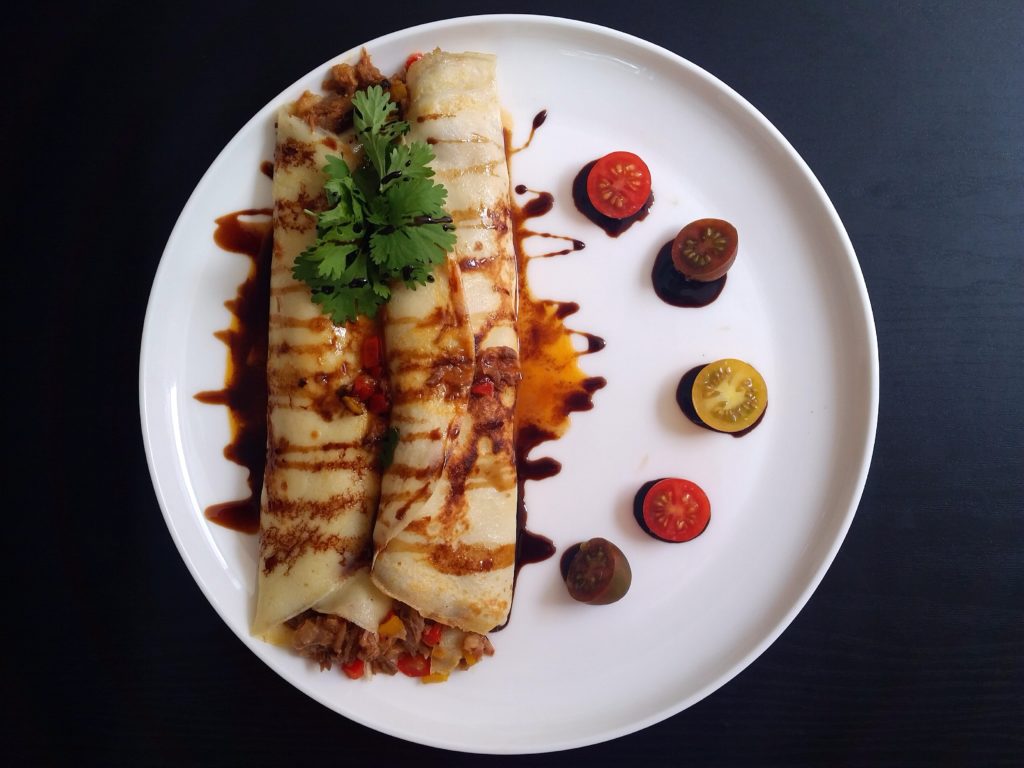
braised brisket crepes au poivreSLOWLY-BRAISED BRISKET MIXED WITH BELL PEPPERS AND ONIONS, AND SEASONED WITH CAYENNE, SMOKED PAPRIKA, AND BLACK PEPPERS. CREPES FINISHED WITH A DRIZZLE OF BALSAMIC REDUCTION.


Most foodies have probably heard of “Steak au Poivre”, which is half-translated from French for “steak with pepper”. Usually, the steak is coated completely in black pepper, then seared to form a smoky, spicy crust on the steak, and served with a cream sauce. Though black pepper doesn’t feature as pungently in this recipe, we’ve joined it with three of our other favorite peppers – bell peppers, cayenne pepper, and smoked paprika – to have savory, spicy, and sweet all work together in the brisket for a super flavorful and addictive bite that made Pea and me go back for more. Any meal – breakfast, brunch, lunch, afternoon snack, dinner, and midnight snack – could use some of this recipe! – Boo


braised brisket crepes above

Servings: 6 (2-crepe portions)
Difficulty: 2 star

Crepes:

  • Dry ingredients, sifted
    1.33 c flour
    2 tb sugar
    0.5 ts salt
  • Wet ingredients
    2 c milk
    2 eggs
    3 tb butter, melted
  1. Whisk wet ingredients together thoroughly, and gradually stir into dry ingredients.
  2. Cover and refrigerate, at least 1 hour.
  3. In a flat pan over medium heat, melt 0.25 tb butter, and pour a thin layer of crepe batter (~3-4 tb) to cook until lightly browned on one side, ~2 minutes. Toss or use a spatula to flip over, and cook until lightly browned on the second side, ~1 minute. Set aside on a plate.
  4. Butter the pan slightly before cooking each additional crepe.

Balsamic reduction:

  • 0.75-1 c balsamic vinegar
  1. In a small pot, simmer balsamic vinegar until thickened to desired consistency, ~10-20 minutes. Add water as needed for a thinner consistency.

Brisket au poivre:

  • Braised brisket
    1.5 lb beef brisket
    4-6 c beef stock
    4 cloves garlic
    2 bay leaves
  • Vegetables, minced
    2 bell peppers
    1 onion
  • Seasoning
    1.5 tb Dijon mustard
    2 ts smoked paprika
    2 ts salt
    0.5 ts black pepper
    0.25 ts cayenne pepper
    0.25 c cilantro, minced
  1. In a large pot, sear the brisket in olive oil on all sides.
  2. Add garlic, bay leaves, and stock to just cover brisket. Cover and barely simmer over low heat until tender, 5-6 hours.
  3. Discard bay leaves. Remove brisket and garlic to a mixing bowl, and pull apart with 2 forks. Keep warm.
  4. Boil braising liquid until reduced to 20% of original volume, 20-30 minutes. Meanwhile, cook and set aside crepes, and prepare balsamic reduction.
  5. Add vegetables to reduced braising liquid to cook through, 5-6 minutes.
  6. Stir vegetables, reduced braising liquid, and seasoning into the pulled brisket.

Herb-Crusted Rack of Lamb

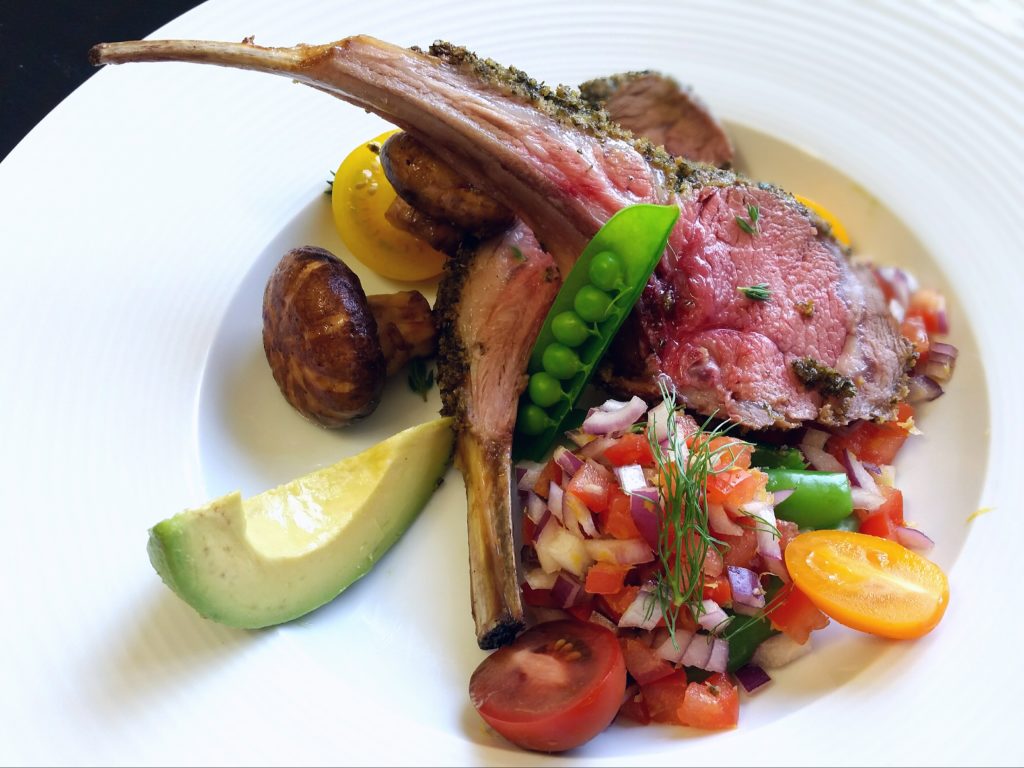
herb-crusted rack of lambROASTED RACK OF LAMB WITH CRUSHED HERB AND GARLIC CRUST. SERVED WITH ASSORTED SEASONAL VEGETABLES.


A wise man (not me) once tweeted, “Once you realize that you don’t need a special occasion to buy a cake, the second part of your life begins.” And while I can definitely get behind cake anytime and anywhere, the same can be said about rack of lamb. Often found on Thanksgiving or Christmas dinner tables, or as specialties at your local fancypants restaurant, rack of lamb is a natural centerpiece and can (and should!) be appreciated year-round with it’s mildly gamey, tender, juicy, supremely flavorful meat. Though quite pricey even at our favorite wholesale clubs, rack of lamb is still our perfect go-to as an occasional treat or a date night main course. In our humble opinion, it goes best with bright and fruity flavors, or with savory sauces like red wine reduction or demi-glace! There’s just nothing quite like it. -Boo


Servings: 2-3 (main portions)
Difficulty: 2 star

Oven: 375 F, 20 minutes; 400 F, 15 minutes

Ingredients:

  • 1 (1.5-2 lb) rack of lamb
  • coarse salt and black pepper
  • 2 tb Dijon mustard
  • Herb crust
    2 tb breadcrumbs
    2 tb fresh parsley
    2 tb fresh rosemary
    2 tb fresh thyme
    3 cloves garlic
    2 tb olive oil

Directions:

  1. Process or finely mince herb crust ingredients, and set aside until use.
  2. Season rack on all sides with coarse salt and pepper.
  3. Sear in olive oil until browned on all sides. Remove to a work surface.
  4. Brush rack completely with Dijon mustard , and press herb crust mixture evenly over the rack.
  5. Roast at 375 F to desired doneness, 20 minutes.
  6. Increase temperature to 400 F, and roast to desired doneness, 14-16 minutes for medium-rare.
  7. Set aside to rest, 10 minutes.
  8. Slice racks into chops, and serve.

Blood Orange Sea Scallops Flambé

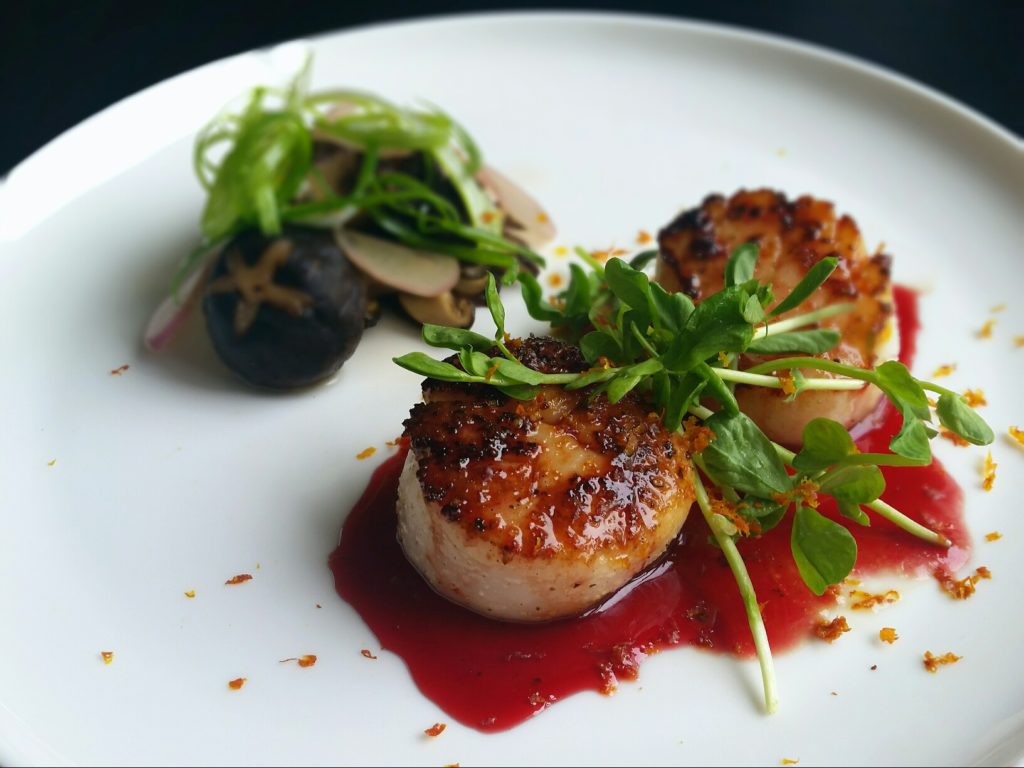
blood orange sea scallops flambeSILKY SEARED SCALLOPS WITH A SPICED BLOOD ORANGE REDUCTION. MISO-POACHED RADISHES AND SHIITAKE MUSHROOMS.


There are few better mealtime omens than a good scallop starter. And while scallops are great with the usual butter and white wine sauce, their natural sweetness and creamy texture complement fruity, tangy flavors delightfully! Blood orange may not be in season anymore, but of course regular oranges can be used, even though you won’t get the almost-berrylike tones as you would from the blood orange. For those of you who like playing with fire, there’s an optional step to flambé the sauce with Grand Marnier, too!

The focus of this recipe is definitely the sauce, while the method for the seared scallops is pretty much the same as any classic recipe – some light seasoning followed by a very hot pan and some oil for a minute or two a side. Happy cooking 🙂 – Boo


Servings: 2 (appetizer portions)
Difficulty: 1 star

Ingredients:

  • Blood orange sauce
    2 blood oranges, zested and juiced
    0.75 tb honey
    2 pinches salt
    1 pinch five spice
  • 1 tb Grand Marnier
  • 4 (large) sea scallops
  • Seasoning
    salt and black pepper, medium coarse
    garlic powder
  • Garnish
    pea sprouts
    blood orange zest
  1. In a small saucepan, stir and simmer sauce ingredients on medium heat until slightly thickened.
  2. Add Grand Marnier, and optionally set alight to flambé.
  3. Reduce sauce to 2-3 tb, or to a syrupy consistency. Remove from heat, and keep warm.
  4. Season scallops on both sides, and sear in olive oil over high heat, 1.5-2 minutes per side.
  5. Serve scallops with orange sauce, and garnish as desired.

Brown Butter Gnocchi with Mushrooms and Swiss Chard

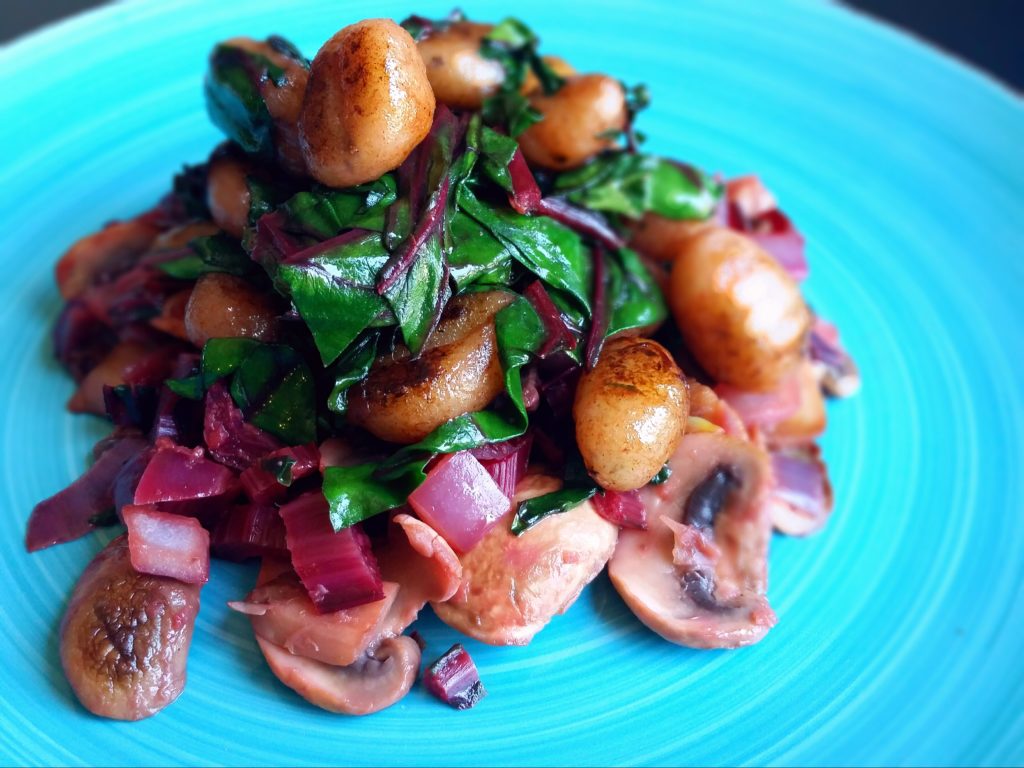
brown butter gnocchiCHEWY PORCINI AND TRUFFLE POTATO GNOCCHI BROWNED IN BUTTER AND TOSSED WITH SAUTEED MUSHROOMS AND SWISS CHARD.


Never big fans of Whole Foods, Pea and I were still excited for the recent opening of one just two blocks away from our home. As we strolled through the aisles of fancypants ingredients and munched on the occasional free sample, we were shocked to find Swiss chard, one of my all-time favorite veggies, at a reasonable price! Quickly, before the shock and novelty of a good deal at Whole Foods wore off, we checked out contentedly with our find.

Swiss chard is great sautéed, stir-fried, or even raw in a salad or as a wrap. Although the recipe below is for a “gnocchi dish”, the swiss chard adds an fantastic dimension of flavor to the plate, which is otherwise just seasoned with salt, pepper, and lemon zest. The leaves are like a softer, silkier spinach, and the stems are just a hint sweet. With the mushrooms and chewy potato gnocchi, this vegetarian-friendly recipe makes a great earthy, savory meal for two or a comforting appetizer for three or four! – Boo


Servings: 2 (full courses) or 3-4 (appetizer portions)
Difficulty: 2 star

Ingredients:

  • Vegetables
    0.5 lb mushrooms, sliced
    0.5 onion, diced 1 cm
    2 cloves garlic, grated
    0.5 lb Swiss chard
  • 8 oz gnocchi
  • 2 tb butter
  • 0.25 tb olive oil
  • Seasoning
    0.5 ts salt
    0.25 ts black pepper
    lemon zest

Directions:

  1. In a large pan, sear mushrooms in olive oil over medium-high heat.
  2. Meanwhile, separate chard leaves from stems. Dice stems, and chop leaves.
  3. Add onions, chard stems, and garlic to large pan, and saute over medium-high heat until softened, 3-4 minutes.
  4. Add chard leaves to saute until wilted, 1-2 minutes. Set vegetables aside.
  5. Cook gnocchi per package instructions, and drain.
  6. In a pan, heat and stir butter over medium-high heat until browned. Add olive oil and gnocchi, and sear gnocchi on several sides, 2-3 minutes.
  7. Stir vegetables and seasoning into gnocchi, and serve.