Category Archives: Cuisine

Crawfish Étouffée

crawfish-etouffeeCRAWFISH TAILS SIMMERED IN A BUTTERY AND SPICY CAJUN BROTH WITH ONIONS AND SWEET BELL PEPPERS. SERVED WITH RICE, AND GARNISHED WITH LEMON AND ITALIAN PARSLEY.


Crawfish étouffée deserves special attention as one of Pea’s all-time favorite dishes. Despite half the name deriving from the French word meaning “to smother”, a few funky accents over the vowels, and the stick of butter in a first step that would make the French proud (although I hear their sticks are twice as big as ours), the crawfish étouffée was actually invented in Louisiana. Though to be fair, the étouffée has quite the culinary overlap with French cuisine, aside from the butter. The technique in making  étouffée is pretty similar to French stews, and it often begins with a butter roux, with or without vegetables or other ingredients, to which spices and a flavorful stock is added with the main protein to cook to a thick, rich consistency.

We won’t get into too many details about the differences between Cajun and Creole – suffice it to say that Creole recipes tend to have tomatoes, and Cajun doesn’t – or the differences between light and dark roux in cousin dishes like gumbo. The idea behind this recipe is to flavor everything to your taste, so the amounts in our recipe might not be the same in yours! And since this dish is from Louisiana, and not France, no one will bite if you don’t follow the instructions to the letter, either. – Boo


Servings: 4 (full courses)
Difficulty: 1 star

Ingredients:

  • 1 stick butter
  • Minced vegetables
    1 onion
    2 bell peppers
    4 cloves garlic
  • 0.33 c flour
  • Cajun spices
    2 ts smoked paprika
    1.5 ts cayenne pepper
    0.75 ts salt
    0.5 ts black pepper
    0.5 ts garlic powder
    0.5 ts onion powder
    1 ts dried oregano
    1 ts dried thyme
  • 2 c chicken stock
  • 2 bay leaves
  • 1 lb crawfish tail meat
  • 2 tb chopped parsley
  • Garnish
    lemon wedges
    chopped parsley

Directions:

  1. In a pot or large pan, melt butter over medium heat.
  2. Saute vegetables in butter until softened, 8-10 minutes.
  3. Add flour and spices to coat vegetables, and toast over medium heat, 3 minutes.
  4. Add chicken stock and bay leaves, and stir and simmer until thickened, 3-4 minutes.
  5. Add crawfish to cook or warm through, 3-5 minutes.
  6. Stir in parsley, optionally garnish, and serve with rice.
Herb-Crusted Rack of Lamb

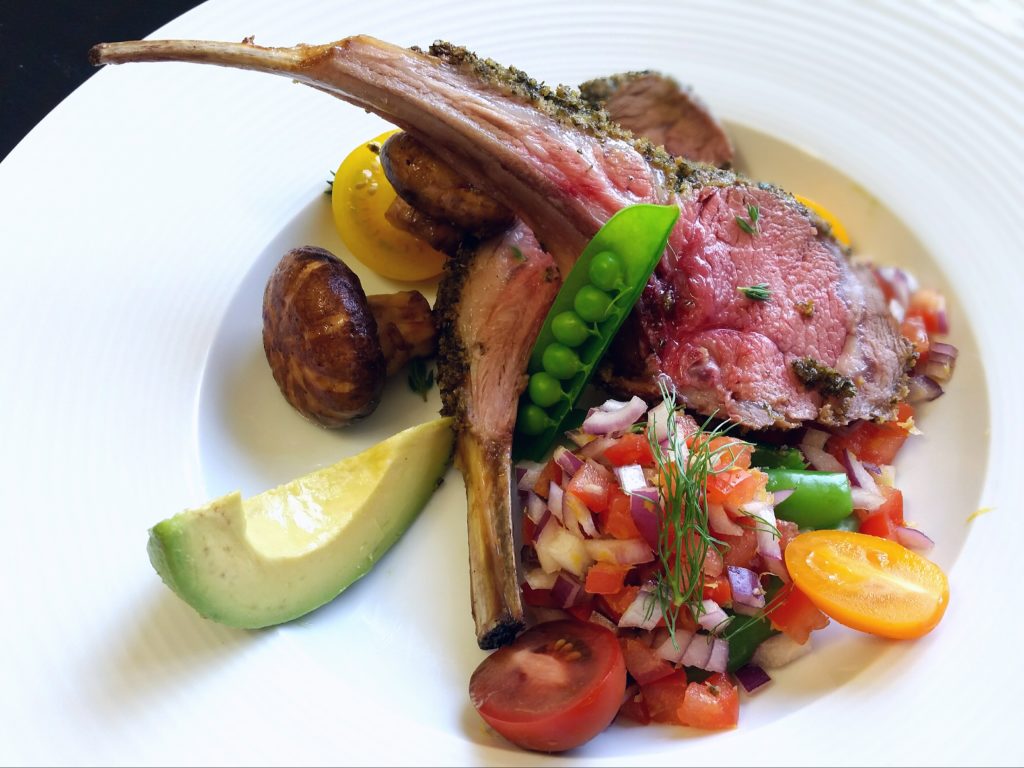
herb-crusted rack of lambROASTED RACK OF LAMB WITH CRUSHED HERB AND GARLIC CRUST. SERVED WITH ASSORTED SEASONAL VEGETABLES.


A wise man (not me) once tweeted, “Once you realize that you don’t need a special occasion to buy a cake, the second part of your life begins.” And while I can definitely get behind cake anytime and anywhere, the same can be said about rack of lamb. Often found on Thanksgiving or Christmas dinner tables, or as specialties at your local fancypants restaurant, rack of lamb is a natural centerpiece and can (and should!) be appreciated year-round with it’s mildly gamey, tender, juicy, supremely flavorful meat. Though quite pricey even at our favorite wholesale clubs, rack of lamb is still our perfect go-to as an occasional treat or a date night main course. In our humble opinion, it goes best with bright and fruity flavors, or with savory sauces like red wine reduction or demi-glace! There’s just nothing quite like it. -Boo


Servings: 2-3 (main portions)
Difficulty: 2 star

Oven: 375 F, 20 minutes; 400 F, 15 minutes

Ingredients:

  • 1 (1.5-2 lb) rack of lamb
  • coarse salt and black pepper
  • 2 tb Dijon mustard
  • Herb crust
    2 tb breadcrumbs
    2 tb fresh parsley
    2 tb fresh rosemary
    2 tb fresh thyme
    3 cloves garlic
    2 tb olive oil

Directions:

  1. Process or finely mince herb crust ingredients, and set aside until use.
  2. Season rack on all sides with coarse salt and pepper.
  3. Sear in olive oil until browned on all sides. Remove to a work surface.
  4. Brush rack completely with Dijon mustard , and press herb crust mixture evenly over the rack.
  5. Roast at 375 F to desired doneness, 20 minutes.
  6. Increase temperature to 400 F, and roast to desired doneness, 14-16 minutes for medium-rare.
  7. Set aside to rest, 10 minutes.
  8. Slice racks into chops, and serve.

Raspberry Financiers

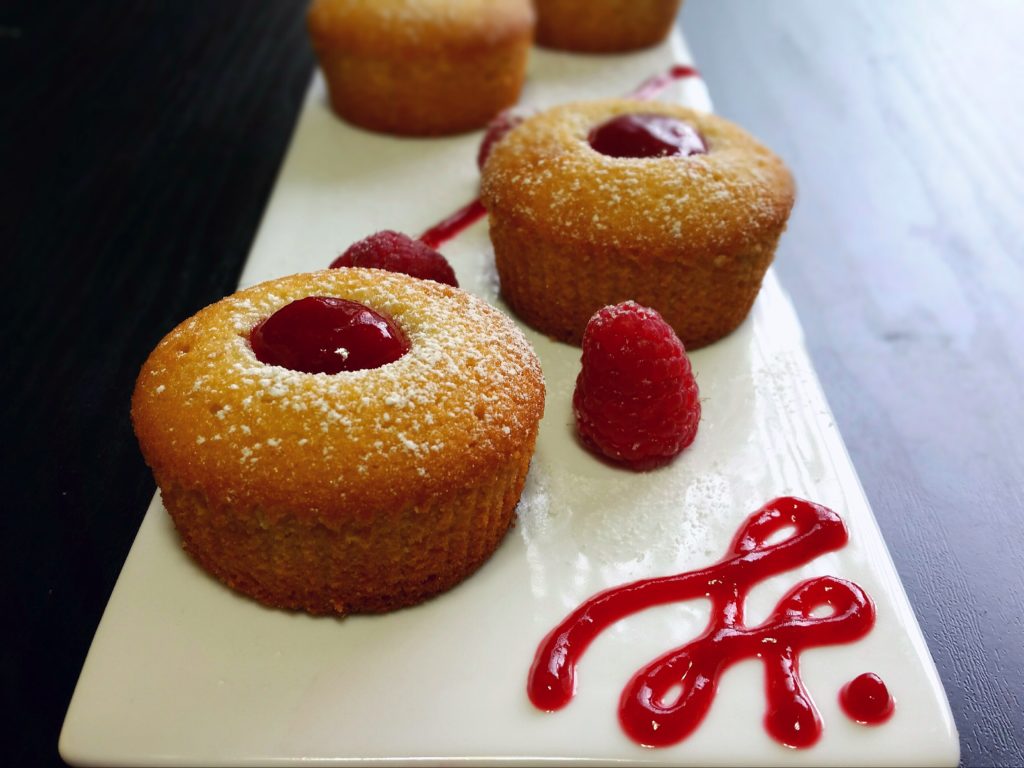
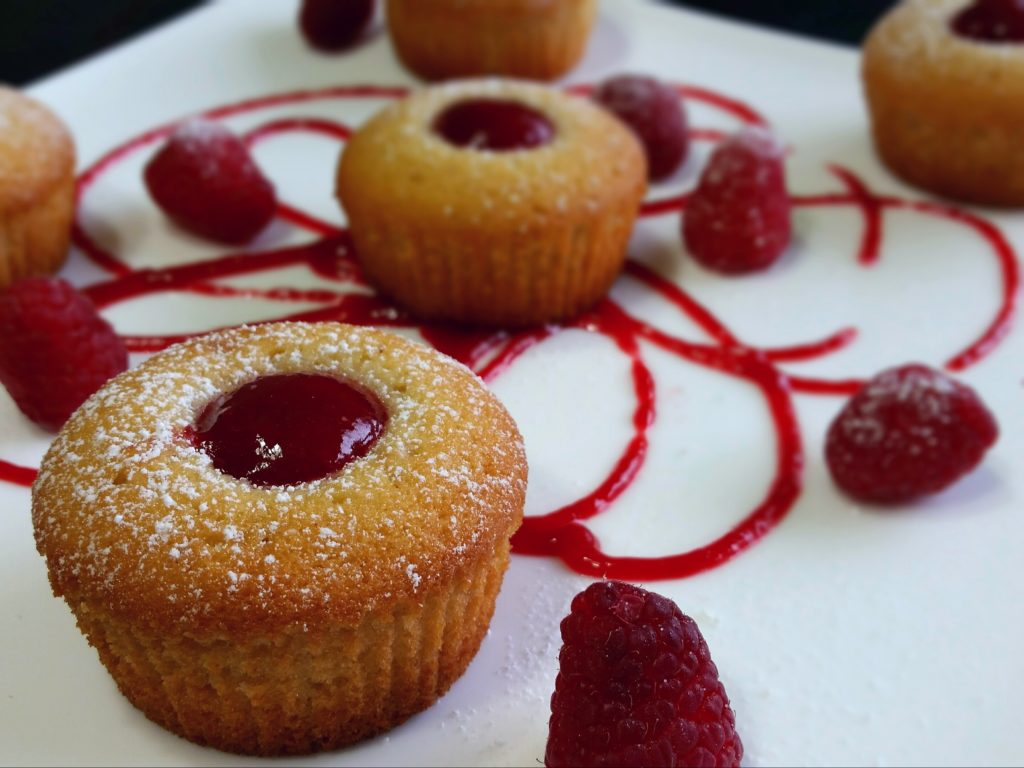
raspberry financiersMOIST, GOLDEN FRENCH ALMOND CAKES WITH RASPBERRY COULIS AND POWDERED SUGAR.


These little guys are like cupcakes, but even better! They are traditionally made as rectangular bars to resemble bars of gold, hence the name financier. And although Boo and I have managed to collect molds of all sorts of shapes, we don’t expect everyone else to have a rectangular 6 x 3 cm mold at arm’s reach, so we decided to use a regular cupcake tin. Plus, I think they’re cuter round. Geometric differences aside, these moist, spongy almond cakes are absolutely satisfying, incredibly easy to make, and great with a cup of tea or coffee.

When you’re making these, you may want to mix gently to keep from incorporating too much air into the batter, otherwise they will deflate as they cool after baking. After breaking up the egg whites with a fork, I used a rubber spatula to mix the batter together, which worked out just fine. But other than for aesthetic reasons, this step can be optional.

For our financiers, we used raspberry, but almost any fruit with a hint of tartness – like blueberries, peach, or even passionfruit – would pair beautifully with the richness of the cake. Be warned: they’re addictive. Thank goodness this recipe only makes 10! – Pea


raspberry financiers 2

Yield: 10 financiers
Difficulty: 1 star

Oven: 400 F, 6 minutes; 350 F, 14 minutes

Preparation:

  • Grease 10 small cupcake molds, or line with cupcake wrappers.

Almond cake:

  • 1 stick butter
  • 4 egg whites
  • Dry ingredients
    0.5 c sugar
    1 c almond meal
    0.33 c flour
  • 2 tb honey
  • 10 raspberries
  1. In a small saucepan, heat and stir butter over medium heat until browned. Pour into a bowl, and set aside to cool slightly.
  2. In a mixing bowl, lightly stir together dry ingredients, egg whites, and honey until homogenized.
  3. Gently stir butter into egg mixture.
  4. Divide batter into prepared molds or cupcake wrappers. Place a raspberry in the center of each with the cavity facing up.
  5. Bake at 400 F, 6 minutes. Lower to 350 F, and bake ~14 minutes until cooked through. Meanwhile, make raspberry coulis.

Raspberry coulis:

  • 3 oz raspberries
  • 1.5 tb sugar
  • 2 tb water
  1. In a small saucepan, stir and mash ingredients over medium heat until thickened, 10-12 minutes.
  2. Press through a strainer, and discard seeds.
  3. Using a small round tip, pipe coulis into the centers of financiers.
  4. Serve warm.

*recipe inspired by Bruno Albouze

Asian Honey-Glazed Salmon

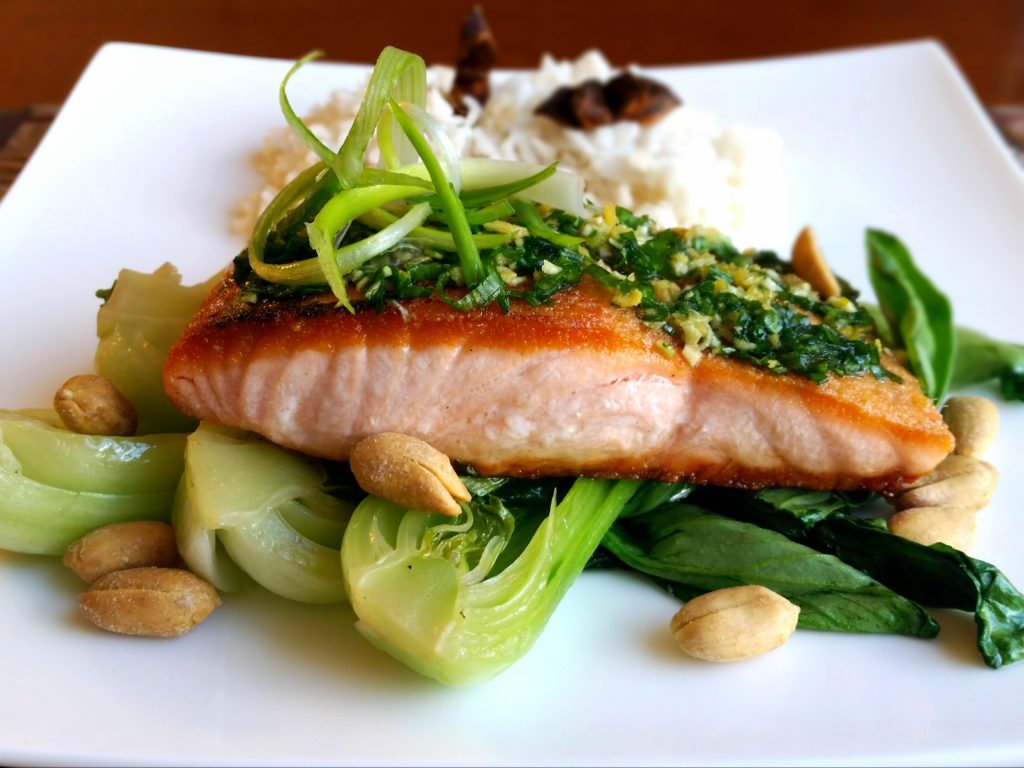
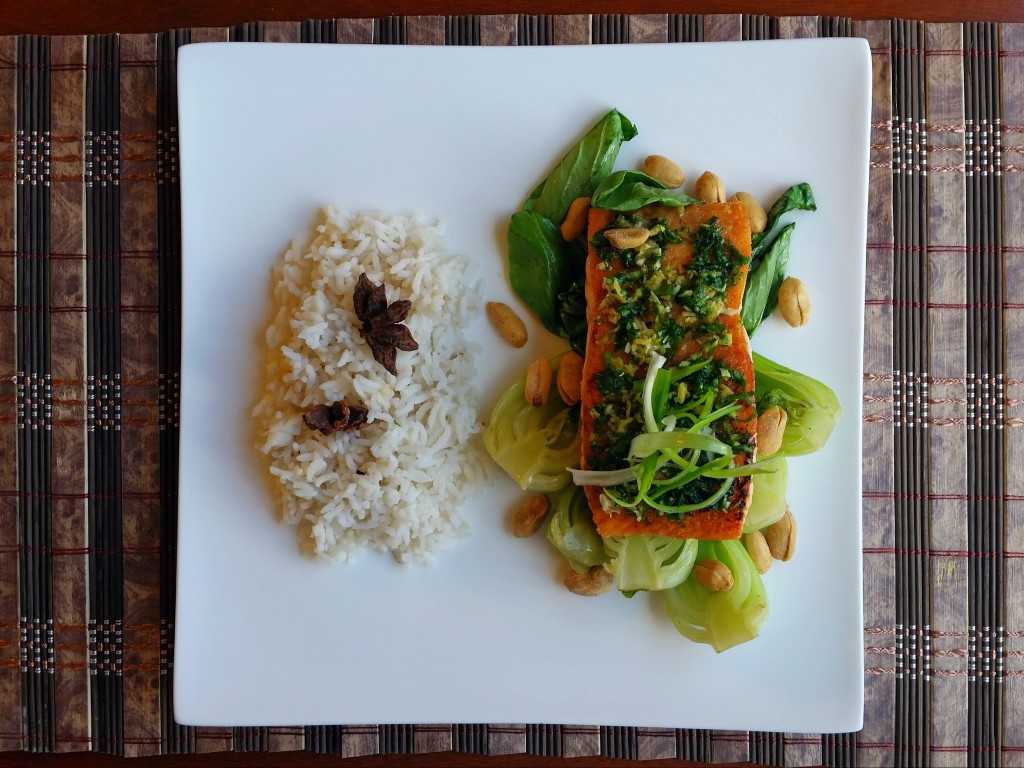
honey glazed salmonCRISPY FILLET OF SALMON GLAZED WITH HONEY AND SEASONED WITH FRESH MINCED AROMATICS. BOK CHOY STIR-FRIED WITH GARLIC AND SESAME OIL. CINNAMON-ANISE STEAMED RICE.


As much as we love our comforting, spicy stews and hearty broths through the winter, we felt it was time to bring in the light, fresh, and crisp flavors to hit off the start of spring. And so we bring you our very quick and easy honey-glazed salmon, where the natural tanginess of the fresh green onion and the just-barely-cooked ginger and garlic mince were the life of the dish, maybe even more so than the salmon itself! Since this worked so well with the lightly salted bok choy dashed with sesame oil and the fragrant rice, we’re including the sides in the recipe, too. If you’re just feeling the salmon, though, feel free to go straight down to that part of the recipe. Hope you give this a try! – Boo

P.S. If you want some curly green onions for garnish, slice them into thin strips about 4 inches long, then put them in ice water for several minutes.


honey glazed salmon top-downServings: 2 (full courses)
Difficulty: 1 star

Anise rice:

  • 1.2 c water
  • Spices
    3 star anise
    4 cloves
    0.25 ts salt
    0.25 ts cinnamon
  • 1 c white rice, washed
  1. In a small saucepan, bring water with spices to a boil.
  2. Add rice to boiling water. Cover and steam over low heat until cooked through, 20-25 minutes. Meanwhile, prepare bok choy and salmon.

Garlic bok choy:

  • 4-6 heads bok choy, halved lengthwise
  • 2 cloves garlic, sliced
  • 0.5 tb sesame oil
  • 0.5 tb cooking wine
  • 1 ts vinegar
  • salt and black pepper
  1. In a pan/wok, saute bok choy with garlic in vegetable oil over medium-high heat until slightly softened, ~3 minutes.
  2. Add sesame oil, and toss to coat vegetables.
  3. Add remaining ingredients, and cook to desired doneness, 3-5 minutes.
  4. Cover to keep warm, and set aside. Meanwhile, prepare salmon.

Glazed salmon:

  • 2 (6-8 oz) salmon fillets
  • Seasonings
    salt
    white pepper
  • 1.5 tb corn starch
  • Toppings
    2 green onions, minced
    2 cloves garlic, minced
    1 tb grated ginger
  • 2-3 tb honey
  • Garnish
    green onions
    roasted salted peanuts
  1. Salt and pepper salmon on both sides, and sift a thin layer of corn starch onto both sides.
  2. Sear salmon in olive oil over medium-high heat until cooked pink halfway up, ~4 minutes, and flip over. Spread toppings on seared side, and drizzle honey over fillets.
  3. Continue searing second side until crisped and cooked to desired doneness, 3-5 minutes.
  4. Remove salmon from heat to rest, 3 minutes.
  5. Serve, optionally with green onions and roasted salted peanuts.

The French Macaron

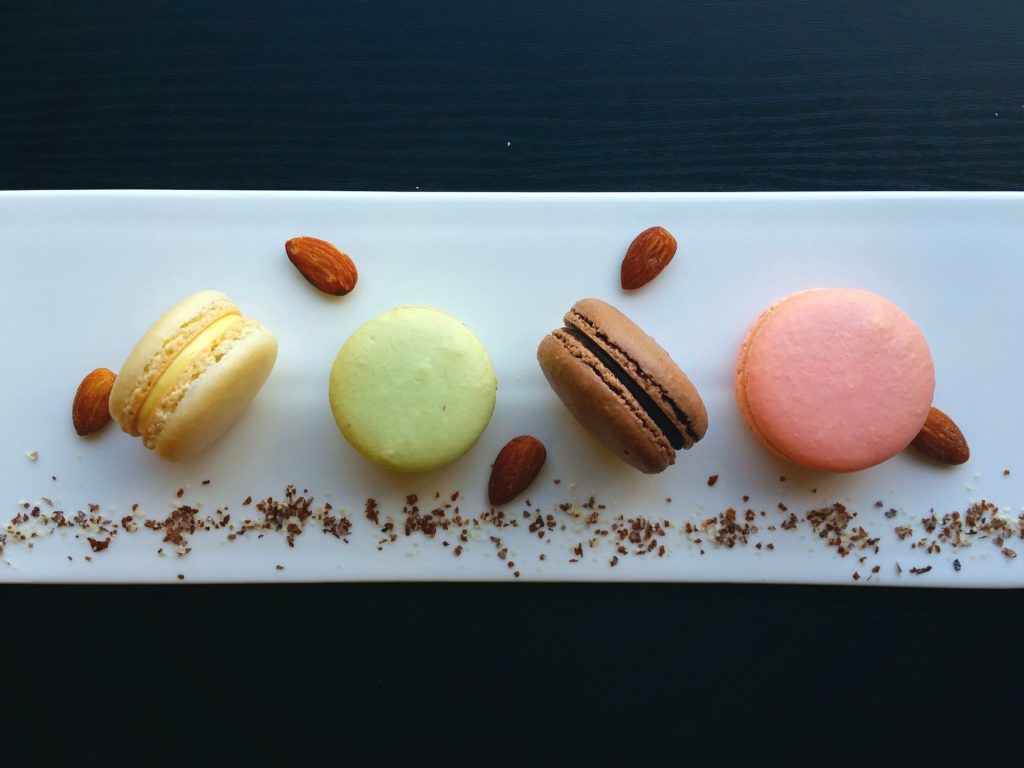
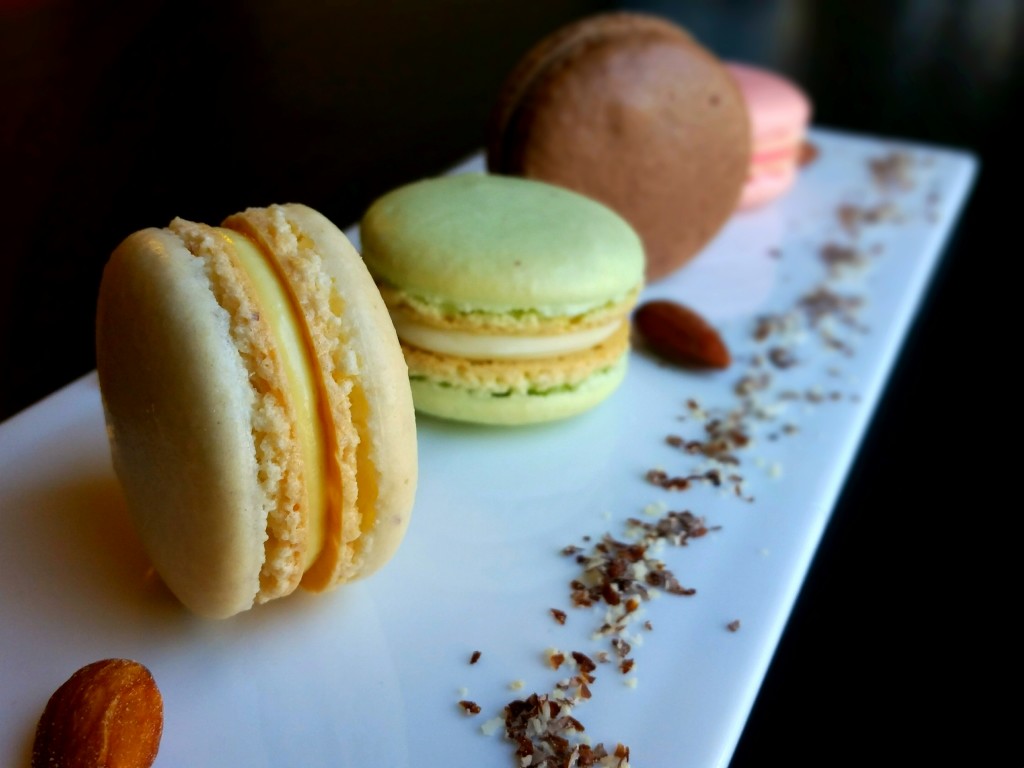
french macaronsFOUR CLASSIC MACARONS. ALMOND MACARON WITH FRENCH ALMOND BUTTERCREAM. MINT MACARON WITH MINTY WHITE CHOCOLATE GANACHE. CHOCOLATE MACARON WITH NUTELLA DARK CHOCOLATE GANACHE. ROSE MACARON WITH RASPBERRY ROSE MASCARPONE CREAM.


If there’s a dessert with a reputation for its difficulty, it’s the macaron. Bakers will tell you how finicky they are from the temperature and age of your egg whites to the moisture content of your flour and the air. They’ll tell you the recipe for the perfect batch one day might crack, collapse, and end in utter disappointment the next evening. That every measurement needs to be absolutely precise. Yes, there’s some truth to these worries. But no, making consistent batches of macarons isn’t just playing a lottery. Just like perfecting any dish or dessert, macaron making comes down to a few key principles – the meringue, the macaronage, and the drying (notice that the weather, age of your egg whites, and miniscule changes in your flour moisture content are not included!). Whether it’s a hot, sunny day or a cold, rainy day, these principles stay the same. It might take a few batches to know exactly what you’re looking for, but once you get it, you won’t forget it!

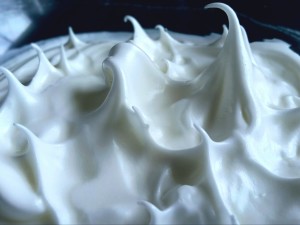
  1. The Meringue. It’s whipped just enough so that you can fold the almond flour and sugar into it completely without knocking out too much air. You’re looking for peaks that gently curl over when the whisk is lifted straight out of it. This gives you the perfect amount of air so that during the macaronage, you don’t deflate the meringue before all the dry ingredients are properly mixed in (underwhipped), and you don’t have a lumpy, broken mixture (overwhipped)! And there’s no need to age your egg whites. It might make whipping them take a minute or two less but makes no difference in the final product. It’s less effort, too.
    meringue firm peaks
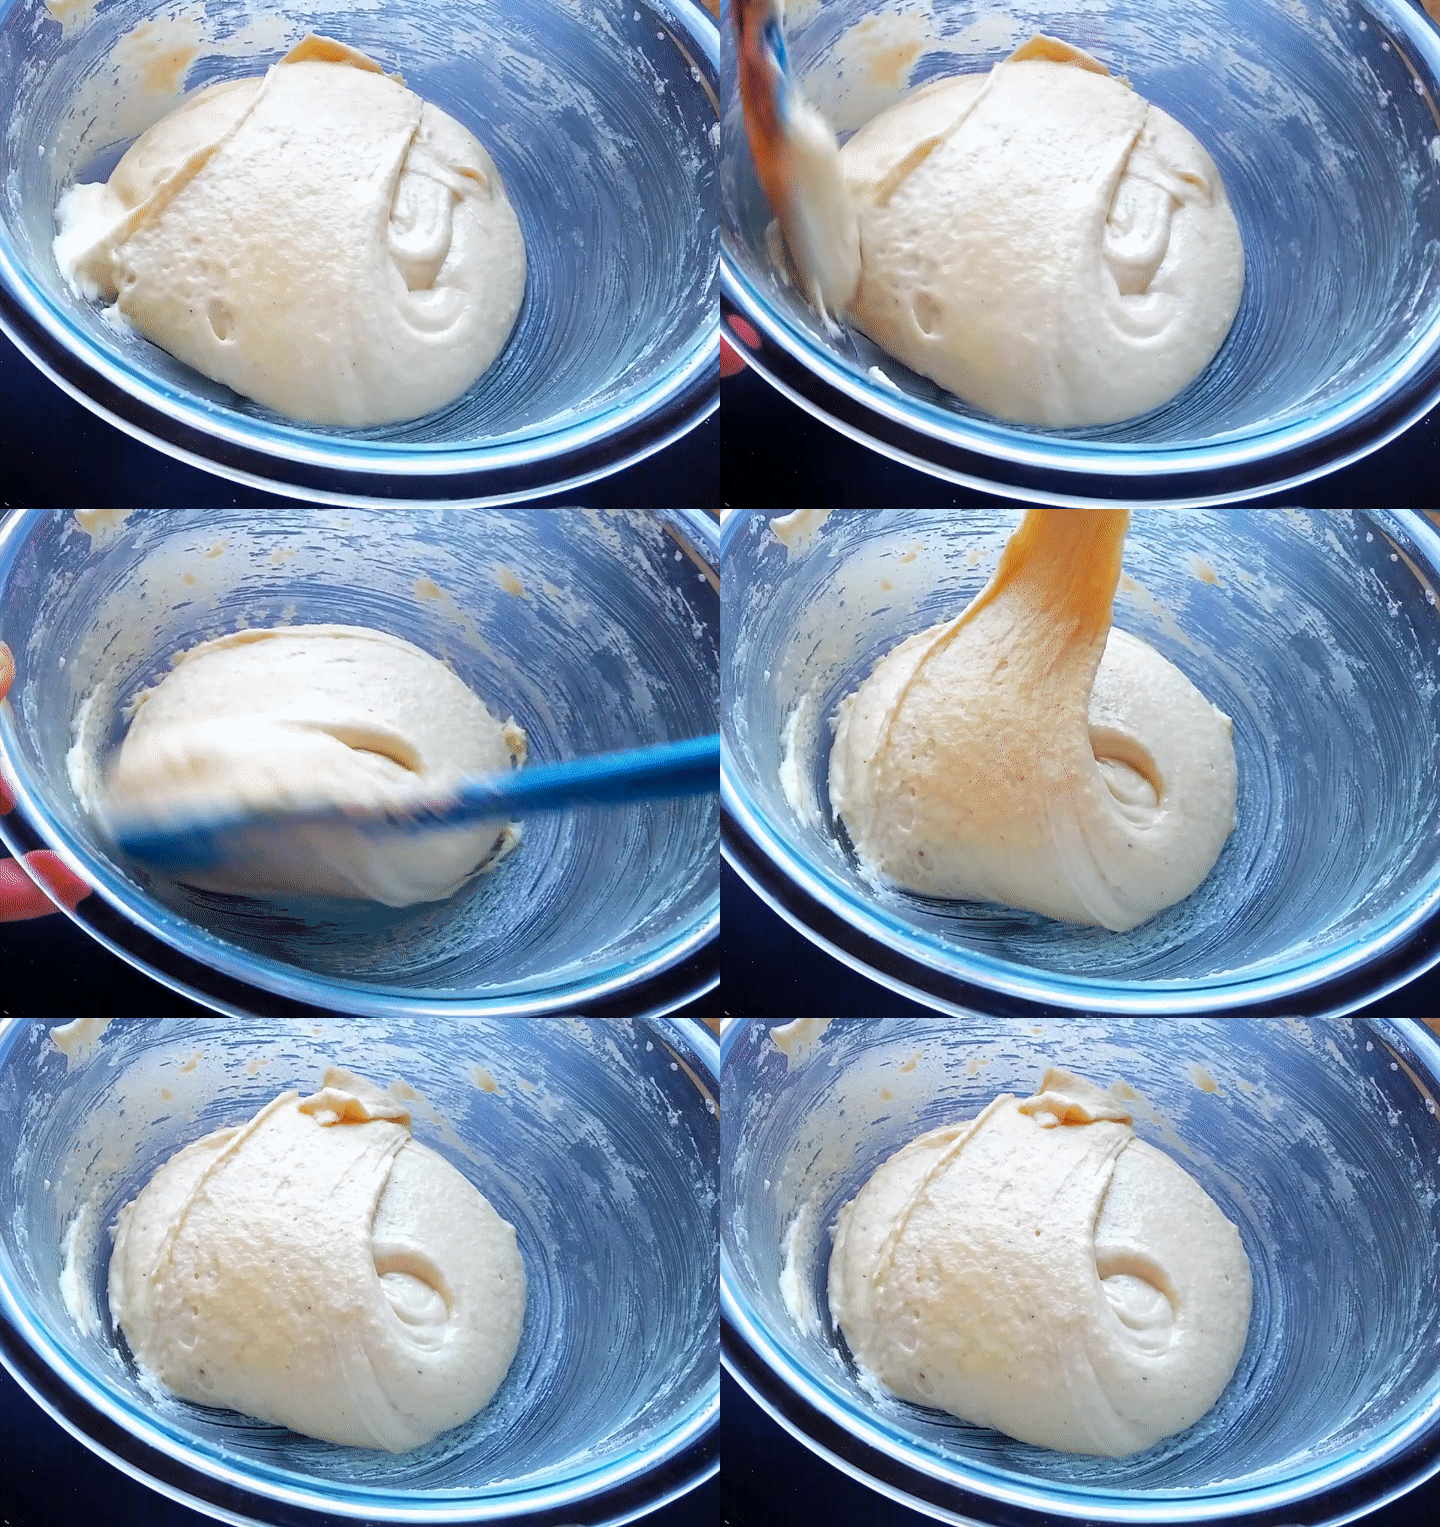
  2. The Macaronage (or the folding of the solids into the meringue). The macaron batter is a suspension of almond meal in a meringue that has been deflated just enough to pipe out smooth round buttons that spread ever so slightly. This is the part where practice makes perfect. Just keep in mind that it’s better to under-mix than  to over-mix, or you’ll have your macarons running into each other on the baking sheet! Some describe this stage as the “molten lava” stage, and others call it the “thick ribbon” stage. Call it what you want, but it should look something like this:
    macaronage
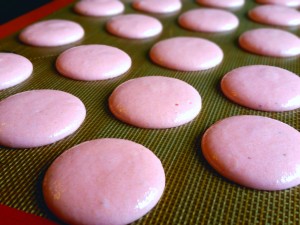
  3. The Drying. After piping out your cute buttons, you need to set them aside until the tops are dry to the touch and don’t stick to your finger when you “pet” them. Just like with royal icing (the shiny, smooth icing you might find on decorated cookies), a crust forms on the macaron surface as the air pulls moisture from the meringue. This forces the air in the meringue to find another way out during baking – through the bottom, where it bubbles out and forms the frilly feet of the macaron. No need to postpone your macaron-making plans on a rainy or humid day! The drying will still happen – it might just take a little longer.
    meringue buttons

Once you get the hang of it, there are all sorts of small changes you can make to the shell recipe, such as using hazelnut or pistachio flour, or adding extracts for flavor and food coloring for fun. And there is a whole world of fillings to try. Below you’ll find the recipe for the basic almond macaron to get you started, with a French almond buttercream. Enjoy! – Boo and Pea


french macarons angleYield: 44-56 macaron shells
Difficulty: 2 star

Oven: 310 F, 18 minutes

Preparation:

  • Line 2-3 baking trays with parchment paper or silicone mats.
  • If using parchment paper, optionally draw guide circles (diameter 2.5-3 cm) about 3 cm apart on parchment paper, and flip written-side down.

Macaron shells:

  • Dry ingredients, sifted
    120 g almond meal
    150 g powdered sugar
  • Meringue
    110 g (~3) egg whites, room temperature
    0.25 ts cream of tartar (or lemon juice)
    100 g granulated sugar
  • (optional) 4-10 drops food coloring
  1. In a mixing bowl, beat egg whites with cream of tartar to soft peaks. Gradually add granulated sugar to egg whites while beating to a firm meringue (tips of peaks should gently curl when whisk is lifted), ~4-6 minutes.
  2. Sift dry ingredients into the meringue. Fold until smooth and falling in thick ribbons.
  3. Using a large round tip, pipe buttons (diameter 2.5-3 cm) onto the prepared baking trays spaced ~3 cm between the edges of adjacent shells.
    Small pea tip: Keep the tip ~0.5 cm above and perpendicular to the baking tray. Keep the tip centered and still while piping each shell to desired size.
  4. Rest at room temperature until surface dries to the touch, 45-60 minutes.
  5. Bake on middle rack, 18 minutes. Remove from oven, and set side until cooled to room temperature. Meanwhile, make filling.
    Small pea tip: Lower the oven temperature by 5-10 F, and bake for 1 minute shorter if using a dark pan.
  6. Carefully remove/peel shells from parchment or silicone mat.
    Small pea tip: If macarons stick to parchment or silicone mat, run a thin knife across the bottom to help release shells.

French almond buttercream:

  • 3 egg yolks
  • Simple syrup
    75 g sugar
    2.5 tb water
  • Flavorings
    1 ts almond extract
    0.25 ts vanilla extract
    0.25 ts salt
  • 6 tb butter, room temperature
  1. In a mixing bowl, beat egg yolks until light yellow and thickened.
  2. In a small saucepan, heat sugar with water to 240 F (or just beginning to turn golden).
  3. Continue beating egg yolks while pouring syrup into yolks a thin stream along the side of the bowl. Beat until cooled to room temperature, 6-8 minutes.
  4. Beat in flavorings.
  5. Add butter in 1 tb increments, and beat until smooth and holds peaks.
  6. Refrigerate for 5 minutes until use.

Assembly:

  1. Pair shells by size.
  2. Using a round tip, pipe ~0.5 tb filling onto one shell of each pair. Gently sandwich with second shell.
  3. In an airtight or covered container, refrigerate macarons in a single layer, at least 8 hours.
  4. Serve, and optionally refrigerate up to 1 week or freeze up to 3 months.

Saffron Crab Cakes

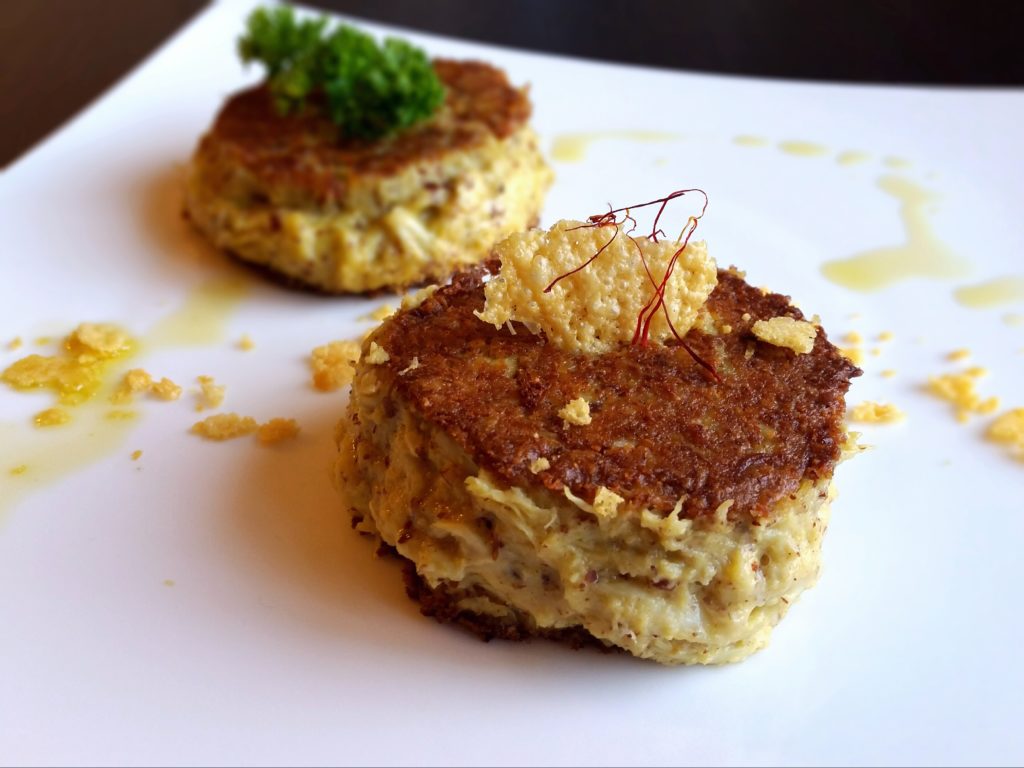
saffron crab cakesTENDER, CRISPY, CREAMY CRAB CAKES BODIED WITH SAFFRON AIOLI AND ALMOND MEAL. WITH BAKED PARMESAN CRISPS, FRESH PARSLEY, AND OLIVE OIL.


The blue crab is Maryland’s official state crustacean, a tidbit I took for granted during the 10 years I grew up there. Not until I moved away did I realize what I was missing. Finally, I decided my craving was due, and I picked up a can of quality lump crab meat for a nostalgic taste of a Maryland classic.

Usually, crab cakes use mayonnaise, breadcrumbs, and other seasonings that are quickly mixed together before being pan-fried until golden-brown and crispy on the outside. And while these simple ingredients already make crab cakes absolutely delicious, I wanted to add just a touch of luxury by whisking up a saffron aioli in place of mayonnaise and using almond meal instead of breadcrumbs. A touch of smoked paprika and cayenne also gives the cakes a spiciness that isn’t “hot”, but brings an extra layer of excitement. To keep the shape a little better, I folded some aluminum foil into a ring mold and tied it in some twine before frying them. You can serve it with a lemon wedge and tartar sauce like many restaurants do, a quick drizzle of nice olive oil and some cheese, or just eat it plain. Whatever you do, these are a guaranteed hit as an appetizer, lunch, dinner, or snack! – Boo


Yield: 6 (3-inch diameter) crab cakes
Difficulty: 2 star

Ingredients:

  • Saffron aioli (or 1 c mayonnaise)
    0.25 ts saffron, ground
    1 tb hot water
    1 egg yolk
    1 lemon, zested and juiced
    0.5 c olive oil
    1 clove garlic, grated
  • Slurry
    0.75 c almond meal (or breadcrumbs)
    1 tb Dijon mustard
    1 tb Worcestershire sauce
    1 tb lemon juice
    1 egg
  • 1 lb crab meat
  • Seasoning
    4 green onions, minced
    3 tb cilantro, minced
    0.5 tb thyme
    1 ts salt
    0.5 ts black pepper
    0.5 ts smoked paprika
    0.5 ts cayenne pepper
  • Garnish
    olive oil
    parsley
    parmesan cheese
    lemon wedge
  1. For aioli, soak saffron in hot water, 5 minutes.
  2. In a mixing bowl, beat egg yolk with saffron water and lemon zest/juice until slightly thickened.
  3. Gradually add olive oil to egg mixture in a thin stream while whisking until thickened. Stir garlic into mixture.
  4. Stir slurry ingredients, crab, and seasoning into aioli. Refrigerate mixture, ~30 minutes.
  5. Fold 6 3-inch diameter rings from aluminum foil, and set on a baking sheet.
  6. Fill each aluminum ring to the top, and optionally tie twine around the middle of the ring.
  7. In a pan, fry cakes in olive oil over medium heat until browned, ~4 minutes per side.
  8. Remove onto serving plate, and remove string and foil.
  9. Garnish as desired, and serve.

Black Forest Cake

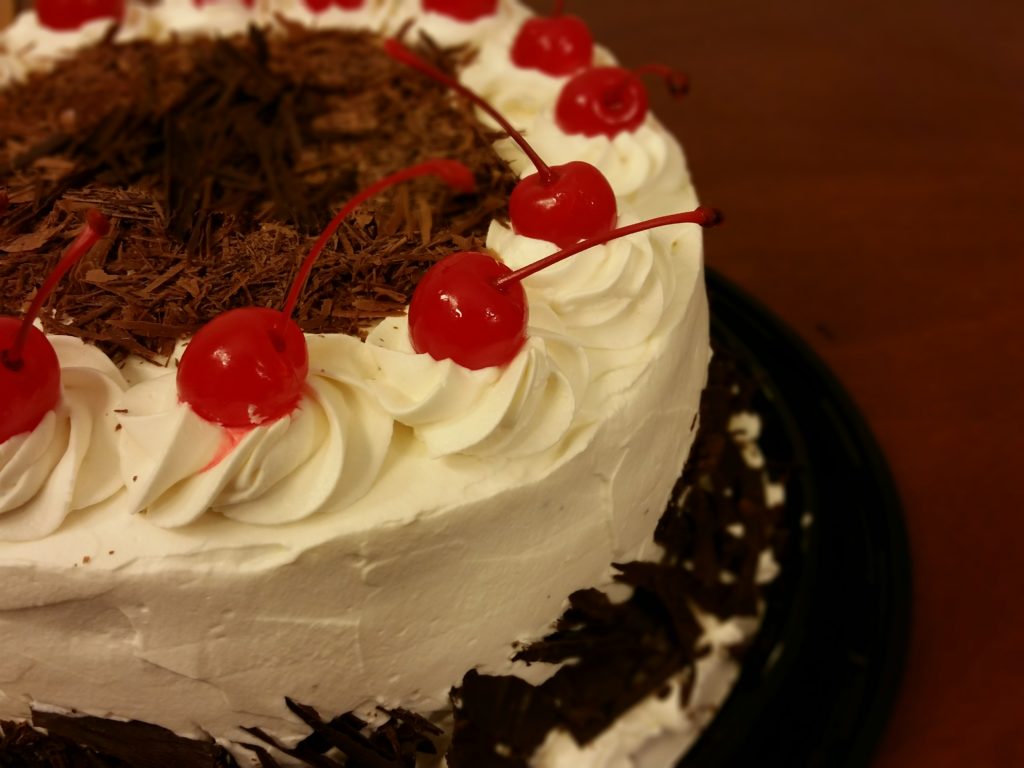
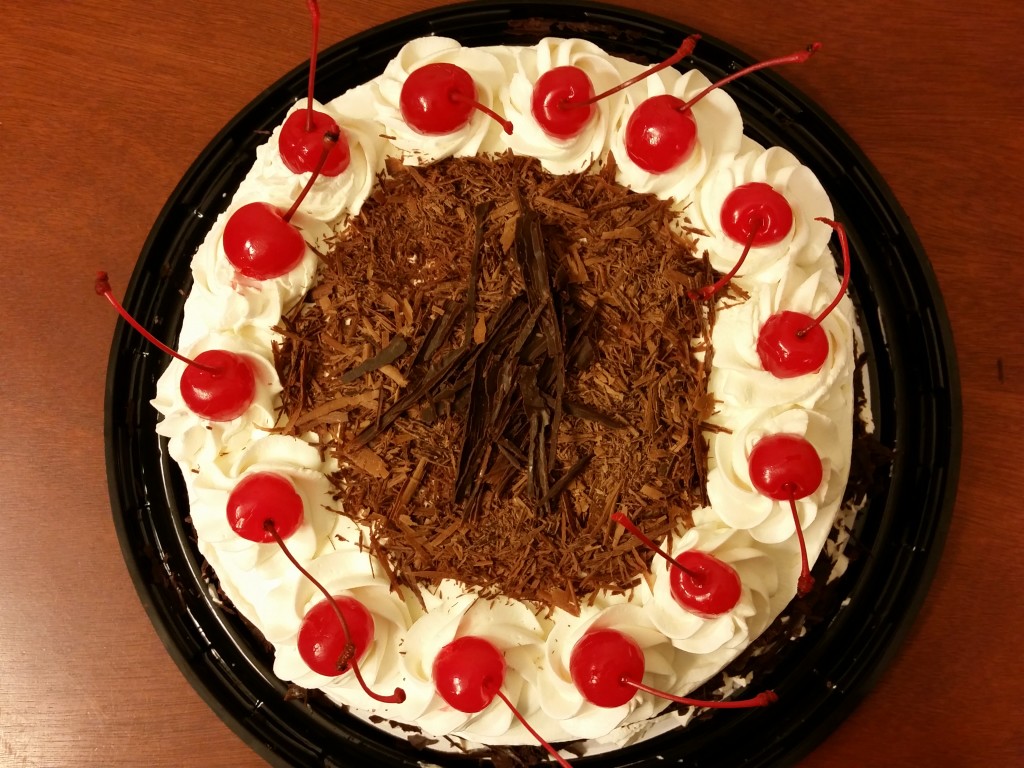
black forest cakeRICH COCOA ESPRESSO SPONGE CAKE BRUSHED WITH CHERRY SYRUP. KIRSCHWASSER WHIPPED CREAM FROSTING AND SWEET DARK CHERRIES. GARNISHED WITH DARK CHOCOLATE SHAVINGS AND MARASCHINO CHERRIES.


When Pea and Boo first moved in together, Pea not-so-subtly hinted at making a Black Forest Cake. As cherry season came that year, Pea and Boo found piles upon piles of fresh, dark red cherries on display at the local farmer’s market, and they decided the time had come. It was one of the first cake projects they took on together, and it was time to revisit the old recipe to give it a few delectable tweaks in time for our friends’ birthday surprises!

One of the greatest things about sponge cakes is their ability to soak up delicious syrups and juices, intensifying the flavor of the cake. The Black Forest Cake, layered with a rich cocoa sponge soaked in cherry and liqueur syrup, is a brilliant example. Kirschwasser (cherry liqueur) is signature, and (fun fact) required by law in Germany, but you can put as much or as little as you want. This recipe uses about one shot for the entire cake, but no one’s stopping you! – Boo


Servings: 8-12 (dessert portions)

Difficulty: 3 star

Oven: 350 F, 25-35 minutes

NOTES:

  • May use fresh and/or canned cherries. If using canned cherries, reserve syrup as a soak for the sponge cake.

Preparation:

  • Line a 8.5-inch springform pan with parchment paper. Butter the interior.

Cocoa genoise:

  • 4 eggs, separated
  • 0.66 c sugar
  • 1 ts vanilla
  • Dry ingredients, sifted
    0.5 c flour
    0.33 c cocoa powder
    2 tb instant espresso powder
    0.5 ts salt
  • 3 tb butter, melted
  1. Over a bain-marie, beat egg whites to soft peaks. Gradually add sugar while beating to a firm, glossy meringue, ~4-6 minutes.
  2. Beat egg yolks and vanilla into meringue until just combined.
  3. Fold dry ingredients into egg mixture by thirds.
  4. Stir a large spoonful of batter into melted butter to lighten. Fold butter gently into remaining batter.
  5. Bake in prepared springform pan until cooked through, 25-35 minutes.
  6. Remove from oven, and invert springform pan over a cooling rack until cooled to room temperature.
  7. Remove cake from pan. Set aside until assembly.

Macerated cherries:

  • 1.5 lb cherries, pitted (including 1 can of cherries with syrup)
  • 2 tb kirschwasser
  1. In a bowl, toss cherries with kirschwasser. Cover and refrigerate until assembly.
  2. Stir remaining ingredients together until sugar dissolves. Refrigerate to cool.

Whipped cream frosting:

  • 3 c heavy cream
  • 1.5 ts vanilla
  • 1.5 ts kirschwasser
  • 0.25 c sugar
  1. Beat cream to soft peaks. Add remaining ingredients, and beat to stiff peaks.

Assembly:

  • Garnish
    dark chocolate curls, shavings, or bark
    cherries
    whipped cream
  1. Reserve several cherries for garnish.
  2. Divide the cake into three disks.
    Small pea tip: Use the disk with the flattest surface as the top layer.
  3. Place the bottom cake layer on assembly surface. Soak with one-third of the cherry syrup, and top with one-quarter of the whipped cream and half of the cherries.
  4. Place the middle cake layer on the cherries, and repeat with cherry syrup soak, whipped cream frosting, and cherries.
  5. Place the top cake layer. Spread frosting evenly over entire cake, and reserve ~0.5 c frosting for garnish.
  6. Decorate cake with chocolate, whipped cream, and cherries.
  7. Refrigerate until chilled, and serve.

black forest cake 2


Berries Mousseline Cake

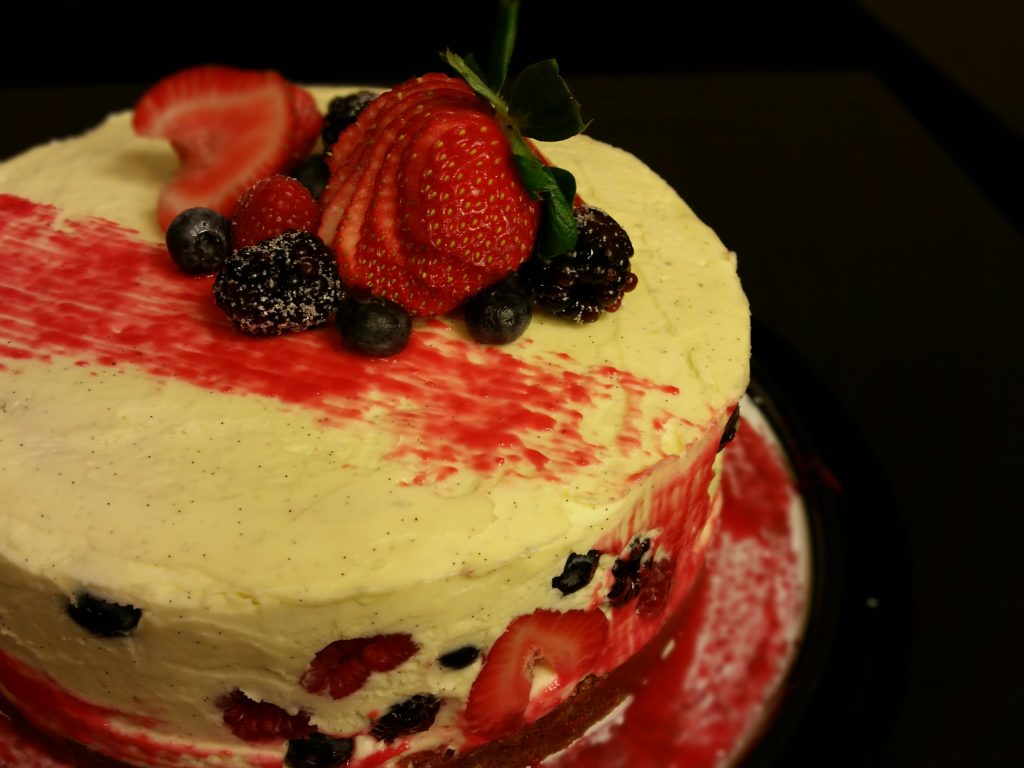
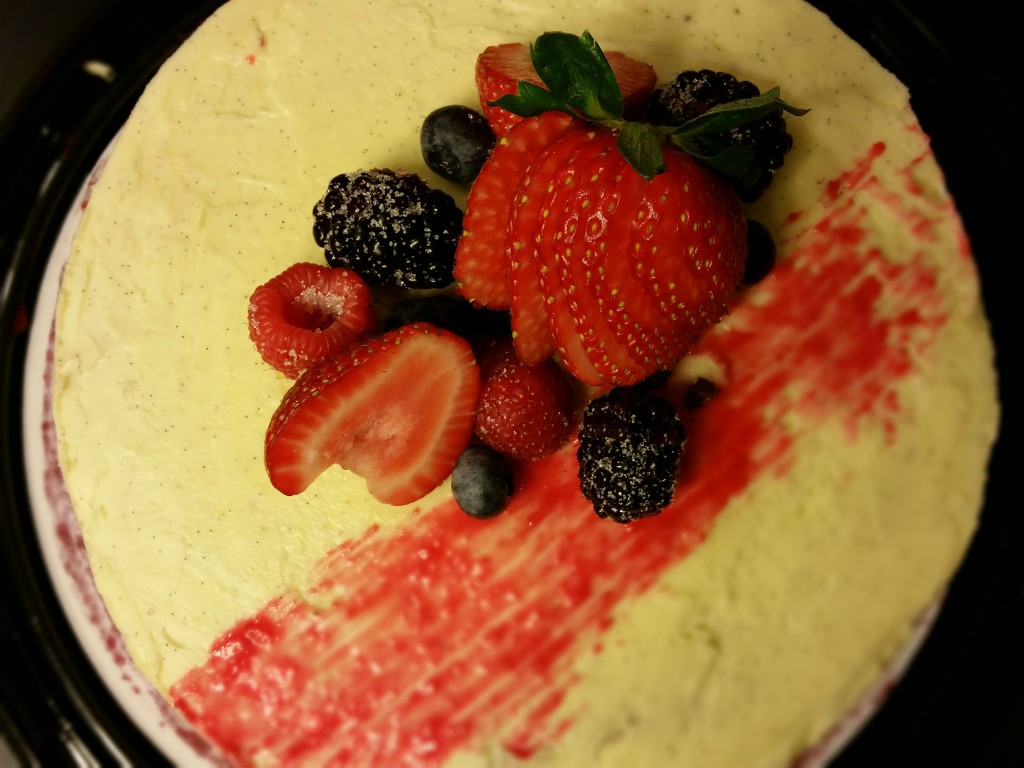
berries mousseline cake 2FOUR-BERRY MIXTURE TOSSED WITH FLUFFED VANILLA BEAN PASTRY CREAM. LAYERED WITH A RICH, SWEET BUTTER CAKE BRUSHED WITH RASPBERRY COULIS. DECORATED WITH SUGAR-COATED BERRIES.


And now, BooPeaKitchen will launch its newest guide on how not to organize surprise parties. Last year, when Boo tried to organize a surprise birthday party for me it wasn’t very successful — let’s just say that repeatedly and unpromptedly asking birthday-girl-to-be to not make plans on the weekend of her birthday is not the best approach. I have to admit though, I didn’t fare much better either. Leading up to Boo’s birthday, I arranged for him to go on a mid-summer hiking trip, giving myself the perfect excuse to stay home with the kitchen to myself and ample time to work on his cake. In my mind, my plans ended with storing the cake at a friend’s place and having her bring it the next day to Boo’s astonishment, but they were foiled by an unexpected afternoon nap. I woke up to Boo’s return, and realizing the finished cake was still in the fridge, I immediately fessed up to the whole plan…

Resting on this boast-worthy surprise party streak of zero, Boo and I decided to recruit our friends to set up a double surprise which upped our success rate to 1/4! Well, at least we have two cakes to show for it: this Berries Mousseline Cake and a Black Forest Cake coming up soon! – Pea


Servings: 8-12 (dessert portions)
Difficulty: 3 star

Oven: 350 F, 40-50 minutes

Preparation:

  • Line an 8.5-inch springform pan with parchment paper. Butter and flour the interior.

Butter cake:

  • 1 stick butter
  • 0.5 c sugar
  • 2 egg yolks
  • 1 ts vanilla extract
  • Dry ingredients
    1.66 c flour
    2 ts baking powder
    0.5 ts salt
  • 0.5 c milk
  • Meringue
    2 egg whites
    0.5 c sugar
  1. Cream butter with sugar. Beat in yolks and vanilla.
  2. Alternately beat dry ingredients and milk into butter mixture in 5 additions.
  3. In a separate bowl, beat egg whites to soft peaks. Gradually add sugar while beating to a firm, glossy meringue.
  4. Fold meringue into batter by thirds.
  5. Bake in prepared springform pan until cooked through, ~40-50 minutes.
  6. Cool to room temperature. Cover in plastic wrap, and refrigerate until chilled, ~2 hours.

Vanilla mousseline:

  • Cream mixture
    1.25 c heavy cream
    1.25 c milk
    0.25 ts salt
  • Yolk mixture
    6 egg yolks
    0.75 sugar
    0.25 c flour
    0.25 c corn starch
    1 vanilla bean, split and scraped
  • 1.5 sticks butter, room temperature
  1. In a large saucepan, bring cream mixture to a simmer over medium-low heat.
  2. Whisk yolk mixture ingredients together. Whisk hot cream mixture into yolk mixture.
  3. Return mixture to saucepan over medium heat, and whisk constantly until thickened and gently boiled for 1 minute. Remove from heat, and whisk in 4 tb butter until incorporated.
  4. Transfer to a mixing bowl. Refrigerate, plastic wrap pressed to the surface, until cooled to room temperature, ~1.5 hours.
  5. Beat cooled cream, 2 minutes. Add remaining butter, and beat until light and fluffy, 5-6 minutes.

Raspberry coulis:

  • 3 oz raspberries
  • 1.5 tb sugar
  • 1 tb water
  1. In a small saucepan, stir and mash ingredients over medium-high heat until thickened. Strain, and set aside until use.

Assembly:

  • (optional) acetate cake bands, cake ring, or springform form
  • Berries
    1 lb strawberries, halved or quartered
    6 oz blackberries
    6 oz blueberries
    6 oz raspberries
  1. If using acetate, assemble a ring (height 4 inches) around circumference of the cake, and place on serving surface.
  2. Slice cake into two disks. Trim one disk by 1 cm around the circumference.
    Small pea tip: Trim the disk with the flattest surface, since this will be used for the top layer.
  3. Place the larger disk in acetate ring, springform pan, or cake ring. Brush cake with raspberry coulis.
  4. Set aside one-third of the mousseline and choice berries for garnish. Mix remaining berries with remaining two-thirds of the mousseline.
  5. Assemble some fruit around the bottom border. Optionally, use mousseline to help keep berries in place. Spread mousseline-fruit mixture evenly into cake.
  6. Place the trimmed cake layer on top. Spread remaining mousseline smoothly over and around the cake.
  7. Cover and refrigerate until set, 3-4 hours.
  8. Garnish as desired with remaining fruit and raspberry coulis, and serve.

berries mousseline cake 1

Chocolate Soufflé with Passionfruit-White Chocolate Filling

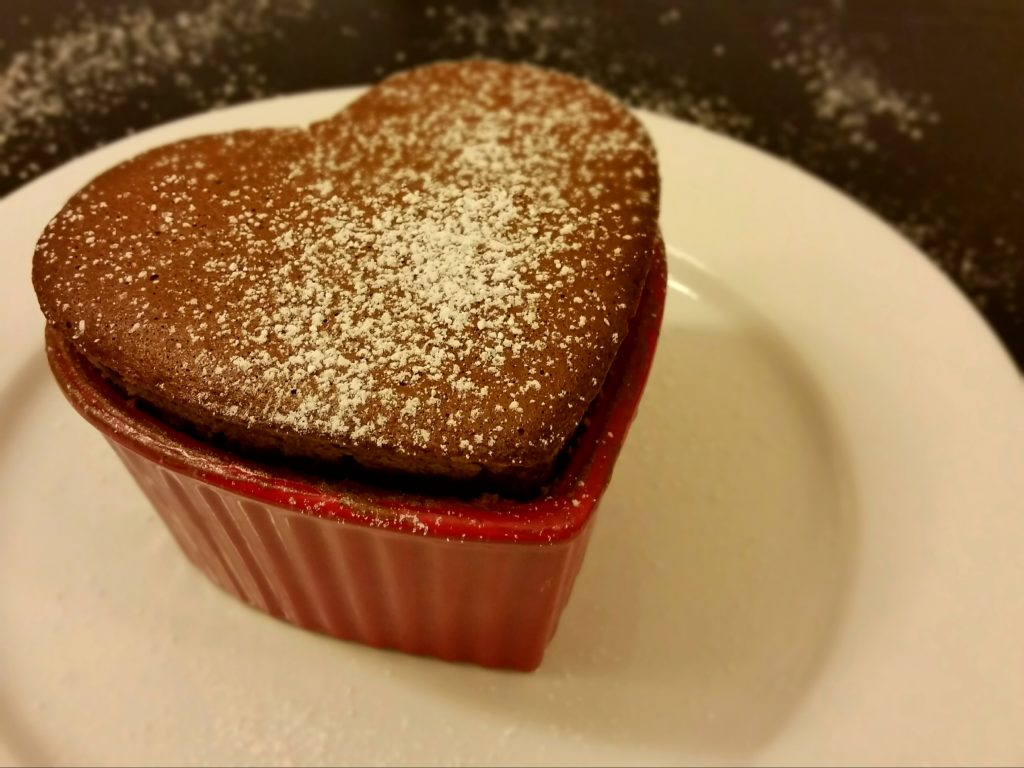
chocolate souffle passionfruit fillingRICH, SWEET, AND FLUFFY CHOCOLATE DESSERT WITH A WARM WHITE CHOCOLATE AND A PASSIONFRUIT CENTER.


And now to finish off the Valentine’s tangy series, the dessert course. I thought we could combine chocolate and passionfruit, and we decided to make a soufflé with a passionfruit filling. We ended up posting this a little later because Boo wanted to make some changes to the recipe to make it a little more chocolaty with a dash of coffee and cocoa powder. Hope you enjoy! – Pea


Servings: 2 (9-oz ramekins) or 4 (5-oz ramekins)
Difficulty: 2 star

Oven: 375 F, 22 minutes

Preparation:

  • Coat inside of ramekins with melted butter, then with sugar. Place prepared ramekins in freezer until use.

Passionfruit white chocolate filling:

  • 3 tb white chocolate chips
  • 0.75 tb passionfruit concentrate
  • 0.5 tb heavy cream
  • pinch salt
  1. In a small bowl, microwave and stir together ingredients in 5-10 second increments until homogenized.
  2. Refrigerate to set while preparing souffle.

Chocolate souffle:

  • Chocolate mixture
    3.5 oz dark chocolate
    4 tb butter
  • Yolk mixture
    2 egg yolks
    0.5 tb instant espresso powder
    0.5 tb  cocoa powder
    1 ts vanilla
    0.25 ts salt
  • Meringue
    3 egg whites
    0.25 ts cream of tartar
    3 tb sugar
  • powdered sugar
  1. Over a bain-marie, melt chocolate with butter. Set aside to cool slightly.
  2. Beat yolk mixture ingredients until homogenized, and whisk into chocolate mixture.
  3. Beat egg whites with cream of tartar to soft peaks. Gradually add sugar while beating to stiff peaks (tips of peaks should gently curl when whisk is lifted), 4-6 minutes.
  4. Fold meringue into chocolate mixture by thirds.
  5. Fill prepared ramekins halfway with batter. Spoon the passionfruit white chocolate filling into the center of each ramekin. Top off with remaining batter.
  6. Level off with a knife, and use a fingertip to trace around the inside of the top edge, which helps the souffle to rise.
  7. Bake until maximally risen and cooked through, 21-23 minutes.
  8. Dust with powdered sugar, and serve.

Pork Tenderloin à la Diable

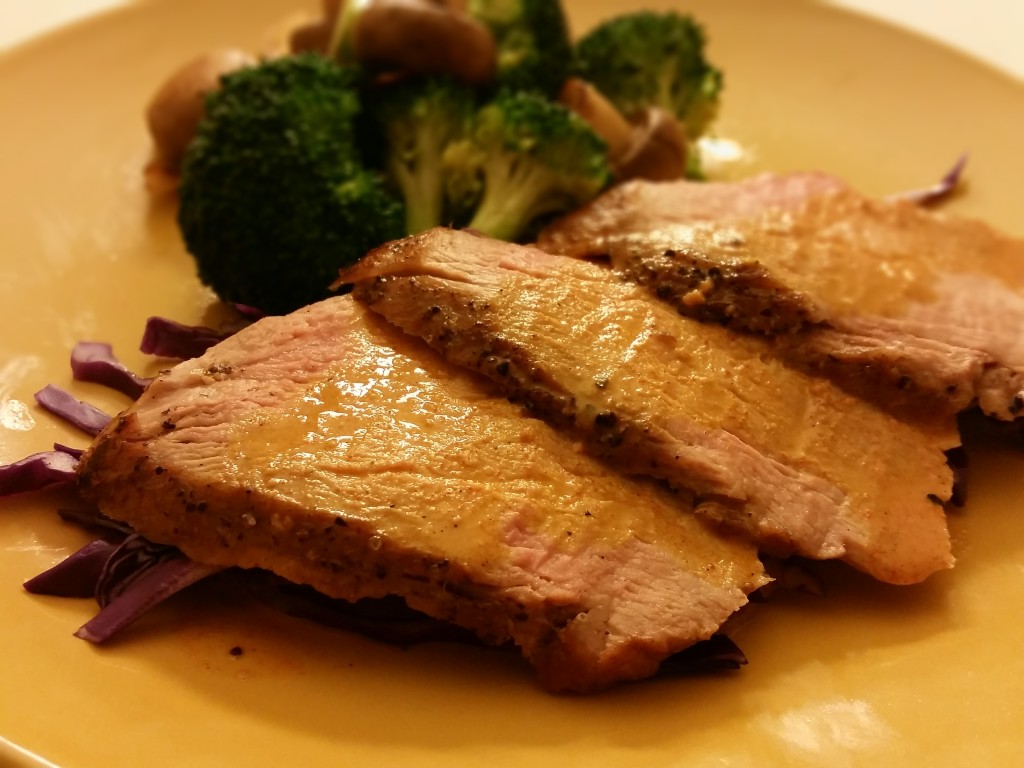
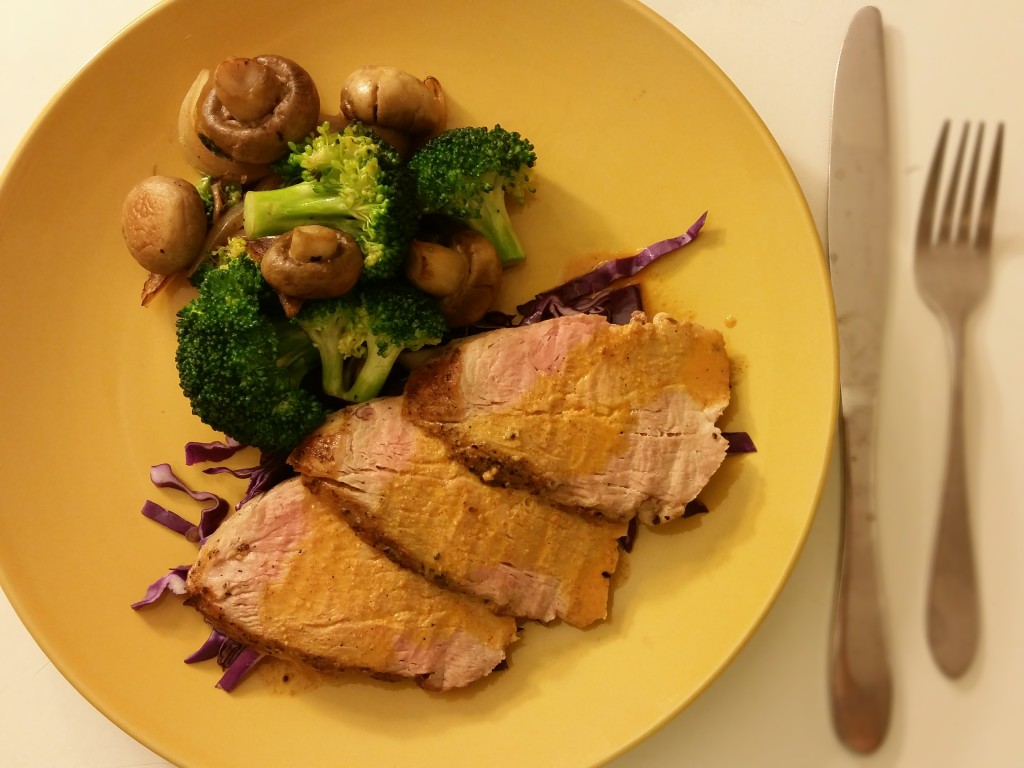
pork tenderloin a la diableSIMPLY-SEASONED AND ROASTED PORK TENDERLOIN OVER A BED OF SHREDDED PURPLE CABBAGE. WITH A BUTTERY, SPICY DIJON SAUCE. GARLIC-SAUTÉED VEGETABLES.


There are probably a hundred (if not many, many more) ways to prepare a pork tenderloin, one of the most versatile cuts of pork or red meat anywhere. As its name implies, it’s so tender that you can cut it with a fork – try it for yourself! Of the ways Pea and I have tried, this has to be one of the easiest and most flavorful. Literally just seared with salt and pepper, and roasted just long enough to prepare a side of veggies,  this can be a quick and easy weekday dinner. It goes so well with the sauce, which is smooth and creamy, yet tangy and smokey from the Dijon mustard and paprika and adds a comforting warmth, even eaten a little cold like we did after taking our pictures. But as I said before, pork tenderloin tends to go well with a lot of different things, so hopefully this recipe helps make it one of your staple proteins, too! – Boo


Servings: 3-4 (main portions)
Difficulty: 1 star

Oven: 375 F, 23 minutes

Ingredients:

  • 1 pork tenderloin
  • salt and black pepper
  • Sauce
    0.5 c chicken stock
    0.33 c white wine
    1 tb heavy cream
    1 tb Dijon mustard
    1 ts smoked paprika
    0.25 ts cayenne pepper
    2 tb butter, cold

Directions:

  1. Salt and pepper the tenderloin on all sides.
  2. In an oven-safe pan, sear tenderloin in olive oil on one side, ~4 minutes.
  3. Flip seared-side up, and transfer to oven to roast, ~23 minutes for medium-well (internal temperature 150 F).
  4. Remove from oven, and set tenderloin aside to rest.
  5. In the same pan, bring chicken stock and wine to a simmer over medium-high heat.
  6. Add Dijon, paprika, and heavy cream. Stir and reduce by half or until slightly thickened.
  7. Remove from heat, and stir in butter until melted.
  8. Slice tenderloin, and serve with sauce.

pork tenderloin a la diable 2