Author Archives: BooPeaKitchen

Meat Internal Temperatures – A Guide to Juicy, Flavorful Meat, Every Time

If you’ve watched some TV cooking shows, you’re bound to have heard how cooking a steak to a pitch-perfect pink medium-rare, or keeping a roast chicken or turkey juicy, takes professional skill. Or at the very least, a laundry list of preparation steps like brining in a tub of 20 ingredients or salting no more or less than five-and-a-half seconds before the meat hits the pan.

Yes, some of these tricks have their merits, but I would say 95% of the moistness and natural flavor of your favorite steak of roast comes down to temperature. So once you go out and buy a sturdy, reliable meat thermometer, here’s a table of temperatures to look for if you want that juicy goodness:
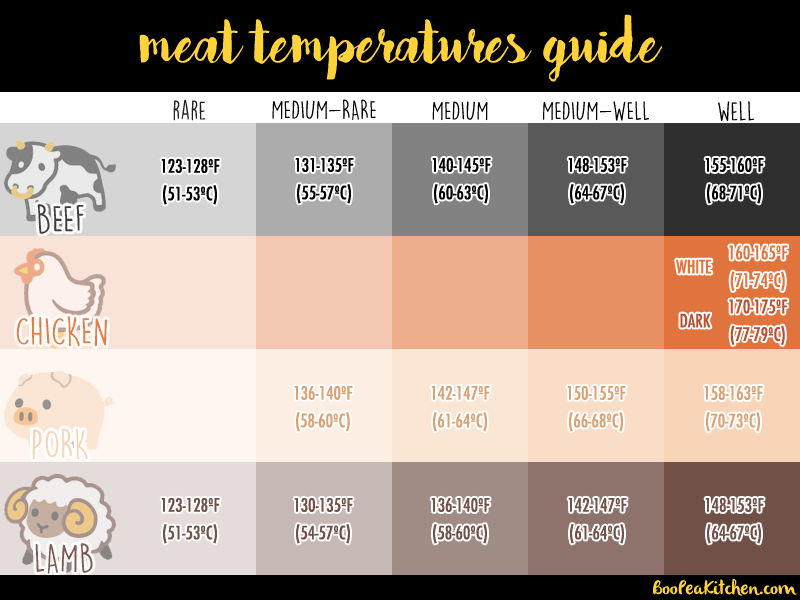
meat temperatures guide

These are RESTED temperatures!

One important note is that these are rested temperatures taken after the meat is removed from your oven or stove and allowed to sit for about 5-15 minutes, depending on the size of the steak or roast! Because the temperature of the outer parts of the meat is much higher than on the inside as you just finish cooking, the heat redistributes and transfers towards the inside as the meat rests. You should aim to rest the meat after the thickest part of the meat reaches about 5-10 F under the target temperature. The larger the meat and the higher the cooking temperature, the earlier you should rest it, towards the side of 10 F under.

Using a New York Strip steak as an example…

Remove it from the pan or oven onto a resting plate when it hits about 126-130 F for medium-rare, since it will cook through to the middle and rise a few degrees as it rests.

On cooking chicken:

Don’t eat raw or undercooked pink, fleshy chicken. As if you needed a reminder. Though some of the USDA’s 165 F guideline is rightly simplified for mass public safety, some of the juiciest, most tender chicken can be served safely around 145-150 F using proper techniques and times. At BooPeaKitchen, we like our white meat (the breast) around 155-160 F and dark meat (the rest) around 165 F, so we take our roast chickens out around 150 F when the juices that run off the chicken just start turning clear. Just so that no one accidentally gets sick thanks to us, our official recommendation will be a little higher!

On cooking pork:

While rare pork is still questionable because of the risk of the Trichinella spiralis parasite, the USDA fairly recently lowered the safe temperature to 145 F. It turns out that a few minutes around 136 F is sufficient stave off this parasite, so we give temperatures down to medium-rare. We would still recommend pork be cooked medium for the best taste and texture!

On ground meats:

These temperature do not apply for ground meats, simply because there is a lot more surface area for possible bacteria to survive. Cook any ground meat to at least 157-160 F!

*The images used the chart are credited to Google emojis.
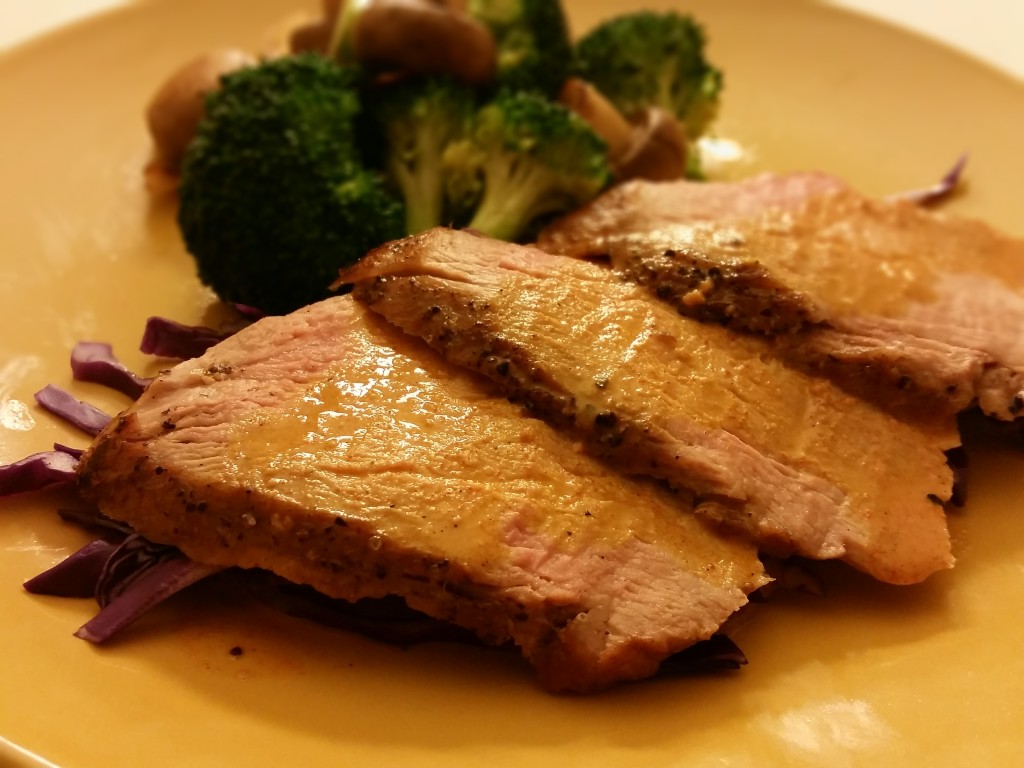
Pork Tenderloin à la Diable

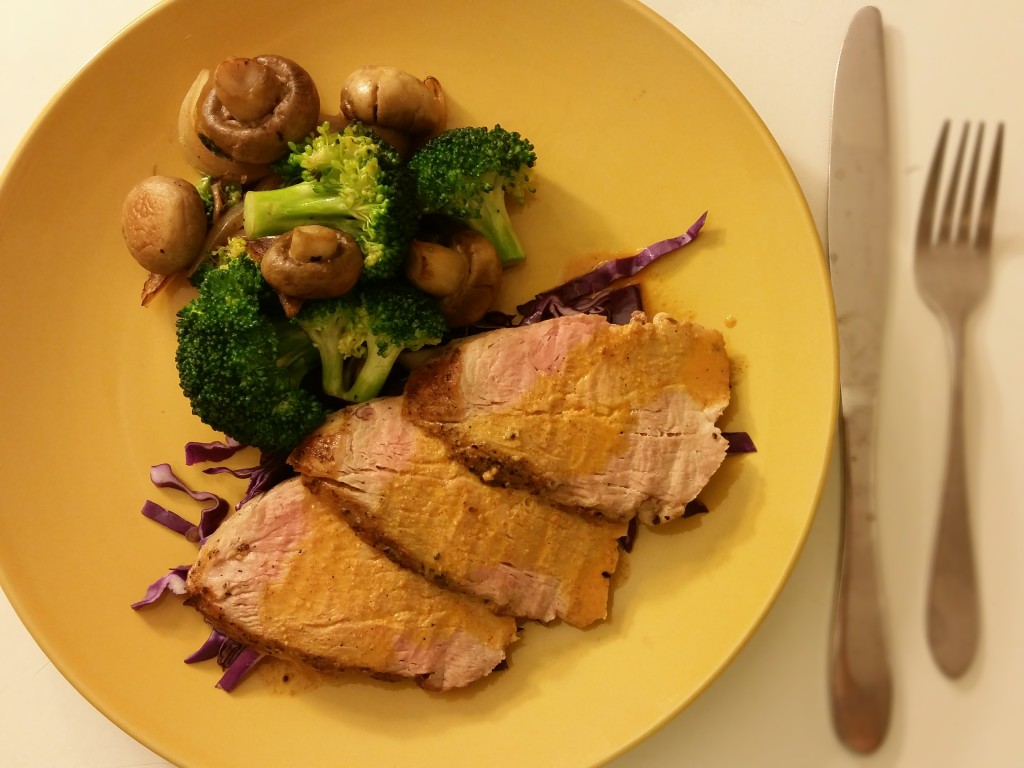
pork tenderloin a la diableSIMPLY-SEASONED AND ROASTED PORK TENDERLOIN OVER A BED OF SHREDDED PURPLE CABBAGE. WITH A BUTTERY, SPICY DIJON SAUCE. GARLIC-SAUTÉED VEGETABLES.


There are probably a hundred (if not many, many more) ways to prepare a pork tenderloin, one of the most versatile cuts of pork or red meat anywhere. As its name implies, it’s so tender that you can cut it with a fork – try it for yourself! Of the ways Pea and I have tried, this has to be one of the easiest and most flavorful. Literally just seared with salt and pepper, and roasted just long enough to prepare a side of veggies,  this can be a quick and easy weekday dinner. It goes so well with the sauce, which is smooth and creamy, yet tangy and smokey from the Dijon mustard and paprika and adds a comforting warmth, even eaten a little cold like we did after taking our pictures. But as I said before, pork tenderloin tends to go well with a lot of different things, so hopefully this recipe helps make it one of your staple proteins, too! – Boo


Servings: 3-4 (main portions)
Difficulty: 1 star

Oven: 375 F, 23 minutes

Ingredients:

  • 1 pork tenderloin
  • salt and black pepper
  • Sauce
    0.5 c chicken stock
    0.33 c white wine
    1 tb heavy cream
    1 tb Dijon mustard
    1 ts smoked paprika
    0.25 ts cayenne pepper
    2 tb butter, cold

Directions:

  1. Salt and pepper the tenderloin on all sides.
  2. In an oven-safe pan, sear tenderloin in olive oil on one side, ~4 minutes.
  3. Flip seared-side up, and transfer to oven to roast, ~23 minutes for medium-well (internal temperature 150 F).
  4. Remove from oven, and set tenderloin aside to rest.
  5. In the same pan, bring chicken stock and wine to a simmer over medium-high heat.
  6. Add Dijon, paprika, and heavy cream. Stir and reduce by half or until slightly thickened.
  7. Remove from heat, and stir in butter until melted.
  8. Slice tenderloin, and serve with sauce.

pork tenderloin a la diable 2

Miso-Poached Salmon with Shiitake Mushrooms

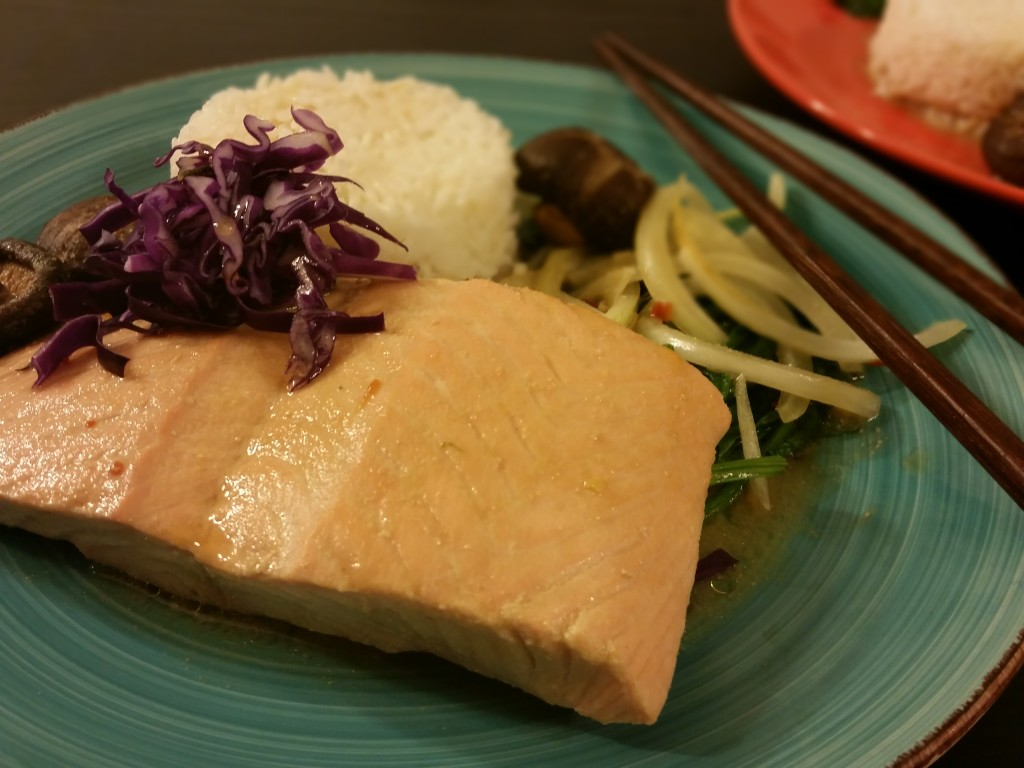
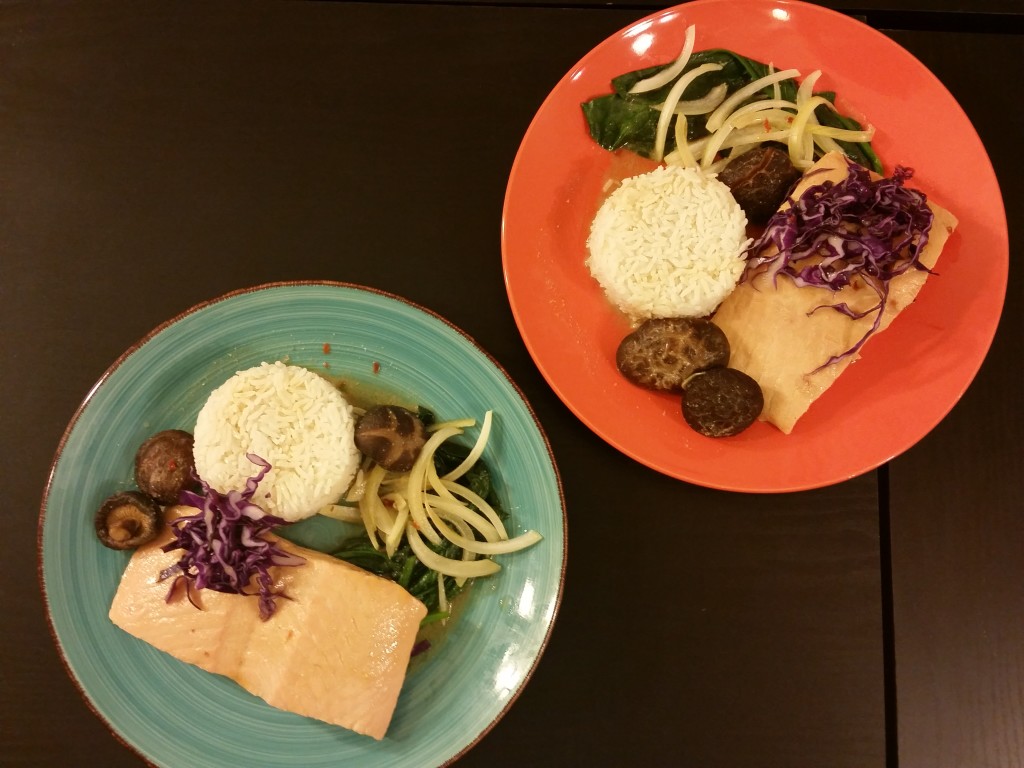
miso poached salmon 2SALMON FILLET POACHED IN A FRESH AND LIGHT MISO BROTH INTENSIFIED WITH SHIITAKE MUSHROOMS AND A TOUCH OF CHILI FLAKES. WITH STEAMED RICE, POACHED VEGETABLES, AND SHREDDED PURPLE CABBAGE.


Don’t let Pea’s 5 foot, 2 (and a half!) inch frame fool you. She grew up in Brazil and trained in the buffet-eating arts of rodízio churrascarias. As an adept of Louis C. K.’s philosophy of stopping only when you get to the point of hating yourself, Pea and all-you-can-eat restaurants make for a wonderful (or dreadful, depending on your point of view) combination. Usually, after a night of gorging on infinite food, the imminent regret is converted into a craving for a lighter, but still comforting next meal. And this poached salmon really hit the spot.

Since I actually forgot to think ahead and soak some dried shiitake mushrooms beforehand, we let the mushrooms soak and infuse into the poaching liquid we used for the salmon and veggies, infusing our dinner with savory and mushroomy flavors. To top off the broth, I added a sprig of rosemary for an interesting fresh taste. Just to make an easy dinner even easier, our veggie portion of sliced onions and Chinese spinach was poached for a minute or two after taking the salmon out. Hope you enjoy this one-pot (or pan) recipe as much as we did! – Boo


Servings: 3 (main portions)
Difficulty: 1 star

Ingredients:

  • 3 tb miso paste
  • 3 c water
  • 8-12 dried shiitake mushrooms
  • Seasoning
    3 cloves garlic, thinly sliced
    1 cm ginger, sliced in half
    1.5 tb soy sauce
    2 bay leaves
    1 sprig rosemary
    1 ts chili flakes
  • 3 (4-6 oz) portions salmon fillet
  • sesame oil

Directions:

  1. In a large pan, saute miso paste in vegetable oil over medium-low heat, 30 seconds.
  2. Gradually whisk in water until miso paste dissolves.
  3. Add mushrooms and seasoning. Gently simmer until mushrooms are soaked and softened, ~1 hour.
  4. Lay salmon fillets into the broth, and poach in barely simmering broth, 8-9 minutes for medium.
  5. Serve salmon with shiitake mushrooms, rice, and vegetables. Drizzle each plate with poaching broth and ~1 tb sesame oil.

miso poached salmon

Reading BooPeaKitchen

Our GOLDEN RULERead through the entire recipe before attempting it. It’ll save you a lot of confusion and provide some context!

Cut size

For cubes, we’ll provide side lengths (e.g. cubed 2 cm). For round cuts, we’ll give a radius or diameter.

Measurements

Quantities are usually given in count or volume, and we use standard/average conversions between them (e.g. 1 onion  is 1 medium onion, or about 1 c chopped onion). There are also great food conversion calculators online. We use this one because it’s easy to use and has just about every ingredient you’ll need!

When measurements are given in mass (e.g. pounds or grams), a scale is highly recommended. While less important for meats and vegetables, it just might make a difference for some desserts.

Substitutions

Unless specifically written in the recipe (e.g. vanilla extract vs. vanilla bean), substitutions are perfectly good. We may provide one in parentheses, or you can search them online.

Triple Chocolate Mousse Cake

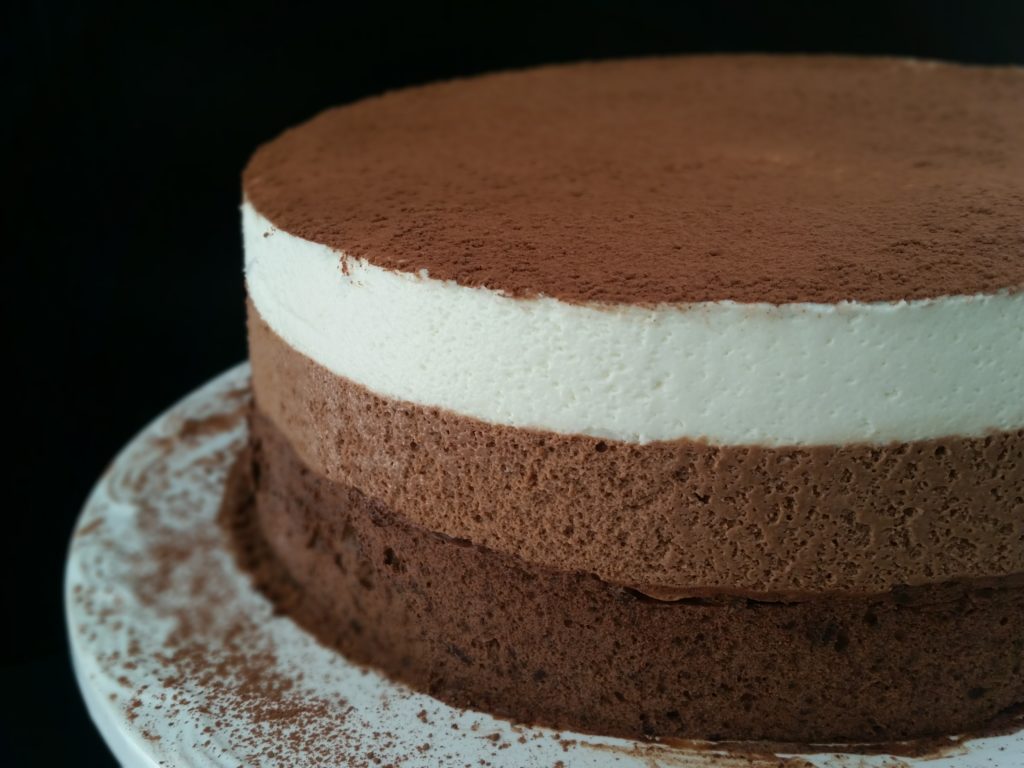
DARK CHOCOLATE MERINGUE MOUSSE ACCENTED WITH ESPRESSO AND SALT. MILK CHOCOLATE CREME ANGLAISE MOUSSE. WHITE CHOCOLATE CREAM MOUSSE. COCOA POWDER. SERVED OVER CHOCOLATE GENOISE SPONGE.


Chocolate is the key to the heart and soul, and mousse is one of the all-time great ways to deliver it. There are basically two kinds of mousse – egg white mousse and cream mousse, sometimes with gelatin to help keep structure. Each of these types of mousse can borrow a little from the other, but egg white mousse generally has more body to it, while cream mousse is… well, creamy. So we made mousse out of three chocolates – dark, milk, and white – which would all be great on their own, but were even better layered on top of each other in showstopping fashion! And who doesn’t like a coffee-enhanced chocolate sponge cake surprise at the bottom?

Each mousse layer is a little different, giving a little contrast as you nom your way through the layers. The dark chocolate mousse is a classic meringue mousse, with egg whites and cream folded into a melted chocolate. The milk chocolate mousse started with a custard that enriches the milk chocolate before being lightened with whipped cream. The white chocolate mousse is a a classic cream mousse that gets topped off with a healthy dusting of cocoa powder.

While the recipe itself isn’t too hard, it does test your patience since you have to let the layers set completely before pouring on the next one! Hope you give this one a try soon! – Boo


Servings: 12-16 slices
Difficulty: 

Oven: 350 F, 25 minutes

Preparation:

  • Line an 8-inch cake or springform pan with parchment paper. Butter and flour the interior.
  • Line a 9.5-inch cake ring or springform pan with parchment paper. Optionally, line interior with acetate paper.

Chocolate genoise:

  • 2 eggs, room temperature
  • 0.33 c sugar
  • 0.5 ts vanilla
  • Dry ingredients
    0.25 c flour
    2.5 tb cocoa powder
    0.25 ts salt
  • 0.25 c coffee liqueur
  1. Over a bain-marie, beat eggs with sugar until warm, but not hot. Remove from heat, and beat until eggs fall in ribbons. Beat vanilla into eggs.
  2. Sift and fold dry ingredients into egg mixture.
  3. Bake batter in a buttered and floured 8-inch cake or springform pan, 25 minutes.
  4. Remove from oven, and cool to room temperature.
  5. Transfer cake to the center of lined 9.5-inch springform pan, and brush with coffee liqueur.
  6. Refrigerate while preparing the dark chocolate mousse.

Dark chocolate mousse:

  • Chocolate mixture
    6 oz dark chocolate, recommended 70-78%
    2 tb cocoa powder
    1 tb instant espresso powder
    0.33 ts salt
  • Meringue
    3 egg whites
    4 tb sugar
    1 ts vanilla extract
  • 0.75 c heavy cream
  1. Over a bain-marie, melt dark chocolate. Stir cocoa powder, espresso powder, and salt into melted chocolate.
  2. Beat egg whites with sugar and vanilla to stiff peaks. Fold meringue into chocolate mixture by thirds.
  3. Beat cream to stiff peaks. Fold whipped cream into meringue mixture by thirds.
  4. Pour mousse over the chocolate genoise, starting from the center. Tap down gently several times, and smooth the top.
  5. Refrigerate to set, 1-1.5 hours, then prepare milk chocolate mousse.

Milk chocolate mousse:

  • 1.5 ts gelatin powder
  • Custard
    2 egg yolks
    3 tb sugar
    0.33 c milk
    0.25 c heavy cream
  • 6 oz milk chocolate, chopped
  • 1 ts vanilla extract
  • 1.25 c heavy cream
  1. In a small bowl, stir gelatin into 1 tb water. Set aside.
  2. In a saucepan, heat milk and cream on medium heat to a bare simmer.
  3. In a mixing bowl, whisk yolks with sugar. Whisk hot milk mixture into yolks.
  4. Return yolk mixture to the saucepan over medium heat, and whisk constantly until slightly thickened.
    Small pea tip: the custard should coat the back of a rubber spatula.
  5. In a mixing bowl, stir custard and vanilla into chocolate until homogenized.
  6. Microwave gelatin until melted, 6-8 seconds. Whisk gelatin into chocolate mixture.
  7. Beat cream to stiff peaks. Fold whipped cream into chocolate mixture by thirds.
  8. Pour mousse over the set dark chocolate layer, starting from the center. Tap down gently several times, and smooth the top.
  9. Refrigerate to set, 1-1.5 hours, then prepare white chocolate mousse.

White chocolate mousse:

  • 1 ts gelatin
  • White chocolate cream
    8 oz white chocolate
    0.5 c heavy cream
    0.5 ts vanilla extract
  • 1.5 c heavy cream
  1. In a small bowl, stir gelatin into 1 tb water. Set aside.
  2. Microwave and stir white chocolate in 30-second intervals until melted. Whisk cream and vanilla into white chocolate.
  3. Microwave gelatin until melted, 6-8 seconds. Whisk gelatin into chocolate mixture.
  4. Beat cream to stiff peaks. Fold whipped cream into chocolate mixture by thirds.
  5. Pour mousse over the set milk chocolate layer, starting from the center. Tap down gently several times, and smooth the top.
  6. Refrigerate to set, 1.5-2 hours.

Finish:

  • Garnish
    chocolate espresso beans
    chocolate shavings
    cocoa powder
  1. Optionally garnish, and serve.